3-2 Setup MN1917
3.1.2 Setup
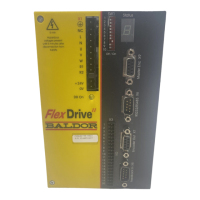
There are two different Flex+Drive
II
demonstration units available.
Model number FPHDEMO/EN/115 requires a 115VAC single phase input.
Model number FPHDEMO/EN/230 requires a 230VAC single phase input.
Check that you are using the correct unit before applying power.
WARNING: When the demonstration unit is turned on, high voltages will be present on connector X1 of the
Flex+Drive
II
. Do not touch connector X1 while the unit is powered, or until 5 minutes after
power has been removed.
1. Remove the demonstration unit from the carrying case.
2. Connect the AC power cord to the power socket on the side of the demonstration unit, as shown in Figure 1. Check
that the switch is in the Off position.
3. Connect the serial cable to connector X6 on the front panel of the Flex+Drive
II
. Connect the other end of the cable
toafreeserial(COM)portonthePC.
4. Set all control panel switches to the off (up) position, as shown in Figure 1.
5. Turn on the demonstration unit using the power on/off switch on the side of the base unit.
After a brief startup sequence, the Status LED on the front of the Flex+Drive
II
should display a minus ( ) sign. This
indicates that the drive is currently disabled, but ready for demonstration.
Note: The motor shaft should rotate freely by hand. Zero torque is present when the drive is disabled.
3.1.3 Drive enable switch
The Flex+Drive
II
cannot drive the motor unless the Enable switch is activated. Before attempting demonstrations,
check that this switch is in the on (down) position, and the LED above it is illuminated (see Figure 1).
3.1.4 Installing the software
The Flex+Drive
II
will have been supplied with the Baldor Motion Toolkit v5 CD.
1. Insert the CD into the PC’s drive.
2. After a few seconds the setup wizard should start automatically. If the setup wizard does not appear, select Run...
from the Windows Start menu and type
d:\start
where d represents the drive letter of the CD-ROM device (use the correct letter for your installation).
Follow the on-screen instructions to install WorkBench v5. The setup wizard will copy the files to appropriate folders
on the hard disk. The default folder can be changed during setup.
The CD also contains the demonstration files used in this manual.