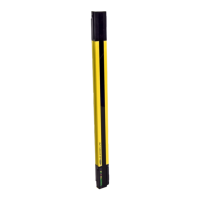
6.3.3 Optical Alignment
CAUTION: Ensure that no individuals are exposed to any hazard if the OSSD outputs turn ON when the
emitter and receiver become aligned.
Verify the sensor mounting, see
Mounting System Components
(p. 28).
Verify that the mute devices are not signaling a mute condition (M1 and M2 inputs are open).
Verify the optimal alignment, adjusting the sensor rotation with the power On:
1. Verify that the emitter and the receiver are pointed squarely at each other. Use a straight edge (for example, a level)
to determine the direction the sensor is facing. The sensor face must be perpendicular to the optical axis.
Straight Edge
Straight Edge
All OFF
Note: At power-up, all indicators are tested (flash), then the Scan Code and Mute Configuration
are alternately displayed.
2. Turn On power to emitter and receiver. If the Channel #1 beam is not aligned, the Status and Zone 1 indicators are
Red, the Reset indicator is Off, and the 7-segment display sequentially indicates CH1. Zone indicators 2–6 will be
Off.
ON Red
ON Yellow
or OFF
ON Red
3.
If the Green Status and Yellow Reset indicators are On, go to the next step. If not, rotate each sensor (one at a time)
left and right until the Green Status indicator is On. (As the sensor rotates out of alignment, the Red Status indicator
turns On). As more beams are aligned, the Zone indicators turn from Red to Green and the number of blocked beam
indicators decreases.
ON Yellow
ON Red
# Beams
Blocked
ON Yellow or OFF
ON Red or Green
4.
Optimize alignment and maximize excess gain.
a. Slightly loosen the sensor mounting screws.
b. Rotate one sensor left and right, noting the positions in each arc where the Status indicators turn Red
(Blocked condition); repeat with the other sensor.
c. Center each sensor between those two positions.
d. Tighten the mounting screws, making sure to maintain the positioning as the screws are tightened.
EZ-SCREEN Low-Profile System with Integral Muting
36 www.bannerengineering.com - Tel: + 1 888 373 6767
 Loading...