2. Introduction to ClickShare
2.3 About the Button
Button functionality
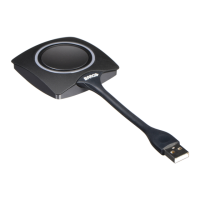
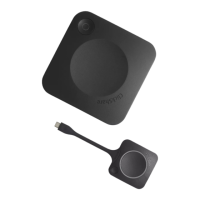
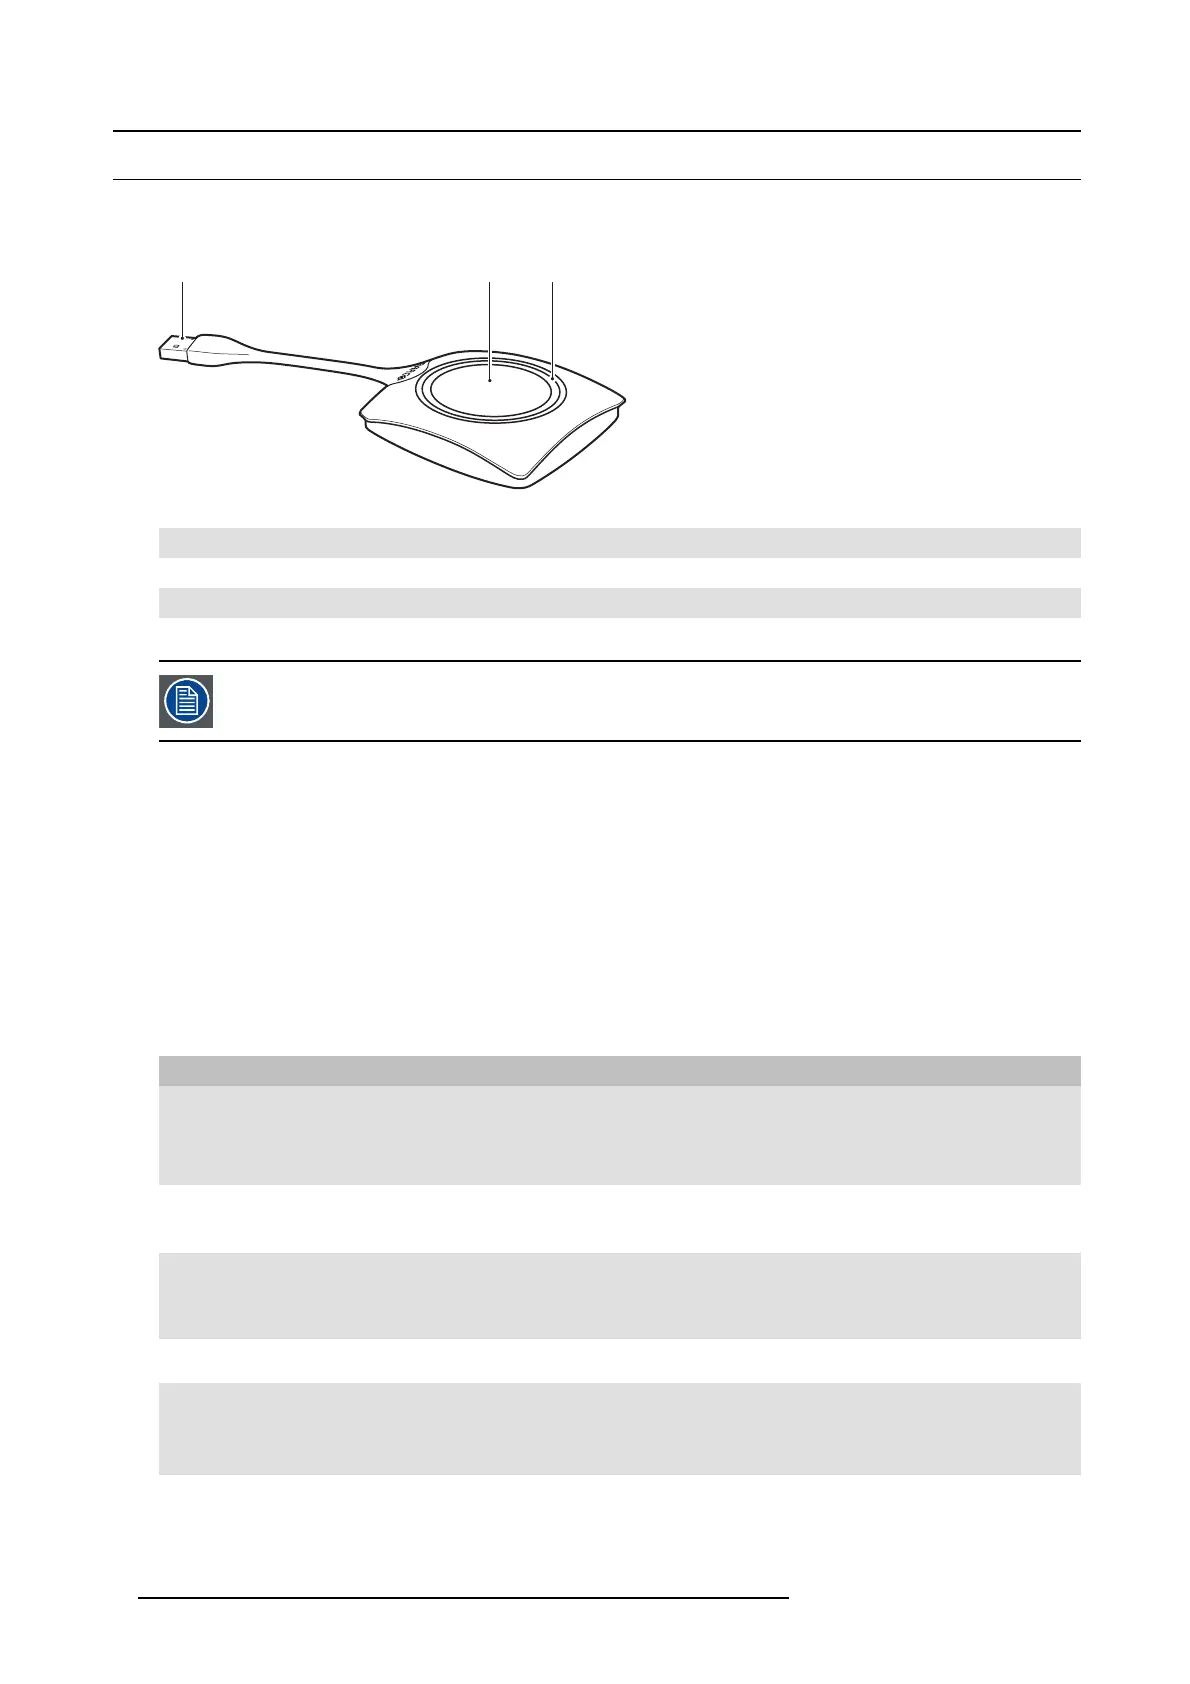
By default, the ClickShare Set comes with four Buttons. A B utton c ontains three main functional components.
1 2 3
Image 2-4
The Button
1
USB connector
2Button
3LEDring
Tabl e 2 - 5
Handle the Button cable w ith care. Rough handling might cause defects.
USB connector
Using the US B c onnector the Button can be plugged into a laptop (for sharing your screen) or in the Base Unit (for pairing the Button
to the Unit or updating its software).
Button
Click the B utton to display the content of the laptop’s screen on the m eeting room display. Clicking the B utton during the meeting
will toggle the sharing of the screen.
Holding the B utton for 2 seconds brings the content of the laptop’s screen as full screen on the meeting screen, removing other
sources currently displayed.
LED ring
The LED ring indicates the current status of your ClickShare.
LEDs behavior Explanation
white blinking
• the B utton is plugged in the laptop and initializing or waiting for the user
to start the ClickShare application.
• pairing/software update of the B utton in the Base Unit is in progress.
static white
• ClickShare is ready to start sharing your screen.
• pairing is done. You can now unplug the B
utton from the Base Unit.
static re d
• sharing your s creen with the display.
• pairing and software update is done. You can now unplug the Button
from the Base Unit.
red blinking
• an error o ccurred.
off (no light)
• the Button is not or not properly inserted into the USB port.
• the Button might be defective.
• the USB port or computer m ight be defective.
8
R5900001 CLICKSHARE 22/12/2014