R5905752 /16 DP2K C26
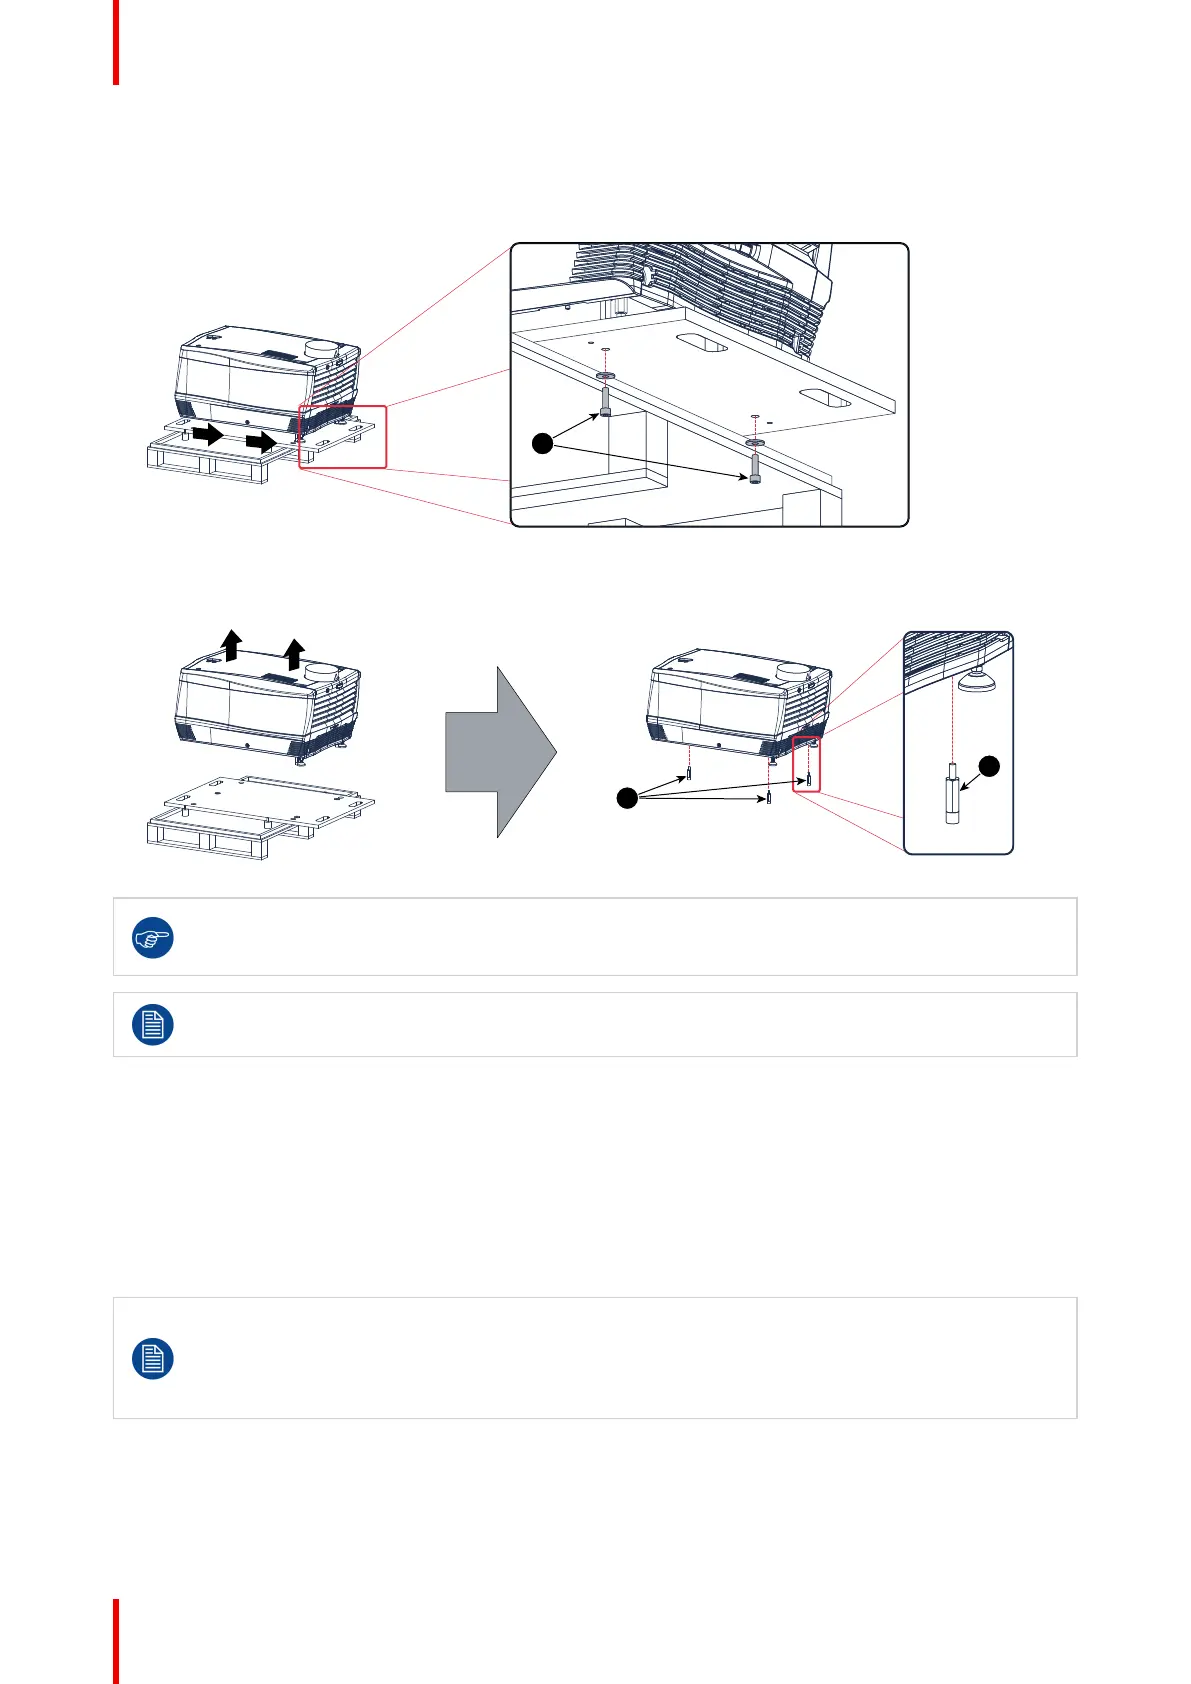
7. Slide the rear side over the edge of the pallet unit the two fixation screws (reference 5) at the rear are
visible.
8. Remove the two hexagon socket head cap screw (reference 5). Use an 8 mm Allen wrench.
Image 2–5
9. Remove the projector from the wooden support plate and finally remove the 3 extension tubes (reference
6). Use a 17 mm wrench.
Image 2–6
Save the original shipping carton and packing material, they will be necessary if you ever have to
ship your projector. For maximum protection, repack your projector as it was originally packed at the
factory.
The lens is delivered in a separate box. For lens installation, see section “Lens & lens holder”.
2.3 Initial inspection
General
Before shipment, the projector was inspected and found to be free of mechanical and electrical defects. As
soon as the projector is unpacked, inspect for any damage that may have occurred in transit. Save all packing
material until the inspection is completed. If damage is found, file claim with carrier immediately. The Barco
Sales and Service office should be notified as soon as possible.
The packaging of the DP2K-xxC is provided with a shock-watch label. If this shock-watch label
was triggered (red colored at arrival) during transport, indicates that the package was possibly
roughly handled by the transport company. In this case, the instructions mentioned on the label,
should be followed, which are: adding a note on the “bill of lading” and informing the transport
company and the Barco sales and service office as soon as possible.
Box content
After unpacking the projector it is recommended to check if all following items where included:
• One short power link cable (mono phase) (in case no UPS is used) - Installed on projector.
General

 Loading...


