57R5911438 /09 UDM
4.10 Removal of an input board
WARNING: The procedures below may only be performed by Barco trained and qualified
technicians.
CAUTION: Always wear a wrist band which is connected to the ground while handling the
electrostatic discharge (ESD) sensitive parts.
The procedure below is applicable to all the input modules of the Input & Communication Unit of the
projector.
Required tools
• Phillips screwdriver PH1
• Torx screwdriver T10
How to remove
1. Switch off the projector and unplug the power cord of the projector.
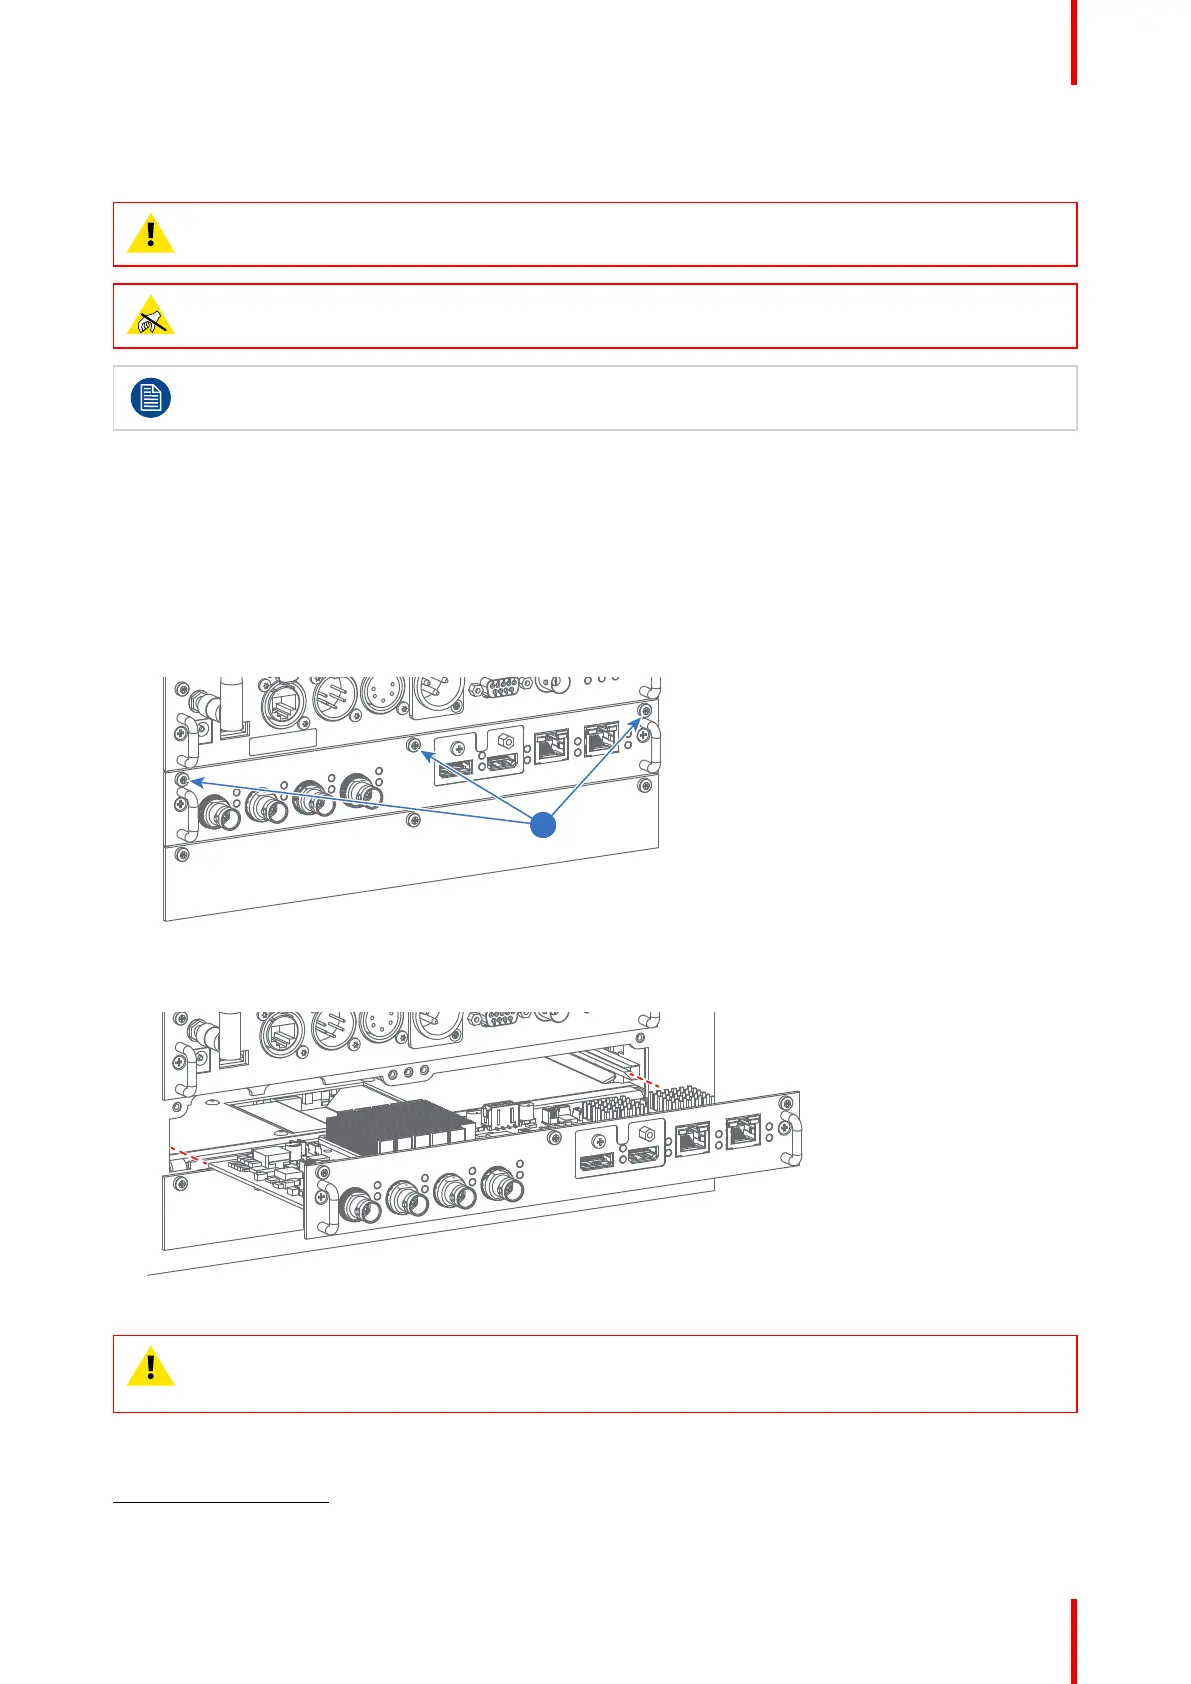
2. Release the 3 captive screws of the input module (4).
3
Image 4–15
3. Pull out the input module of the Input & Communication module using the handles.
Image 4–16
CAUTION: Ensure that unused input slots of the Input & Communication Unit are always covered
with a dummy front plate. After removing one of the input modules, immediately replace with an
other one or install a dummy front plate on the unused input slot.
Installation procedures
3. Depending on the production date of the projector, the captive screws can either be Phillips screws or Torx screws. Refer to the tools
list to see what tool you may require.
 Loading...