AW00097209000 Configuring the Camera
Basler IP Fixed Box Cameras 47
The parameter descriptions for the remaining parameters MotionRegion_1/MotionLevel_1 to
MotionRegion_4/MotionLevel_4 are identical to the MotionRegion_0/MotionLevel_0 parameter
descriptions.
HTTP URL Alarm End - Enter a valid URL. You could, for example, enter this URL:
http://MyServer/cgi-bin/alarm.cgi
The transmitted string will be URL encoded.
The camera will automatically add the following parameters to the end of the URL:
host=<hostname> = the camera’s host name, typically something like this: "Basler-20809681"
date=<date/time> = the date and time when the alarm has been declared, e.g.:
"2012-01-03 16:30:41 CEST".
(How to set the date and time format and the time zone, see Section 3.11.2 on
page 72.)
ts=<timestamp> = time in sec:µsec since 1 Jan 1970, 0:00:00 GMT, when the alarm has been
declared, e.g. something like this: "1330342430.625201"
nr=<alarm number> = the number of the alarm, e.g. "2".
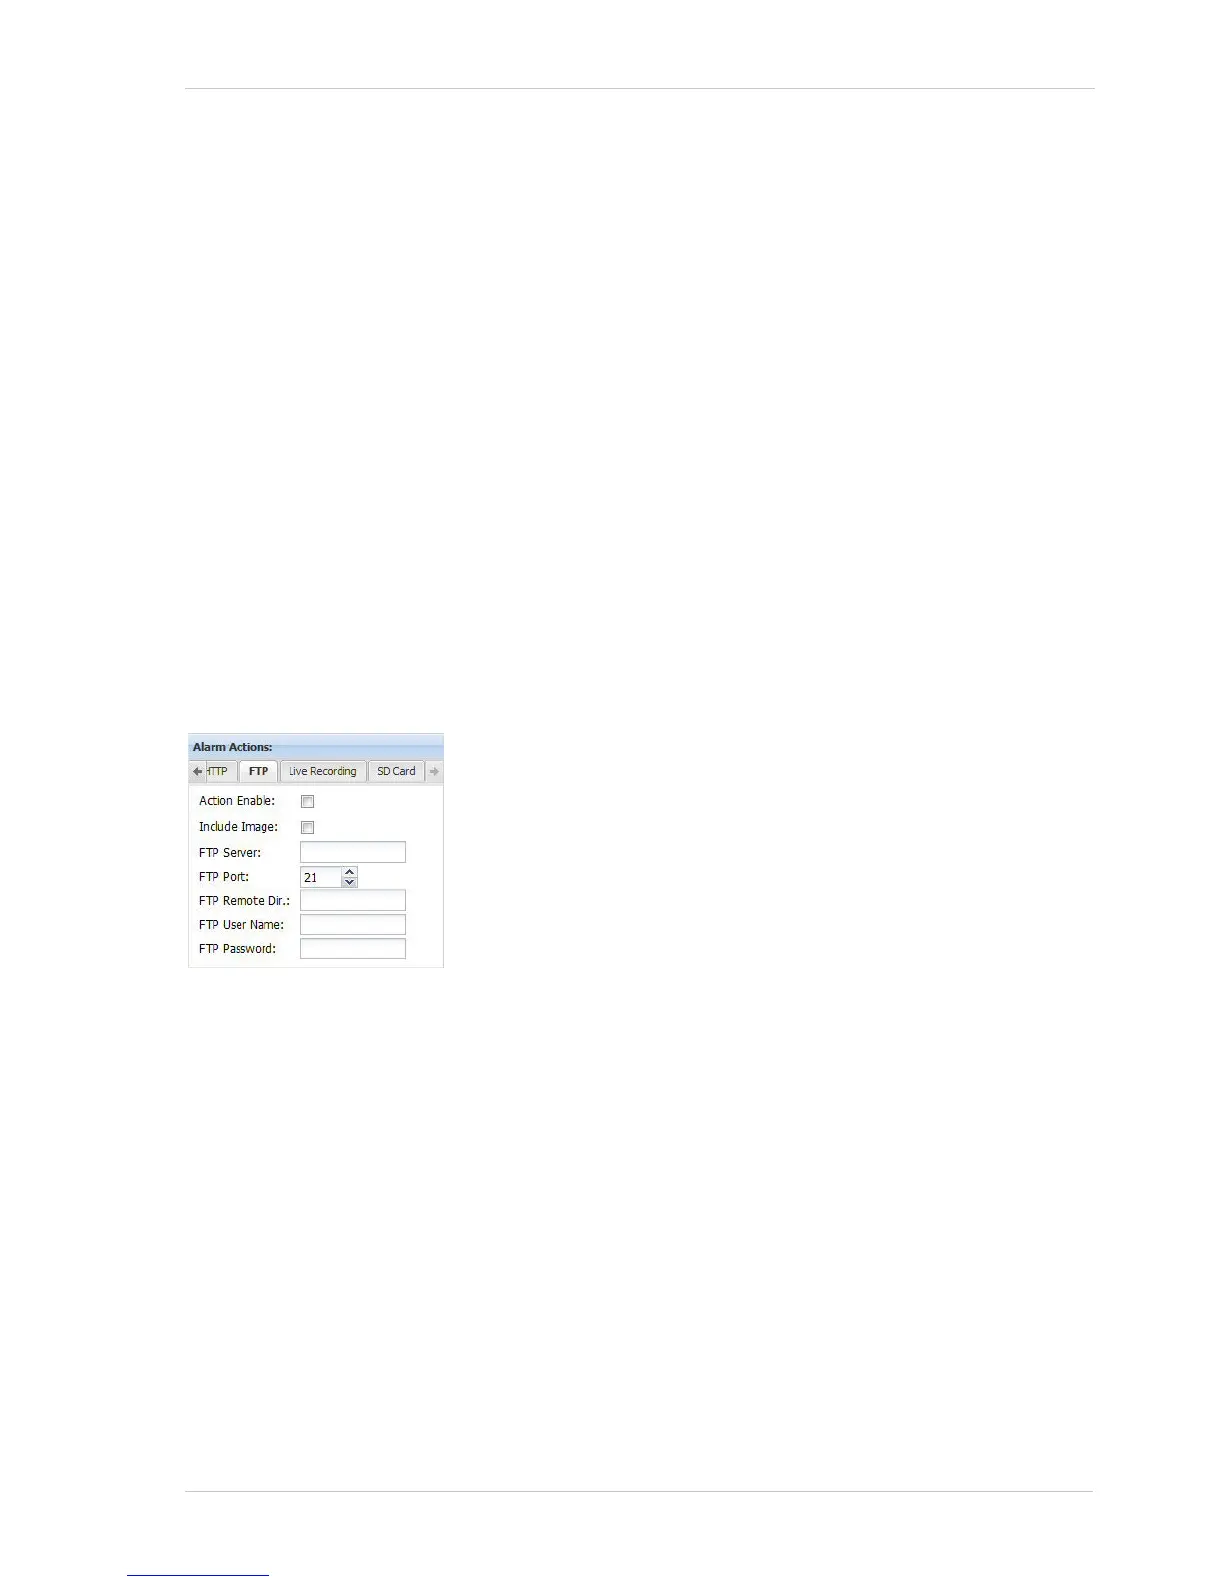
FTP Tab
FTP Server - Enter a valid address for the FTP server that will receive the upload.
FTP Port - Select the port to use on the target FTP server.
FTP Remote Dir - Enter the path to a target subdirectory for the FTP upload. (If no path is
specified, the root directory will be used.)
FTP User Name - Enter a user name for authentication on the FTP server. Up to 15 numbers
and/or letters (upper or lower case) can be used.
Action Enable - Check the Action Enable box on the FTP tab to
enable the sending of an FTP upload as an action to take when an
alarm condition is declared. The upload will be a text file that
includes information such as the camera host name and the date
and time.
Include Image - Check the Include Image box to include an image
with the FTP upload. The included image will be a separate JPEG
file and will be an image that was captured when the alarm was
declared.
Note that an image file will be included for each JPEG encoded
stream (see page 30) enabled on the camera. If none of the
camera’s enabled streams are set for JPEG encoding, the Include
Image check box cannot be checked.
 Loading...