69
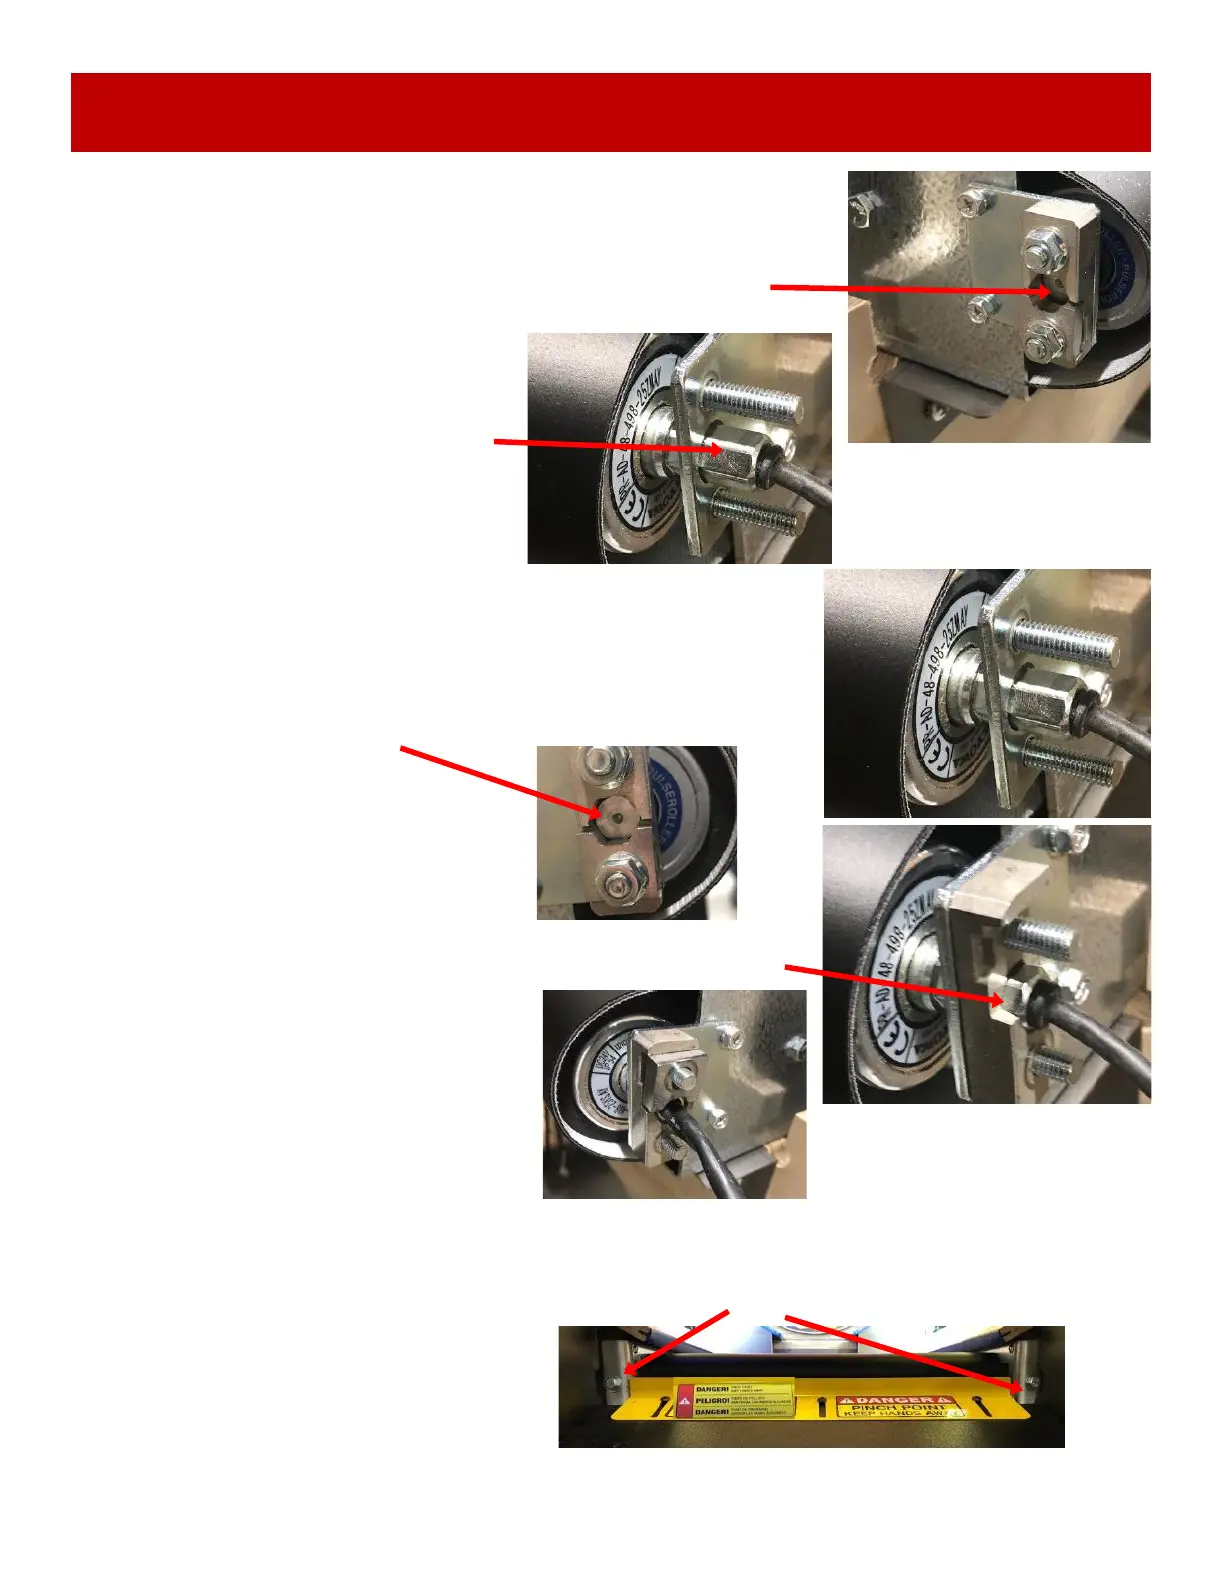
HOW TO REPLACE CONVEYOR MOTOR
Step # 7
From the other side of the roller motor, remove the roller from the
bracket.
It is spring loaded, push a small screwdriver into this hole and depress
the spring loaded pin.
Lift this right side up as you remove the
roller from the left side.
Carefully thread the cable through the
hole as you remove the roller motor.
To install the new roller motor:
Carefully thread the cable through the hole in the mounting bracket
on the left side of the conveyor.
On the right side, push the spring loaded pin in the bracket -
make sure it pops completely into the hexagon shaped receiver.
Carefully thread the cable through the hole in the base plate,
and attach to bracket as shown.
Inset the lock plate back on the assembly.
Install the 2 nuts using a 10 mm wrench.
Do not overtighten!
A snug fit is fine.
Plug in the new roller motor to the control board and re-assemble the game.
Tighten these two nuts with a 14mm wrench to put tension on the belt.
Adjust the pinch guard so that it very close,
but not touching the belt.
 Loading...