81 DeepMind 12 User Manual
Important settings
In order to successfully set up a KEYBOARD SPLIT, there are a number of settings
that need to be checked and adjusted in various menus as follows:
1. Make sure that all units are running the latest version of the rmware. You
can view the rmware version in the SYSTEM SETTINGS page of the GLOBAL
menu. (Press GLOBAL a few times until this menu appears, then check that
the versions are the same.)
2. In the CONNECTIVITY page of the GLOBAL menu, make sure the DEVICE ID is
the same for all units.
3. In the MIDI SETTINGS page of the CONNECTIVITY menu:
• Make sure RX-CHANNEL and TX-CHANNEL are set to the same channel
number for all units.
• Make sure that MIDI CTRL is set to CC.
4. Using the ARP SETTINGS page of the ARP EDIT menu:
• The rst unit can have its clock set to INTERNAL and the TRANSMIT-
CLOCK set to ON.
• The clock of the second unit can then be set to MIDI (Auto). When set
correctly, the TAP/HOLD button of the second unit will blink in time with
the rst unit's clock.
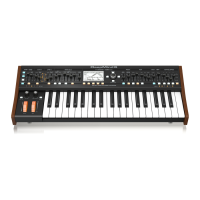
5. If you have more than one keyboard, for example you have two DeepMind
12 units, you can turn LOCAL OFF on one of them, so its keyboard is no longer
used. This option is in the KEYBOARD SETTINGS page of the GLOBAL menu.
OPERATION WITHOUT THE KEYBOARD SPLIT
6. With two DeepMind synthesizers connected as described above, they can
both play when the keys are played on the keyboard. For example, if the rst
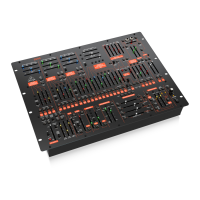
unit is a DeepMind 12 with the keyboard, it will play as normal. The MIDI
connection to the other unit, such as a DeepMind 12D desktop model, will
allow it to play at the same time. You can use the volume controls of each
unit, and/or the external mixer to balance the audio output of each unit.
Each unit can have a dierent program playing.
7. Once you have tested that both DeepMind units are playing correctly from
the one keyboard, you can set up the KEYBOARD split as follows:
Using the CHAIN PARAMETERS menu to create a KEYBOARD SPLIT
1. To directly access the CHAIN PARAMETERS menu, use the POLY section's EDIT
switch three times and the menu will appear, and the EDIT switch will ash.
Do this for both DeepMind units.
FLASHING=EDIT
2. Select POLY-CHAIN OFF for each unit. (PROGRAM-LINK is not an available
option when POLY-CHAIN is OFF.)
3. Select KEY-RANGE ON for each unit.
4. You can either set the value of each range manually, using the -/NO and +/
YES switches, rotary knob, or DATA ENTRY fader, or you can HOLD down the
EDIT switch in the POLY section, as described in the details below.
Setting up the rst unit
5. Press and hold the EDIT switch on the rst unit, with RANGE-LOWER
selected, and press the lowest key on the keyboard (for example).
6. Press and hold EDIT on the rst unit, with RANGE-UPPER selected, and press
the B below middle C on the keyboard (for example).
Setting up the second unit
7. Press and hold EDIT on the second unit, with RANGE-LOWER selected, and
press the middle C key on the keyboard (for example).
8. Press and hold EDIT on the second unit, with RANGE-UPPER selected, and
press the last key on the keyboard (for example).
Note: If you see that the setting up of range of this second unit aects the
range of the rst unit, make sure that MIDI CTRL is set to CC and not NRPN.
9. If you have a third DeepMind unit and want to set up a 3-way KEYBOARD
SPLIT, make sure the MIDI IN of the 3rd unit is connected to the MIDI-THRU of
the 2nd unit, and not MIDI OUT.
10. Then set up the 3rd unit's RANGE-LOWER and RANGE-UPPER in the same
way.
Lower Upper
1st DeepMind
Lower Upper
2nd DeepMind
Upper/LowerUpper/LowerLower
1st DeepMind 2nd DeepMind 3rd DeepMind
Upper