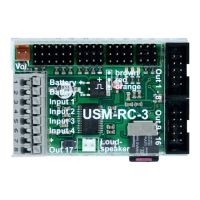
GB Sound module USM-RC-3
11.10.2021 BEIER-Electronic 79
Teach-in the control pad:
Before using the USM-RC-3 for the first time, it must be taught-in to the control pad
or the transmitter. It works like this:
1. Disconnect the sound module from the supply voltage.
2. Switch on the radio and receiver.
3. Put all channels / controls on the radio in neutral position and just press and
hold the "Shift" button (top row, far left) on the control pad.
4. Now switch on the power supply of the sound module and wait until the green
LED flashes quickly.
5. Now release the "Shift" button on the control pad.
6. When the blue LED lights up, press button "7" (top row, far left) and keep it
pressed.
7. Wait until the blue LED turns out and the green LED lights up continuously.
8. This completes the teach-in process.
It is then recommended to check the evaluation of the buttons on the control pad in
the diagnosis (see page 104). With Prop # 3 or Prop # 4, the buttons numbers are
now also displayed there when the button is pressed.
If the button numbers displayed in the diagnosis do not match the buttons pressed,
the "transmission power" of the control pad may have to be changed (see
instructions for the control pad). After adjusting the "transmission power", the
learning process must be repeated!
If the green LED does not flash in step 4, either no signals from the control pad are
arriving at the sound module, or the "transmission power" of the control pad is set too
low.
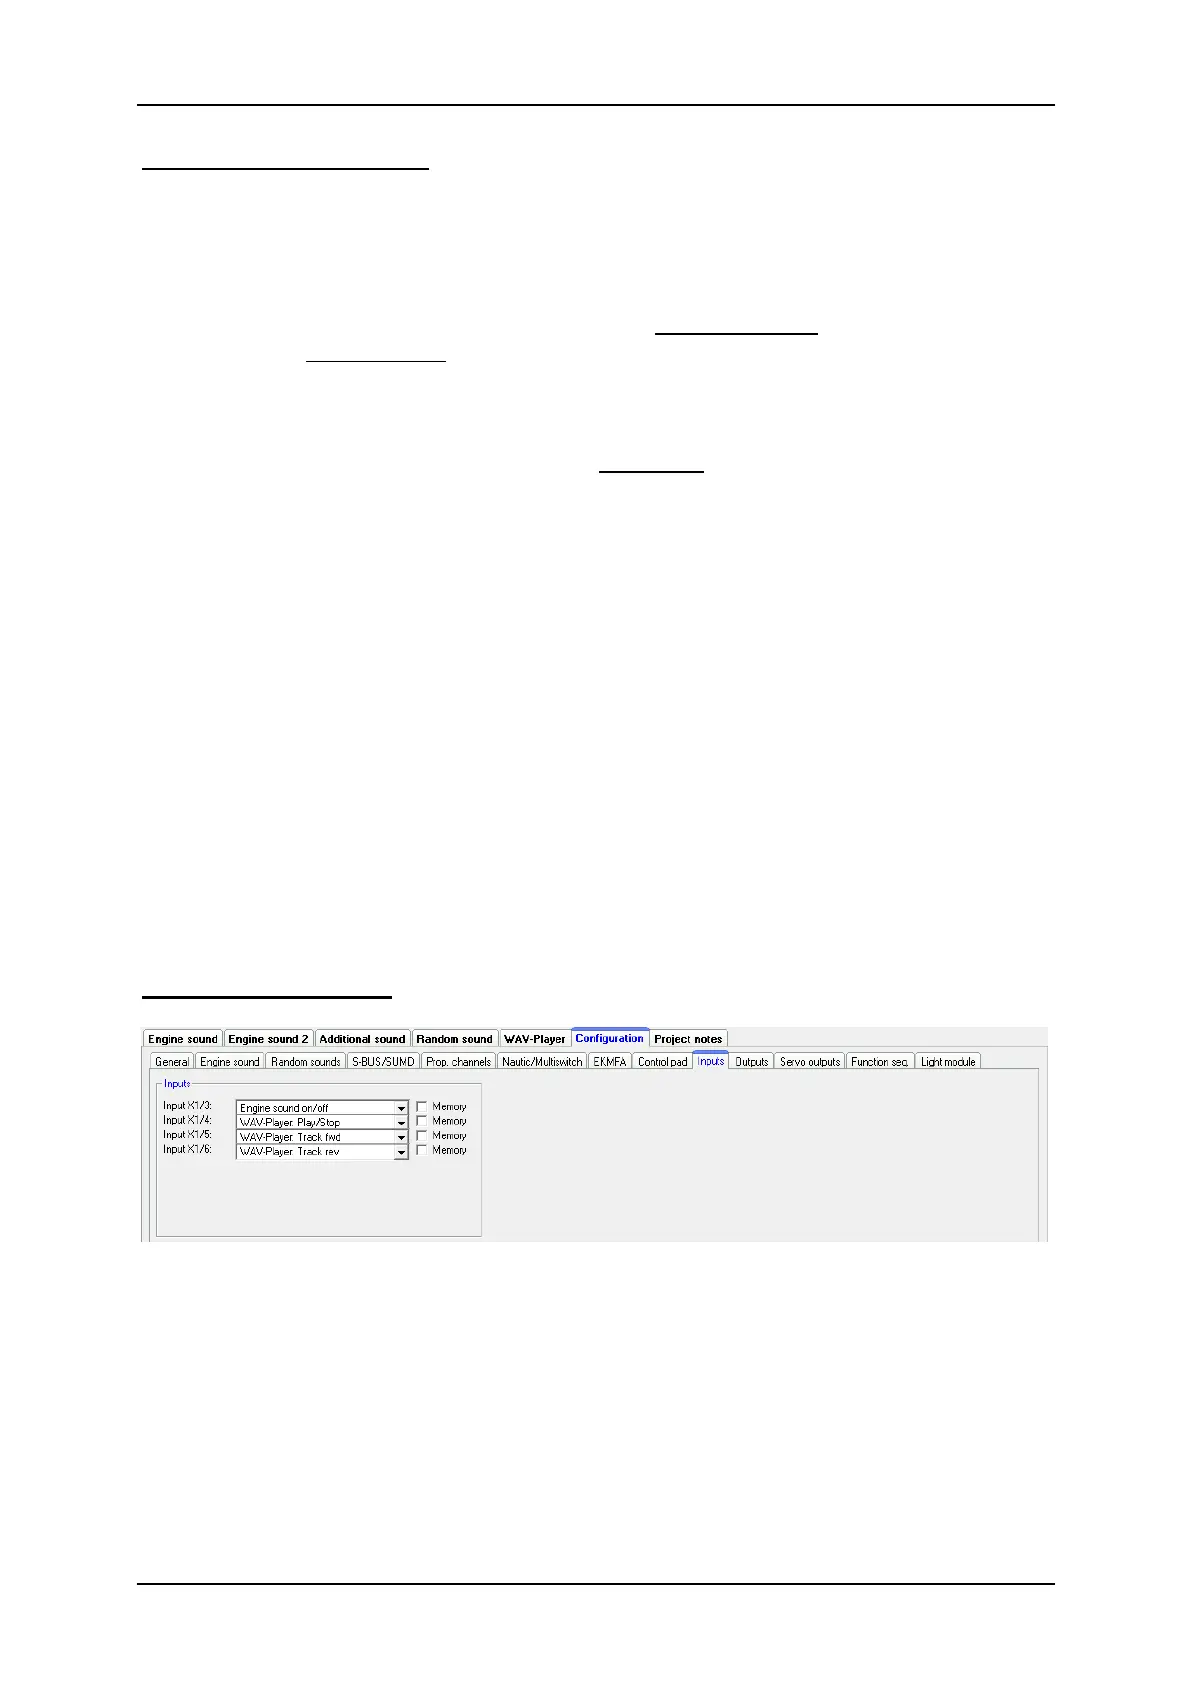
Configuration - Inputs
Here you can assign functions to switching-inputs.
By checking the box "Memory", the function will be stored (if it makes sense) and
reset after reactivating the input again.