23
Mounting Requirements
Installation
The DIU should be located where the driver can easily view and adjust the controls. This can be located on top of, or integrated into, the
dashboard fl ush with the front edge of the dashboard. Ease of operation and visibility of the DIU front panel are the primary considerations.
The method chosen for routing the wiring harness to the DIU should also be taken into consideration when determining the optimal
location.
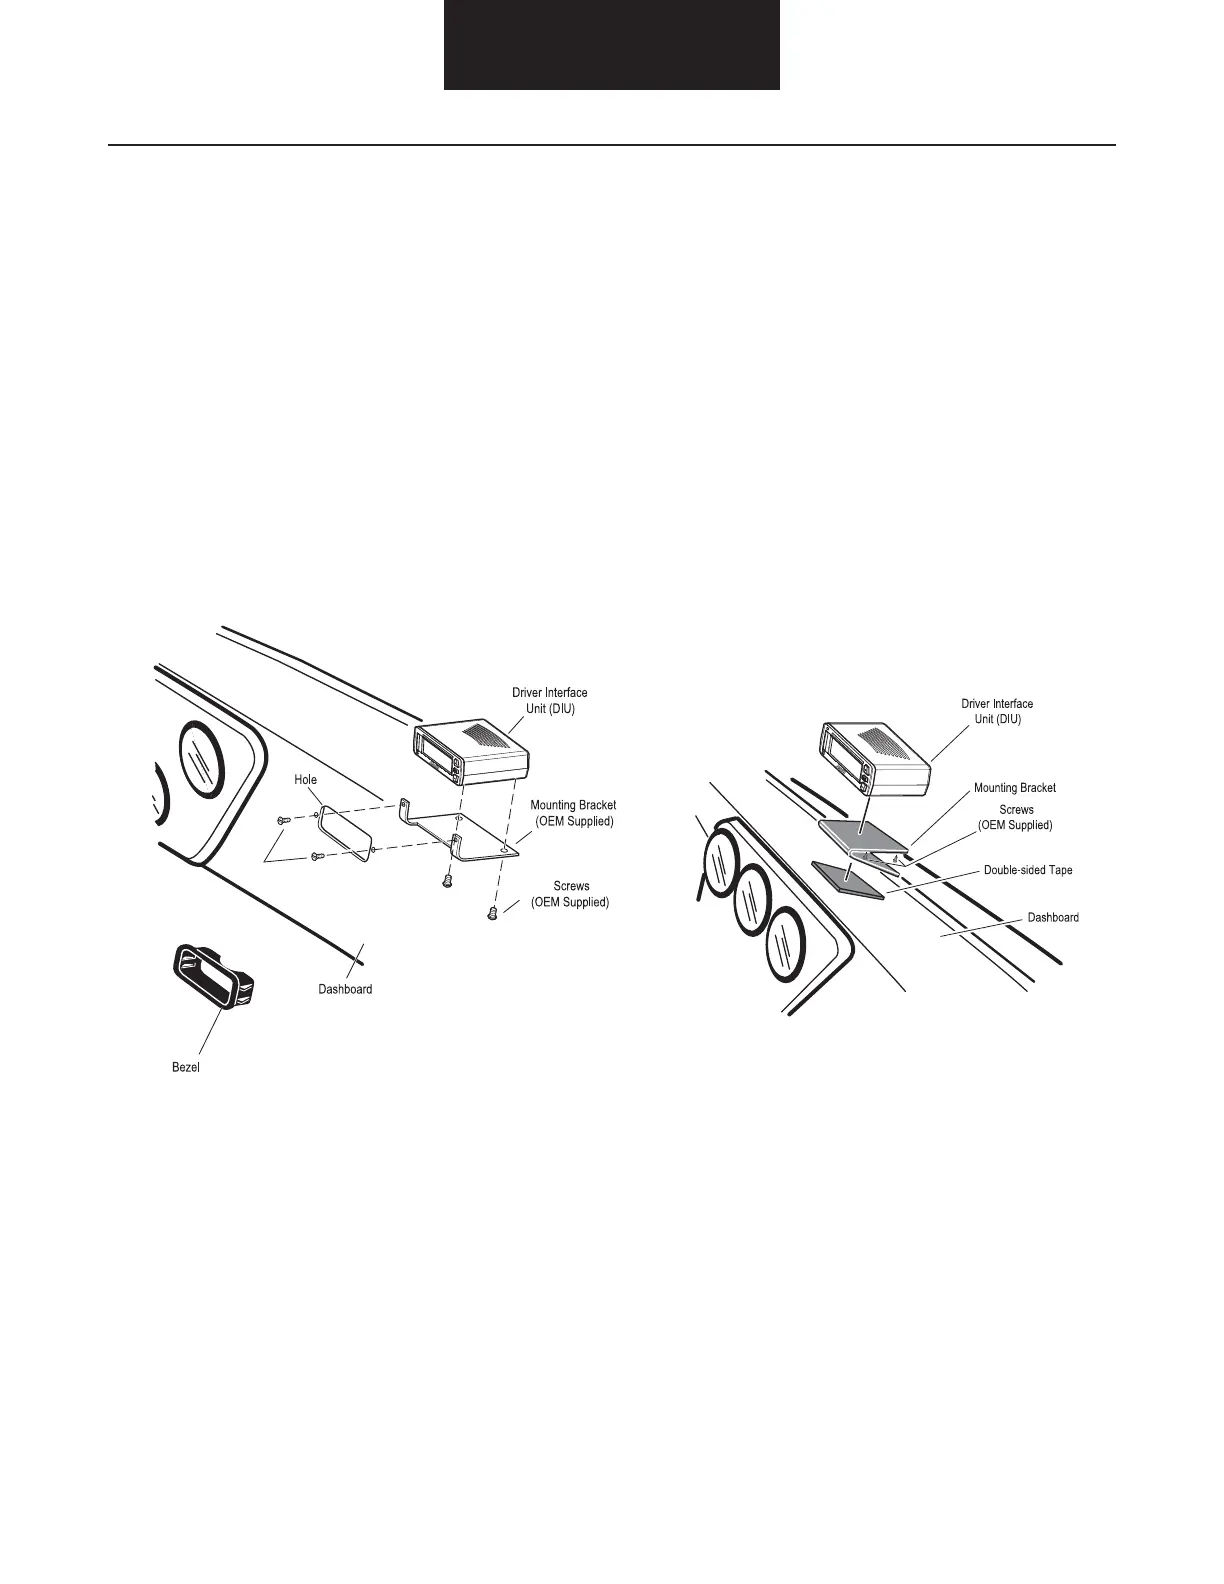
Installation involves mounting the DIU to an in-dash or on-dash bracket. Attach the bottom of the DIU to the bracket with #6-19 Plastite
screws. The four mounting screw locations on the display are .393" (10mm) deep maximum. The screws should leave about .060" (1.5mm)
minimum of clearance between the tip and the bottom of the hole when installed. For example, a .375" (9.5mm) long screw with a .060"
(1.5mm) thick bracket would be acceptable.
Suggested Mounting Brackets
In Dash Installation: On Dash Installation:
Screws