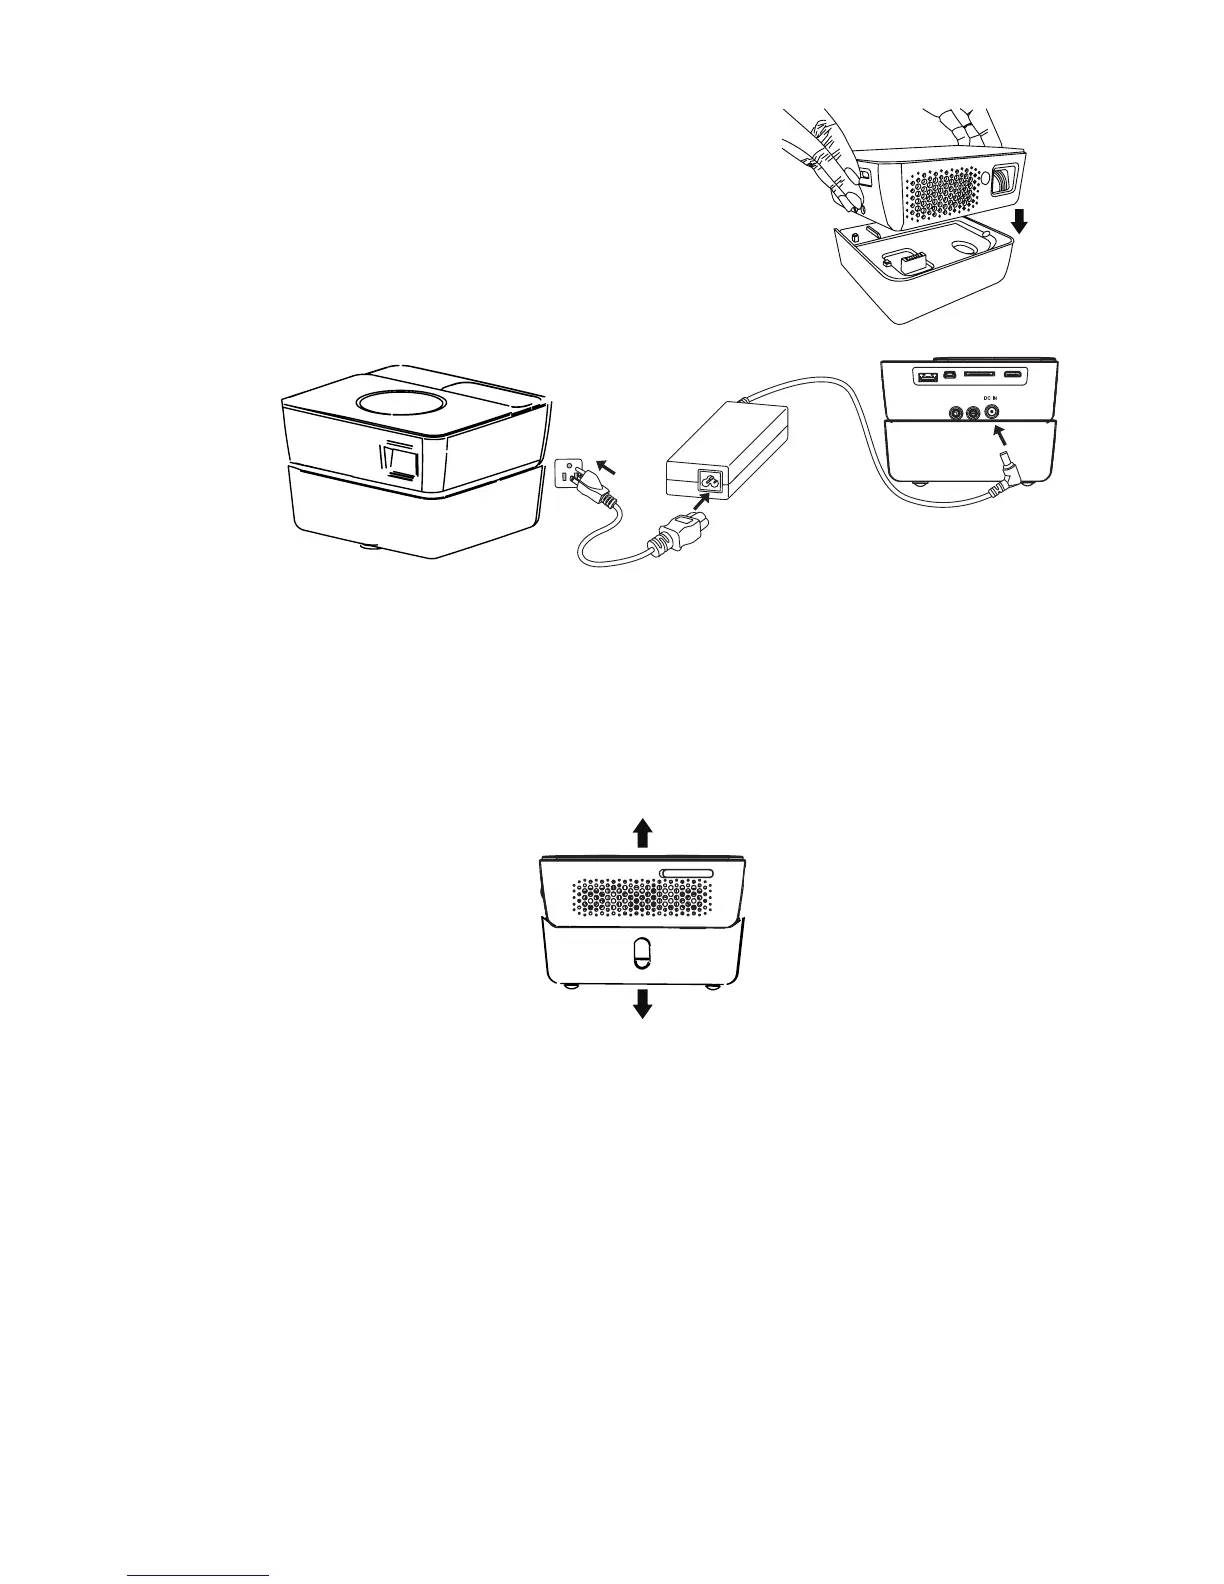
Connection
18
2. Position the projector on the battery.
When the battery capacity is between 10% and
100 % , the battery LED indicator turns off. When
the battery capacity is lower than 10%, the
battery LED indicator blinks red, and the system
will shut down.
3. Match the battery carefully until it fits in
place.
4. Insert the plug from the AC adapter into the DC IN terminal.
5. Insert the appropriate end of the power cord into the AC adapter.
6. Insert the plug on the power cord into a wall outlet. The battery LED indicator
blinks blue when charging is started and turns into solid blue when charging is
completed.
Removing the battery
Slide the battery lock switches on the two sides to remove the battery from the projector.
1
2
3