17
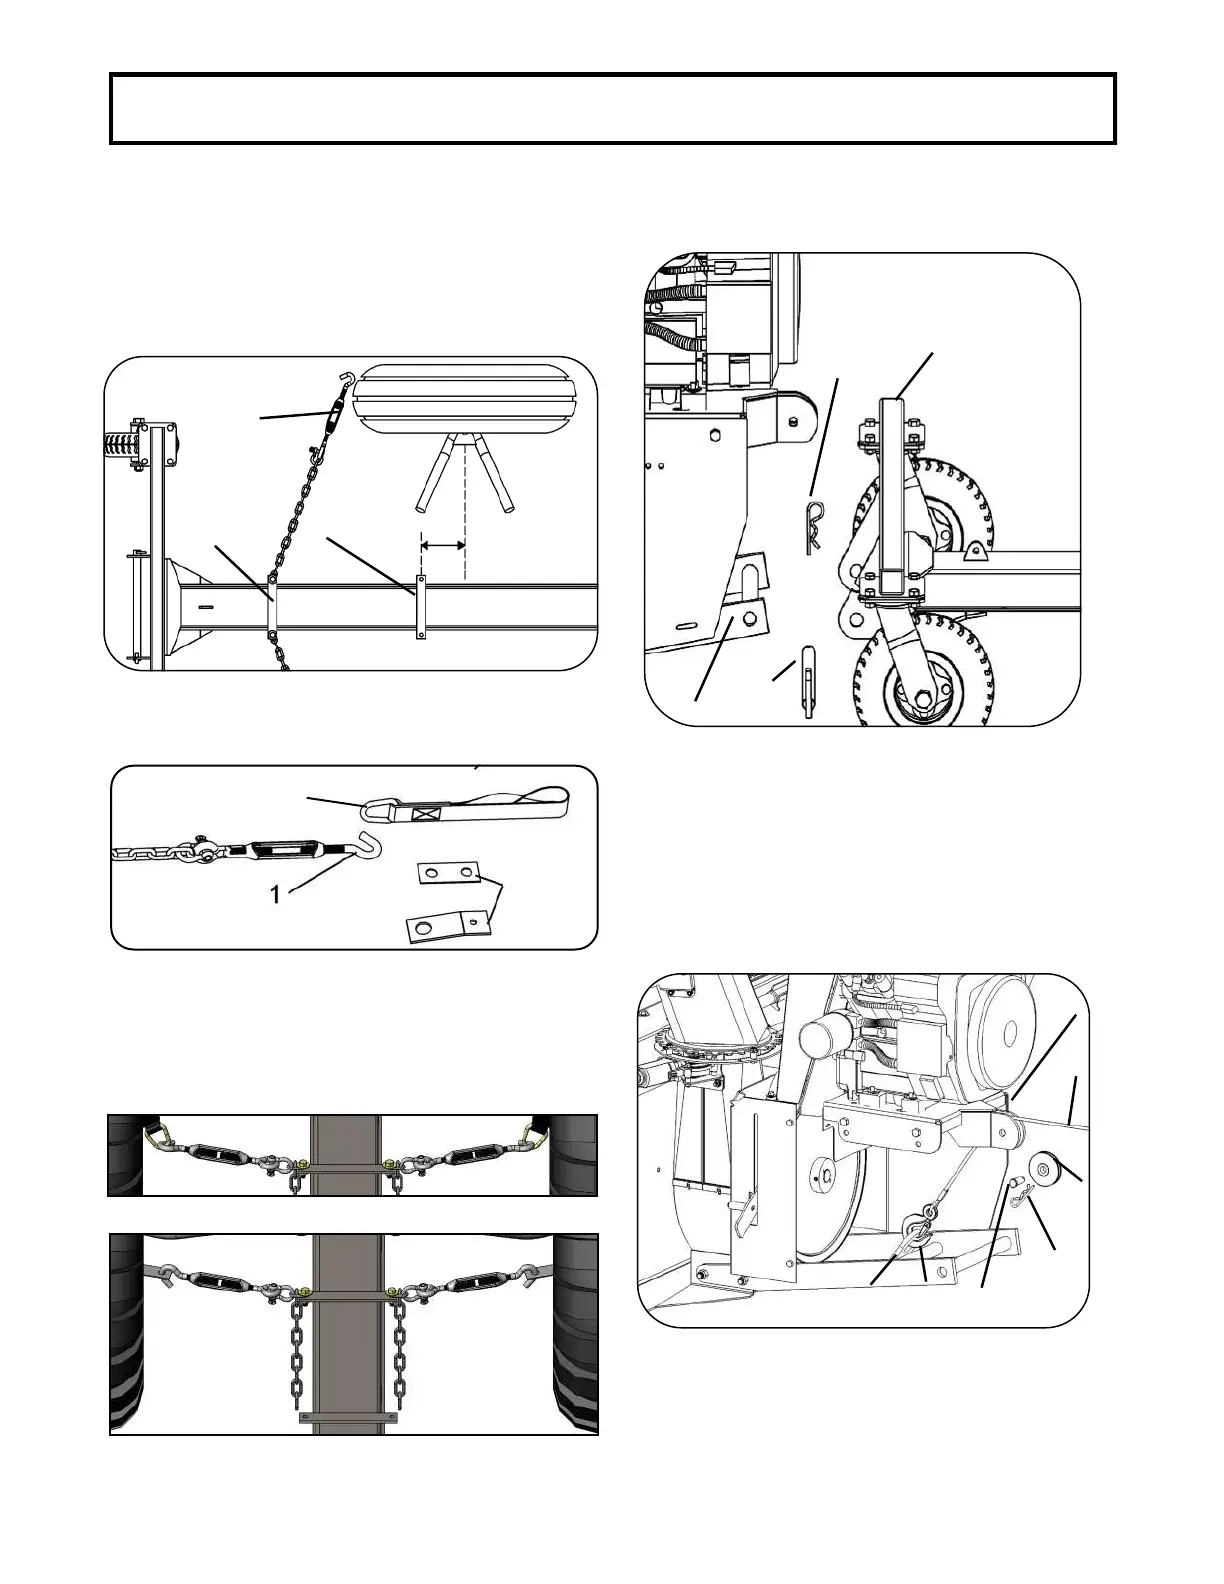
4. Install the snowblower hitch (item 1) on the wheel
support (item 2) of the subframe with a pin (item 3)
and hair pin 4mm (item 4).
Assembling the snowblower to the subframe
5. Secure the winch hook (item 1) in the lift eye on
the hitch (item 2). Place the winch cable (item 3)
between the engine support (item 4) and the
pulley (item 5). Secure the pulley with a pin (item
6) and a hair pin 3mm (item 7).
Install the snowblower lift system
3. Hook the turnbuckles in the brackets
or the lift straps Tighten the turnbuckles firmly.
After adjusting the turnbuckles, tighten
firmly the nuts that secure the brackets on the vehicle’s
suspension arms. Make sure to lock the nuts with the
original locks. Furthermore, tighten firmly the turnbuckle
assembly nuts that secure them to the subframe.
2. In the event where the vehicle is equipped with a
prominent front bumper or tracks, the assembled
turnbuckles will become too angled.
Relocate the assembled turnbuckles from plate 1
towards plate 2.
To avoid any damages to the subframe
or vehicle, plate #2 must be placed in front of the
wheels’ center if the assembled turnbuckles are
relocated.
16’’