33
Fig. 36: “Devices”
frame for connection
with the new device.
Note: if the instrument is already in the list, the user has to select the instrument in the “Device”
frame and then click on the “connect” button .
It is possible to remove a device by clicking on the “-“ button.
When the connection is established “Connected” is displayed in the connection status of the
“Connection” window. One can see the “Connection status” with the device type and the
instrument’s IP Address.
4.2.1 IP address modification of the instrument
If the IP address of the instrument is not valid i.e. two IP addresses are the same or not in the
appropriate network, the IP address has to be changed.
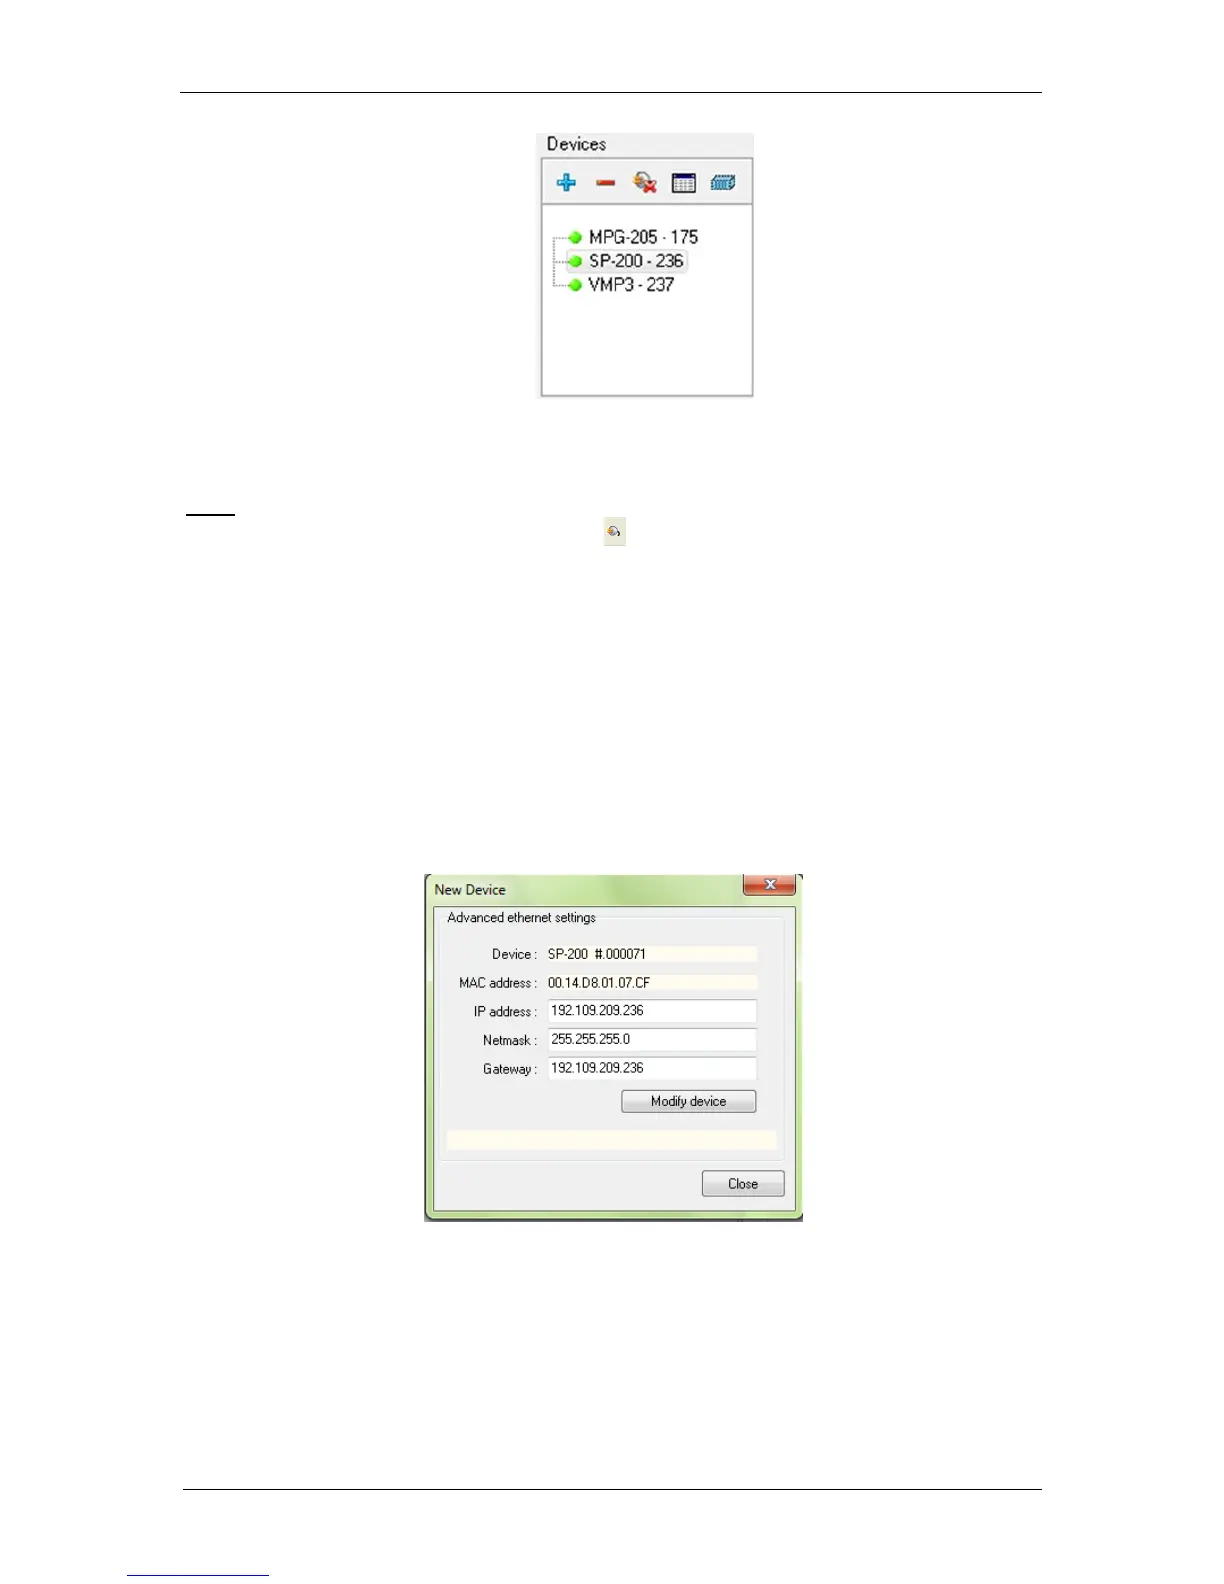
In the “Devices” frame, click on the “+” button to open the “New Device” window. On the
“New Device” window select the desired instrument and click on “Modify”. The following
window then appears:
Fig. 37: “Advanced Ethernet settings”
of the “New Device” window used to
change the instrument IP Address.
Modify the IP Address to have a valid address in your network. Repeat this procedure with the
Gateway and click on “Modify device”. A “configuration changed” message is displayed in
green when the instrument receives the new IP address. Several “Bip” sounds are emitted by
 Loading...