36
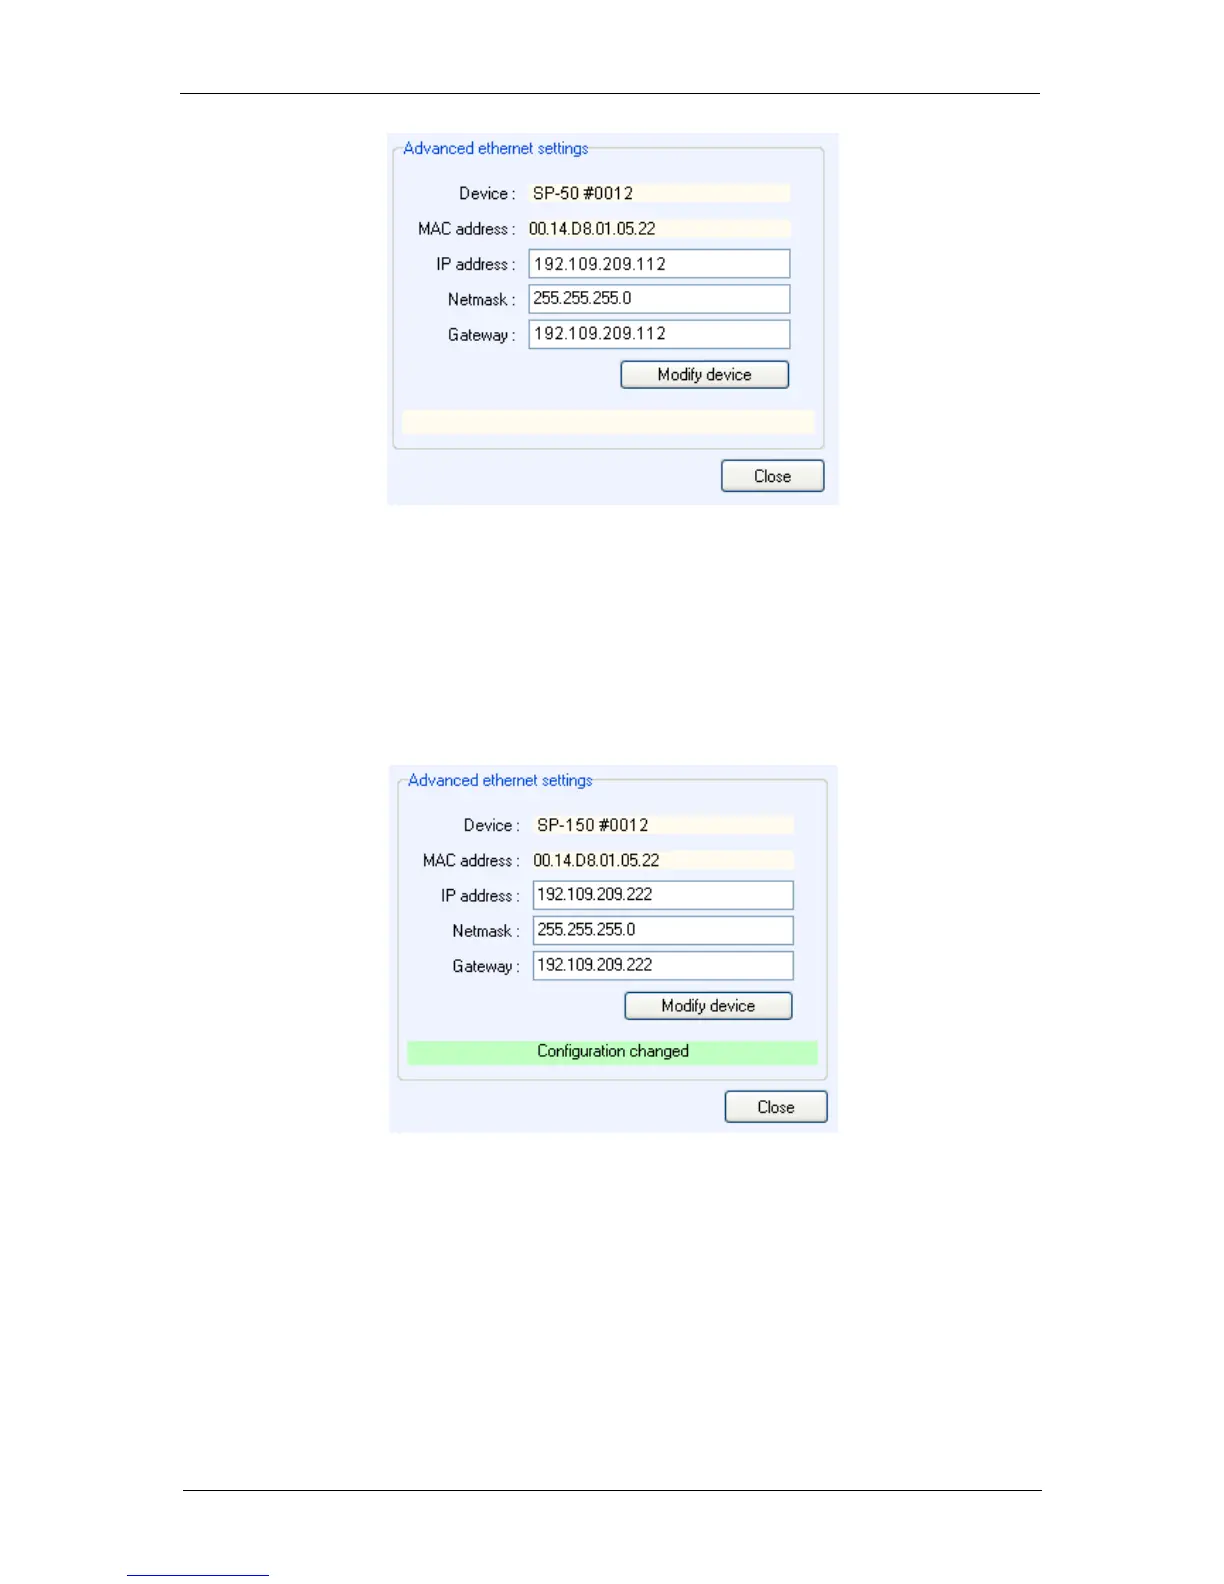
Fig. 42: “Advanced Ethernet settings” of the
“New Device” window used to change the
instrument IP Address.
Modify the IP Address to have a valid address in your network. Repeat this procedure with the
Gateway and click on “Modify device”. Then the new IP Address is sent to the instrument and
a “configuration changed” message appears in green. Several “Bip” sounds are emitted by the
instrument indicating that the communication board is reinitialized with the new IP Address.
“Configuration changed” appears at the bottom of this window.
Fig. 43: New configuration.
Then click “OK” to display the “New Device” window and “Refresh” to refresh the window and
select your instrument’s IP address. Click on the “Select” button.
Now the instrument is connected and ready for use.
 Loading...