14
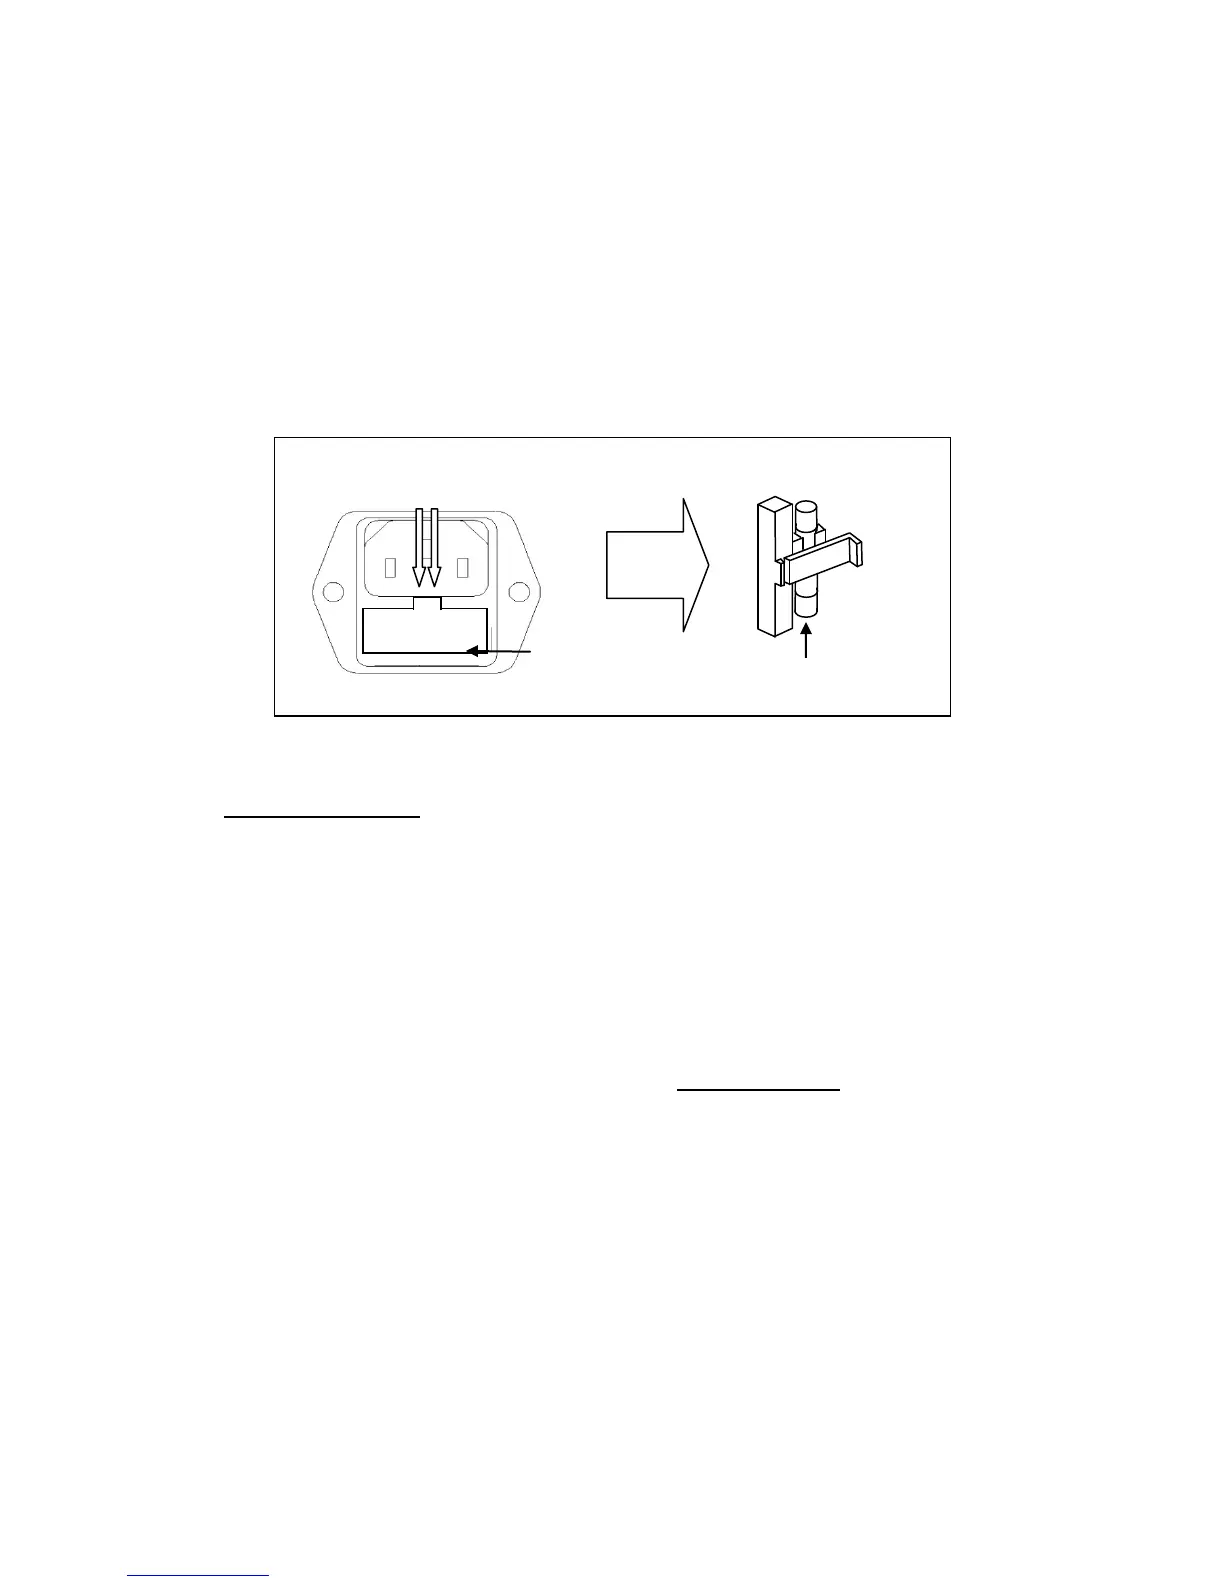
Fuse Replacement
Follow the steps below to replace or check the fuse.
1. Locate the fuse box next to the AC input connector in the rear panel.
2. With a small flat blade screwdriver, insert into the fuse box slit to pull and slide
out the fuse box as indicated below.
3. Check and replace fuse (if necessary) for the desired line voltage operation (see
Table 1).
Power-on procedure
Turn on the instrument by pressing the main power switch on the front panel
of the unit. The instrument will automatically revert to the last setting before
the power was turned off.
NOTE
The 9 pin D-sub connector in the rear is for factory use only!
This instrument does not offer a remote control interface.