14
Replacement of Parts
Maintenance
WARNING!!
Must be performed by an authorized service
agent only.
ELECTRICAL COMPONENTS
1. Turn o the main electrical connection to the oven.
2. Remove the components from the panel and set the
wiring aside.
3. Reinstall the components.
GAS CONTROL COMBINATION
NOTE: Gas models only.
1. Shut o the gas and turn o the power to the oven.
2. Remove the electrical connection.
3. Remove the gas connection in front of and behind the
control combination.
4. Remove the pilot line, replace, reinstall, and adjust.
Check for gas leaks.
REMOVAL OF BURNER
NOTE: Gas models only.
1. Shut o the gas and turn o the power.
2. Remove the combustion cover.
3. Remove the gas connection, etc.
4. Remove the screws fromthe burner mounting bracket.
5. Remove the burner from the combustion chamber.
6. Replace pilot burner if necessary. Install the burner.
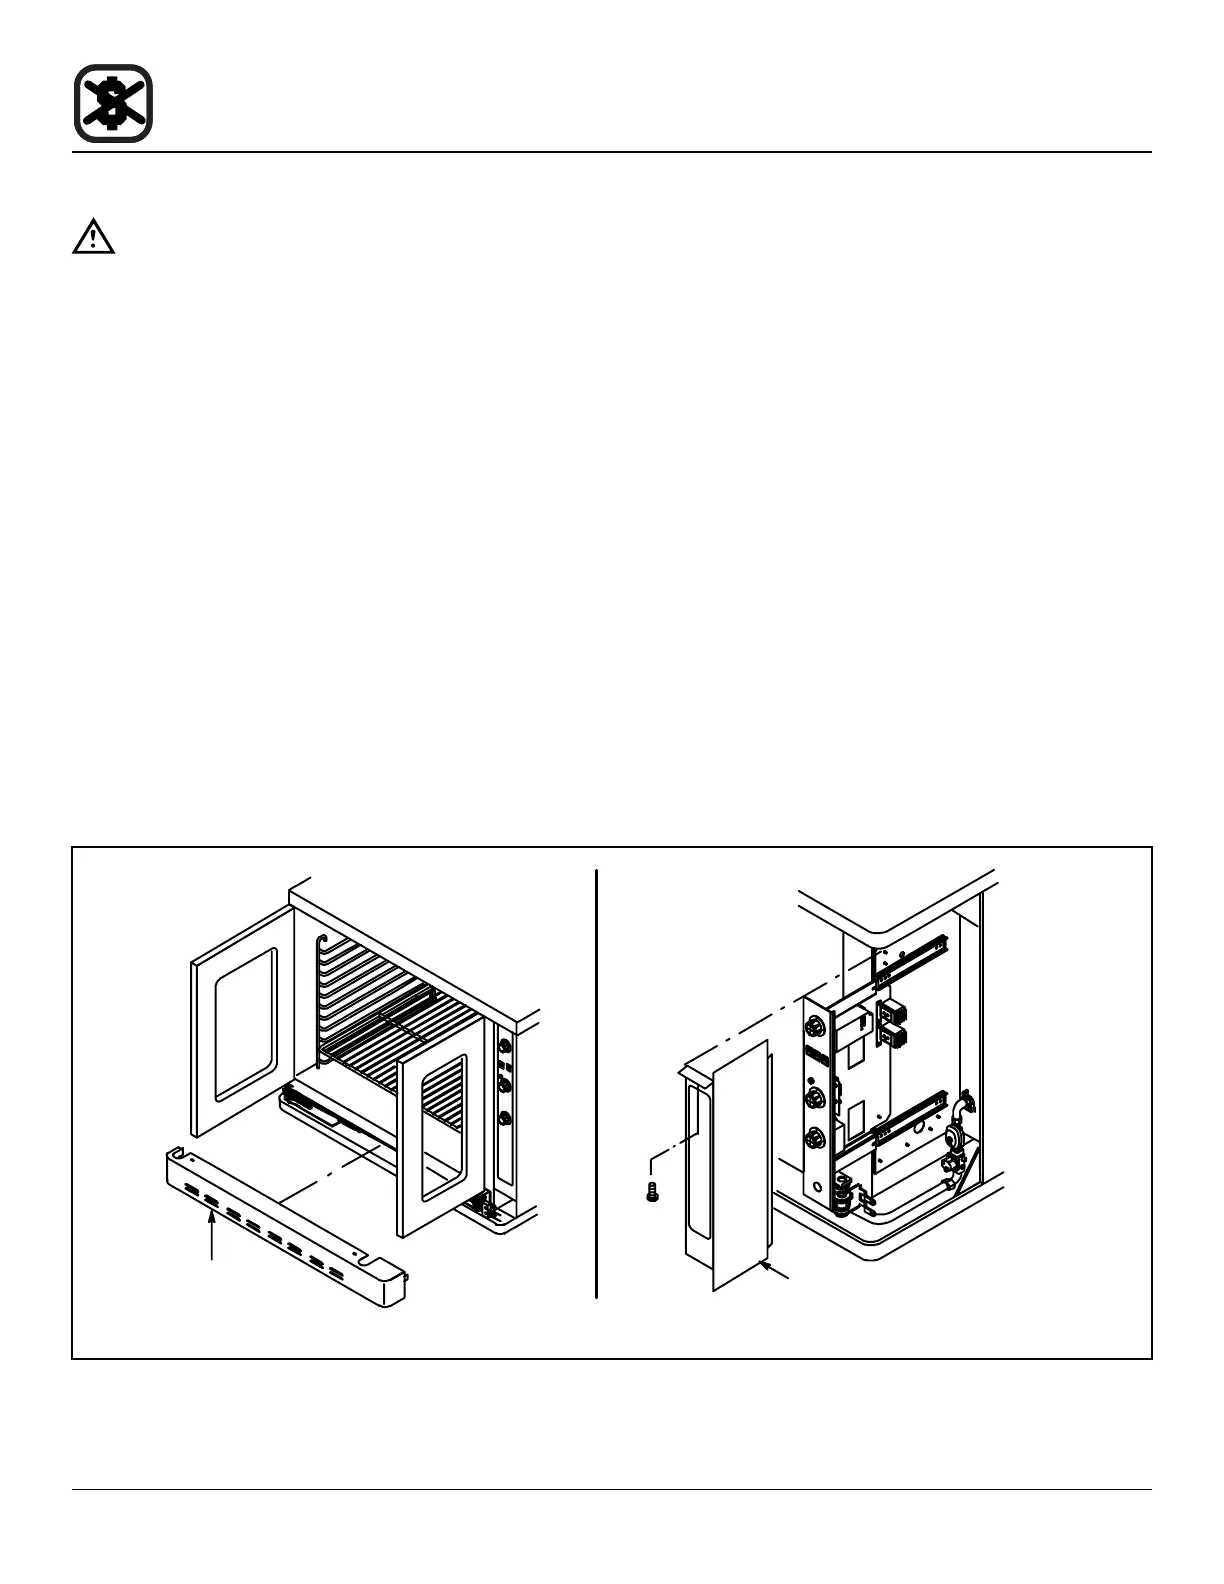
CONTROL COMPARTMENT COMPONENTS
1. Switch power o.
2. Remove the combustion cover.
3. Remove the control compartment cover.
4. Slide the control panel out.
5. Replace and repair the respective component.
6. Install the panel, the control compartment cover and
combustion cover.
Combustion
Cover
Control Cover
DFG-100-ES Shown
Figure 14