Omega Operating Manual BMG LABTECH
24/29 0415B0001G 2014-05-16
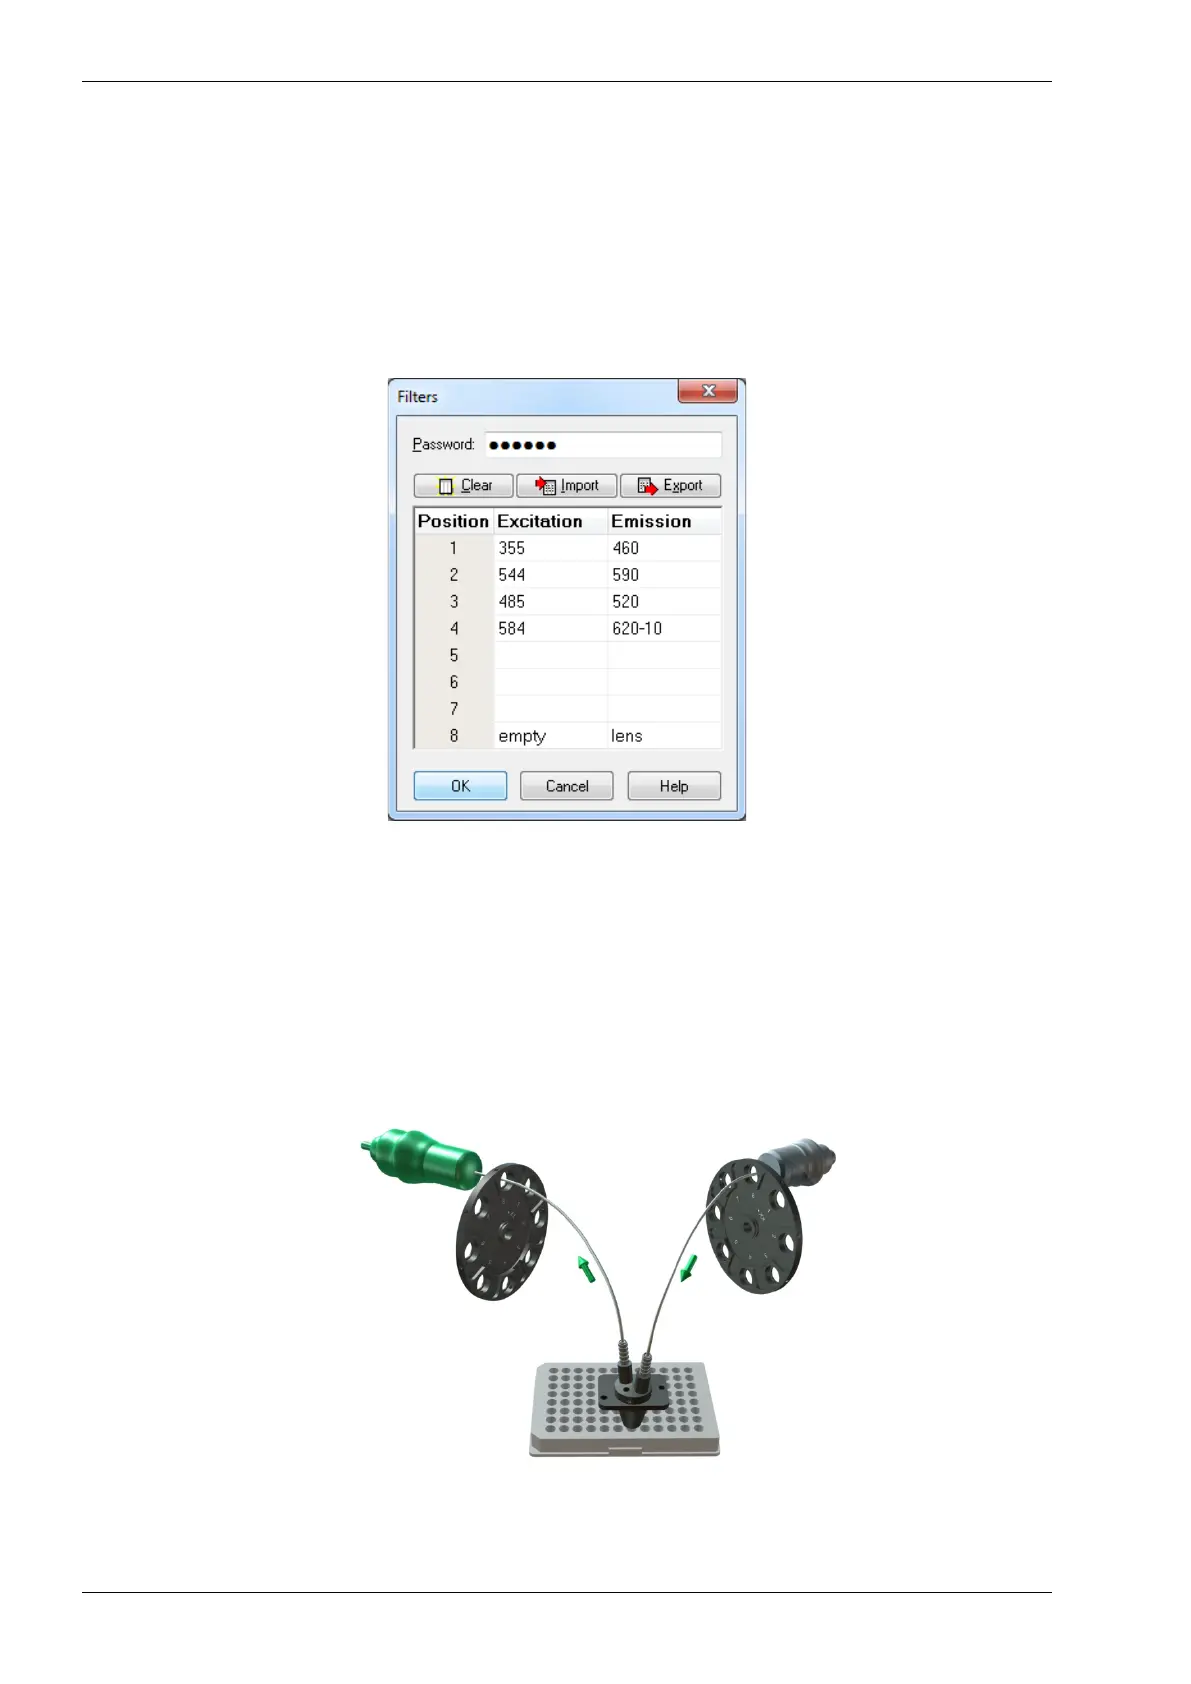
5.3 Filters
In the FLUOstar Omega, 4 excitation and 4 emission filters are factory installed; in the POLARstar Omega, 4
excitation and 5 emission filters are factory installed. (Filter selection varies with instrument configuration. If
your unit is equipped with luminescence, then a lens will be installed. The PMT based absorbance option will
also add filters.)
The position of the factory-installed filters can be found in the shipment information that accompanies the
instrument.
After installation of the software, the filters must be typed in the filter table (figure 26). In the Control software,
the filter table can be reached by choosing ‘Settings | Filter’ (see the software manual for additional
information).
Figure 26: Filter table with example of entered values
5.3.1 Filter Change and Installation
All BMG filters have an arrow printed on the side to indicate the direction in which they should be installed.
The arrow should point in the same direction as the light. If the filter is being installed in the excitation wheel,
the arrow should point outwards towards the front of the unit. If the filter is to be placed in the emission
wheel, the arrow should face inward towards the rear of the unit.
Figure 27: Direction of the light