Toplift / Toplift ECO
14 92023200095
4.8 Assembly of the tube support
picture 4-6
The tube support is to be fixed to a rung and to be
extended to a suitable length and the lower section is
to be placed on a plank or similar on the ground.
4.9 Head support
picture 4-7
When the hoist is used on flat roofs, floors or win-
dows, the rail should be protected against lateral
movement, by using the head support. This can be
fitted directly beneath the head section or between
two rungs.
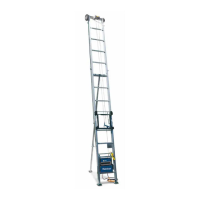
4.10 Stability of the hoist
The rail must be secured on the upper point (head
section) by attaching the ring nuts with a cable or
rope to the building.
When using the bend section, this must also be at-
tached to the building with a cable or rope.
4.11 The undercarriage
If the hoist is equiped with an undercarriage, it can
be moved sideways along the building.
4.11.1 Assemly of the undercarriage
The undercarriage has to be fixed before setting up
the rail section.
1. Dismantle the feet, these are fixed with a bolt
and a split-pin.
2. Add the undercarriage and secure by bolt and
split-pin (picture 4-8)
picture 4-8
4.11.2 Moving the TOPLIFT
Attention! Before moving
the hoist, make sure that
the carriage is in the low-
est position. Detach the rope or cable from
the head section. Never move the hoist
when loaded.
1. Ride the carriage down.
2. Unload the hoisting device.
3. Release the brakes of the undercarriage.
4. Move the hoist.
5. Set the brakes again. ( Turn the brake shoes at
the wheels to the outside)
4.12 Securing the feet /undercarriage
Place the hoist with its feet on solid ground and se-
cure by pins. (If necessary place plank below for dis-
tribution of pressure). When using the undercarriage
adjust spindles so that both wheels are firmly on the
ground. Put on brake shoes.