Saw Operations
CrownMolding LayingFlaton Table
Follow these instructions for cutting crown molding:
1. Move sliding fence to proper position (see Sliding Fence
on page 54).
2. Set the bevel and miter angles using Chart 1 below.
Tighten the miter lock knob and the bevel lock handle
(Figure 33).
3.
Position molding on saw table. Use the chart below for
correct position. Clamp workpiece in place using the
workpiece clamp.
IIF!'vAvl'-1E_ll_[e']l Use clamping position that does not
interfere with operation. Before switching on, lower head
assembly to make sure clamp clears guard and head
assembly.
4. Activate the switch. Lower the head assembly and make
your cut.
5. Wait until blade comes to a complete stop before
returning head assembly to the raised position and/or
removing workpiece.
6. ALWAYS TAKE A TEST CUT USING SCRAP TO
CONFIRM CORRECT ANGLES.
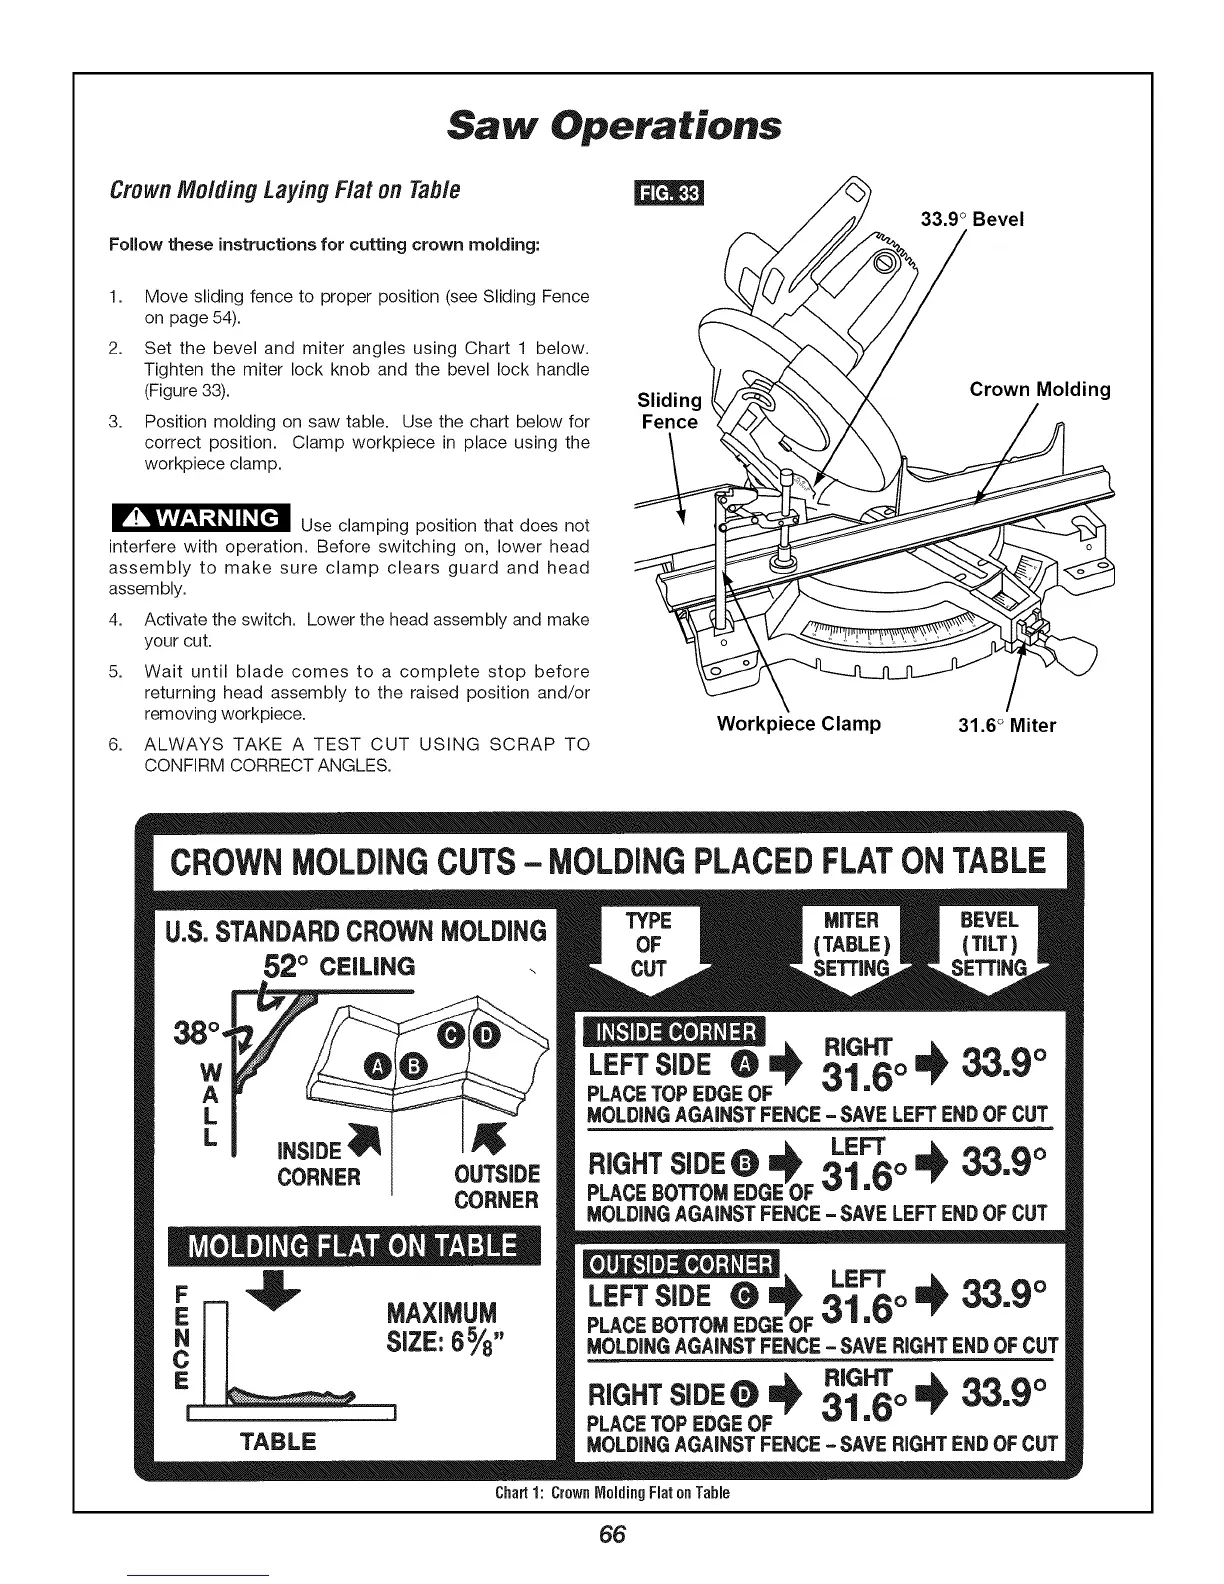
Workpiece Clamp
33.9 ° Bevel
Crown Molding
31.6° Miter
CROWNMOLDINGCUTS- MOLDINGPLACEDFLATONTABLE
U.S.STANDARDCROWNMOLDING
52 ° CEILING
TYPE MITER BEVEL
OF (TABLE) (TILT)
LEFTSIDE O _ RIGHT
PLACETOPEDGEOF 31.6° _ 33"9°
.oL_I.G_G_.s__.c_-SAVELErrE.DO_CUT
LEFT
RIGHTSIDEO _ 31.6° @ 33"9°
PLACEBOTTOMEDGEOF
MOLDINGAGAINST FENCE - SAVE LEFT END OFCUT
LEFT
LEFTSiDE0 _ 31,6° @ 33"9°
PLACEBOTTOM EDGE OF
MOLDINGAGAINST FENCE - SAVE RIGHTEND OF CUT
RIGHTSIDEQ _ RIGHT
PLACETOPEDGEOF 31.6° _ 33"9°
.oLDI.QACAI.STrE.CE-SAW.IO._E.OOFCUT
Chart1: CrownMolding Flat onTable
66