Installation, Operation, and Maintenance Manual
CA Series Heat Pumps - 8733851021 (2025/04) US
10 |
8 Installation
Before installing the unit, examine each pipe, fitting and valve; remove any dirt
or debris found on or in these components. Use care when installing the system
components to avoid damage to the cabinet finish or chassis.
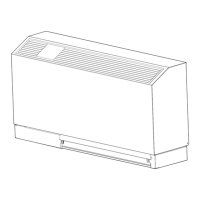
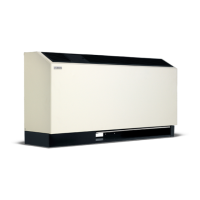
1. After removing the console unit from its packaging remove the cabinet
by removing the cabinet screws on either side of the unit and lifting the
cabinet off the chassis. Set the cabinet aside and cover it (the console unit’s
packaging can be used for this purpose).
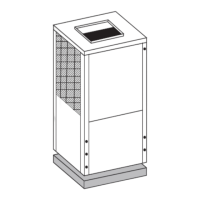
2. Position the sub base directly on the finished floor. Make sure the sub base
is level (use shims if necessary). The sub base has a frame that supports the
cabinet and may be secured to wall.
3. Position the chassis onto the sub base. Check and align electrical, water
and condensate connections and secure to the sub base with 4 screws.
4. Before connecting the unit to water, make sure that the loop has been
properly flushed. After flushing the system, connect piping or hoses to the
proper supply, return and condensate connections. Refer to the piping
section of this manual for more information
5. Make all necessary electrical connections to the unit.
Heat Pump operating under extreme conditions will have limitations on air/fluid
flow rates and/or temperatures.
DANGER
Electric shock!
Before performing service or maintenance operations on the system, turn OFF
main power to the unit. Electrical shock will cause personal injury or death.
6. Make sure the unit’s washable filter is clean and installed in the sub base.
Also make sure that the filter clip is in place.
7. Reinstall the unit cabinet via locating pins at the top of the chassis and two
screws in the unit sub base.
9 Piping
9.1 Supply and Return Piping
The following items should be adhered to in addition to applicable piping codes.
• A drain valve at the base of each riser to enable proper flushing of the
system at startup and during servicing.
• Shut-off/isolation ball valves at the supply and return connections and
unions at each unit to permit proper flow balancing and unit servicing.
• Strainers at the inlet of each circulating pump.
• Use of teflon tape on threaded pipe fittings to eliminate water leaks and
ensure against air entering the system.
• Flexible hose connections between the unit and the rigid system to
eliminate the possibility of vibration transmission through the piping.
• Insulation is not normally required on supply and return piping for boiler
tower installations except in unheated sections or outdoor runs.
• Insulation is required for closed-loop geothermal installations as loop
temperatures may fall below the dew point and can even fall below the
freezing point of water during heating season.
9.2 Condensate Piping
Console units are designed with a blow-through configuration in the air handling
section. This means that there is positive pressure at the unit drain pan and thus
trapping is not required. Condensate is routed from the drain pan via a 5/8”
non-pressure rated vinyl hose that is located below the supply and return water
connections.
Though horizontal runs of condensate piping are usually too short to pose
problems, horizontal runs should be pitched at least 1 inch for every 10 feet of
piping. Avoid low spots or no sloped piping, as these areas can collect sediment
and eventually block condensate flow. Always inspect both internal and external
condensate piping for kinks that could block condensate flow.
9.3 Hose Kits
When using optional hose kits follow the manufacturer’s recommendations
for installation. Never stretch or twist hoses and never use hoses that show
external wear or damage or are suspected of having damage. Never exceed the
manufacturer’s maximum working pressure recommendations.