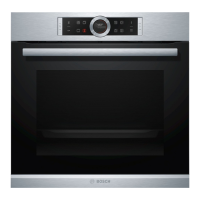
NL appliance door
Removing and installing door windows
Insertion into the device
To make them easier to clean, you can remove the glass
from the appliance door.
When installing the center pane, make sure that the
arrow is located at the top right of the pane and
matches the arrow on the plate.
Remove from the device
1. Insert the middle pane into the bottom of the holder
(Fig. !) and press it at the top.
2. Press both holders down (Fig. ").
1. Open the appliance door slightly.
2. Press left and right on the cover (Fig. !).
3. Remove shield (Fig. ").
3. Guide the front pane into the lower brackets (Fig. #).
4. Close the front window until the two top hooks are
opposite the opening (Fig. $).
4. Loosen and remove the screws on the left and right
of the appliance door (Fig. #).
5. Before closing the door again, clamp a folded
dishcloth (Fig. $).
Pull the glass out at the front upwards and place it
on an even surface with the door handle downwards.
5. Press against the underside of the front glass until it
audibly locks (Fig. %).
6. Open the appliance door slightly again and remove the
dishcloth.
7. Retighten the two screws on the left and
right.
8. Place the cover and press it down until it clicks
audibly (Fig. &).
6. Press the two holders of the central pane upwards, do
not remove them (Fig. %). Hold the diamond with one
hand. Remove the window.
Clean the windows with glass cleaner and a soft cloth.
9. Close appliance door.
:Warning
risk of injury!
Attention!
Ri
Do not use the interior again until the windows have
been opened properly.
■ If there are scratches on the glass of the
appliance door, it can jump. No scraper,
sharp or abrasive
use cleaning agents.
risk of injury!When opening and closing the appliance door
the hinges move and can get stuck. Do not reach
the hinges with your hands.
R■
26

 Loading...


