6720220327
Revised 11-11 Subject to change without prior notice
The eld installed electric heat accessories are
used on cooling or heat pump models that were not
purchased with electric heat from the factory. Each
air handler model is approved for use with the eld
installed accessory electric heat kit.
1. Follow the instructions in the USERS INFORMATION
MANUAL to properly shut down the air handler.
2. Remove the block off plate shown in Figure 13
and discard. Retain the screws; they will be
used to secure the electric heater mount plate.
3. Insert electric heat kit into the opening where
the block off plate was removed. Secure the
mounting plate with the screws that were
removed from the block off plate.
4. Connect the six pin male plug on the electric heater
assembly to the six pin female plug mounted on the
side of the low voltage control box divider panel.
5. Remove the wiring diagram from the kit, remove
the paper that covers the adhesive back and
place the electric heat wiring diagram over the
wiring diagram located on the blower housing.
6. Follow the instructions in the USERS INFORMATION
MANUAL to properly start up the air handler.
Topreventdamage,carefullyinserttheelectric
heatingassemblythroughtherectangular
openinginthefrontofthedischargeopeningso
theheatelementsupportrodisseatedintothe
holeonthebacksideofthedischargeopening.
Afterinstallingtheelectricheater,aoneinch
clearancemustbemaintainedonallsidesof
thesupplyairductand/orplenumfora
minimumofthirty-sixinchesfromtheair
handlerdischargeopening.
If the air handler has been installed prior to
installing the electric heaters or if an older unit is
being replaced, the supply power wires must be
checked to make sure the wires are the proper sizes
to handle the current load for the heaters. If the
supply power wire size is incorrect, new wires will
need to be installed. Follow the “Power Supply
Wiring” instructions for proper installation.
- After the supply
wiring has been connected to the circuit breakers
you must remove the transformer and indoor
blower motor wires from the terminal block and
connect them to load side of circuit breaker #1.
If the air handler was previously installed, nothing
will need to change on the low voltage wiring.
Your DX or HY air handler is equipped with an
electronic commutated motor (ECM) that will
deliver constant air ow over a range of external
static pressure amounts. As your air lter becomes
more restricted through normal use, the torque of
the motor is increased to deliver the same quantity
of air ow. These motors are pre-programmed to
have a zero (0) second delay “ON” delay for use
with electric heat and a 60 second “OFF” delay in
order to blow off remaining water condensate.
1. Turn off all electrical supply circuits to the air
handler at the main service panel.
2. Remove air handler blower door and switch the
air handler circuit breaker(s) to “OFF”
3. Disconnect the power cable and the speed tap
cable that connect to the blower motor.
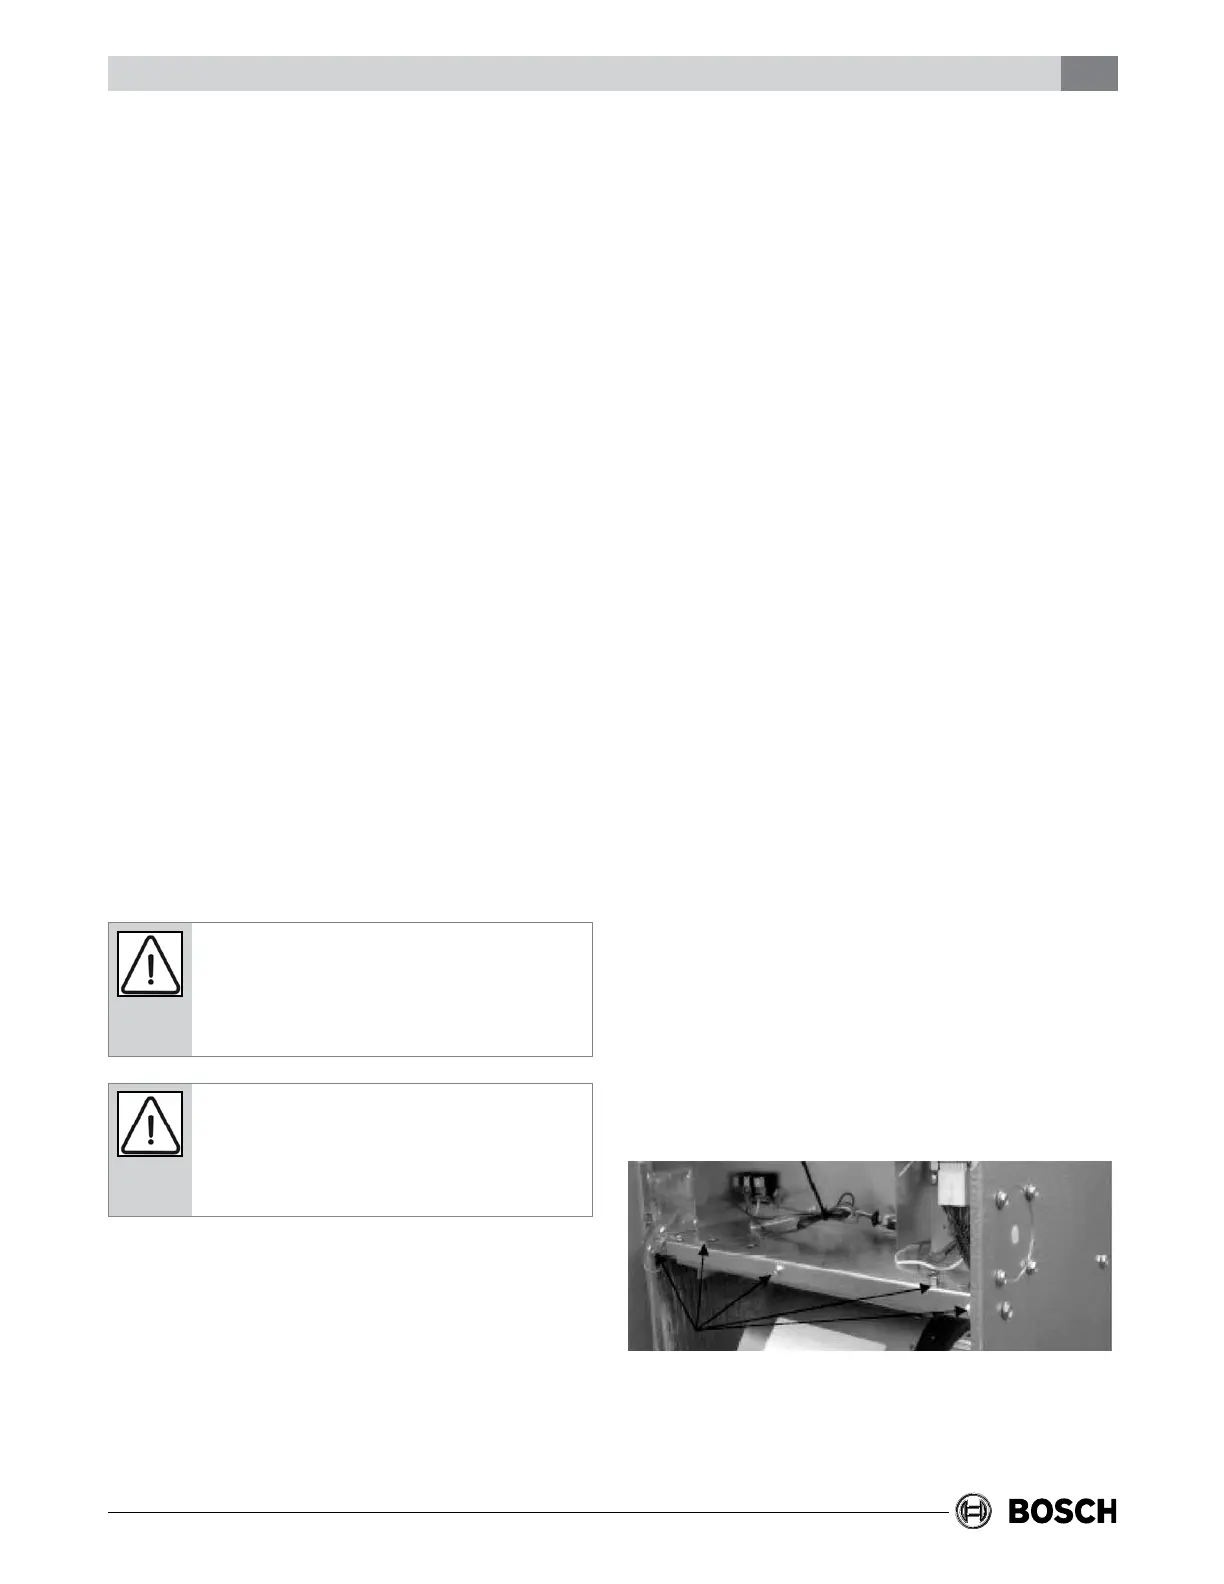
4. Remove the three screws on the right side and
the two screws on the left side of the blower
mounting plate, then remove the angle bracket.
Refer to Figure 5 below for screw locations
5. Slide the blower out of the blower
compartment and set on the oor.