page heading
20
Operation
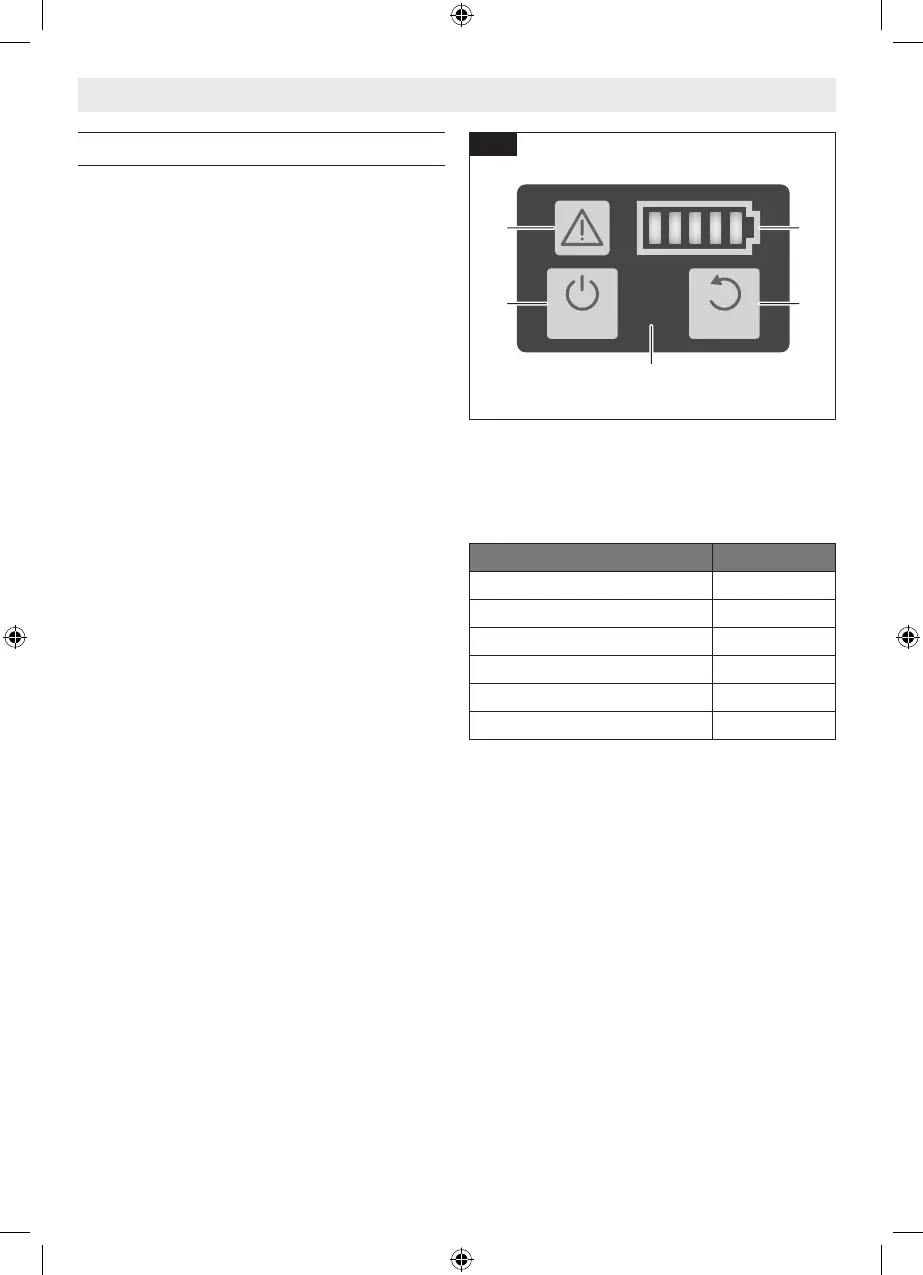
ON/OFF RESET
a
b
c
d
1
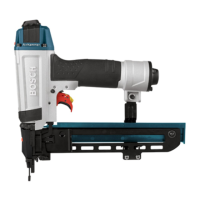
User Interface
(Fig. 15)
The User Interface 1 provides the following func-
tions:
a ON/OFF Button
b Status Indicator
c Battery Charge Indicator
d Reset Button
ON/OFF Button
To switch ON the nailer, press the ON/OFF
Button 1a on the User Interface 1 for 1.5 sec-
onds until the Warning Indicator 1b and Battery
Charge Indicator 1c lights turn on.
To switch OFF the nailer, press the ON/OFF but-
ton 1a again.
The nailer will switch off after 30 minutes of in-
activity.
Status Indicator
The Status Indicator 1b shows the status of the
nailer. A green light indicates that the nailer is
ready for operation. In case the Status Indica-
tor light color is not green, consult the “Trouble
Shooting” section for further information.
Fig. 15
Battery Charge Indicator
The Battery Charge Indicator 1c shows the state
of charge of the battery.
LED Capacity
5 × continuous green light 80–100 %
4 × continuous green light 60–80 %
3 × continuous green light 40–60 %
2 × continuous green light 20–40 %
1 × continuous green light 5–20 %
1 × flashing green light 0–5 %
Reset Button
The Reset Button 1d is used to reset the nailer
to a normal state after an abnormal condition
is corrected. To reset the nailer, press the reset
button for 3 seconds.
Consult the “Trouble Shooting” section for fur-
ther information on resetting of the nailer.
1605A001CD GNB18V-12 202301.indd 20 1/9/23 2:07 PM