AUTODOME IP starlight 7000 HD Replacing an In-ceiling HD Acrylic Bubble | en 71
Bosch Security Systems Operation Manual 2016-07 | 1.0 | F.01U.283.679
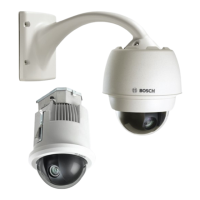
13 Replacing an In-ceiling HD Acrylic Bubble
Notice!
The following instructions are for bubbles VGA-BUBHD-CCLA and VGA-BUBHD-CTIA.
1. Loosen the lock screw (item 1, below) in the trim ring using a P1 or smaller Phillips
screwdriver until the bubble can rotate freely.
2. Clean the bubble according to the instructions in the section “Maintenance.”
3. Place the replacement bubble onto the in-ceiling housing, and rotate it clockwise
approximately 1/4 turn until it stops. Then tighten the lock-screw.
Notice!
Trim ring can become deformed
If the trim ring is not turned completely, the screw slot on the trim ring will not be aligned
with the screw slot in the housing. You cannot see the screw slot in the housing when you are
turning the screw in the slot in the trim ring. You can turn the screw in the slot in the trim
ring, but miss the screw slot on the housing. Forcing the screw into the trim ring (without the
screw going into the screw slot in the housing) can deform the ring.
 Loading...
