21
THEORY OF OPERATION
Power Amplifier Board, Sheet 2 of 2 (continued)
Outputs to the DSP board from the amplifier board at J700 also include the +20Vdc at pin 4
through fusible resistor R704 [C6] to create +20 fused. The mute and standby signals for the
power amplifiers are brought into the amplifier board at J700 on pins 15, 16 and 18.
The audio inputs to the power amplifier board are applied at J700 [C/D7] pins 8-12 and 14 via a
cable running from J8 of the DSP board. These inputs are then applied to the inputs of the
individual amplifier channels as shown on amplifier schematic sheet 1.
The outputs of all six of the amplifier channels are brought out of the amplifier board at J701 pins
2, 3, 4, 6, 8 and 10. These outputs are fed back to the Input/Output board at J22 by a cable. The
bass channel output is also monitored and output to the Input/Output board as the PROTECT
signal at J701 pin 11. This PROTECT signal is applied to the Input/Output board at J22 pin 11
[Input/Output board schematic, D2]. It is passed to a window comparitor made up of transistors
Q1 and Q2. The output of this comparitor is the signal BUF_PROTECT. This signal is sent to the
microcontroller U5 [C4] at pin 3. In the event of a failure, this BUF_PROTECT signal will cause
the microcontroller to send out a shutdown command on the Amp_Power pin 11 of the
microcontroller to shut down power to the amplifier.
DISASSEMBLY/ASSEMBLY PROCEDURES
Note: Refer to figures 1, 2 and 3 for the
following procedures.
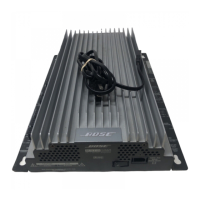
1. Heatsink Removal
1.1 Using a Phillips-head screwdriver,
remove the four screws (20) that secure the
heatsink (16) to the chassis (8).
1.2 Lift the heatsink straight up just far
enough to be able to reach the amplifier
board (9 & 10) cables. Disconnect these two
cables. The amplifier board is mounted to the
underside of the heatsink. Lift the heatsink
clear of the chassis.
2. Heatsink Replacement
2.1 Align the heatsink (16) with the chassis
base (8). Reconnect the two cables removed
in step 1.2. Slide the heatsink down over the
chassis until it is flush with the chassis end
plates.
2.2 Secure the heatsink to the chassis using
the four screws (20) removed in step 1.1.
3. Input/Output Board Removal
3.1 Perform procedure 1.
3.2 Disconnect the two cables that run to the
power transformer (4).
3.3 Using a nut driver, remove the one hex
head bolt (2) that secures the power trans-
former to the chassis (8). Lift the power
transformer out of the chassis. Lift the power
transformer gasket out of the chassis.
3.4 Using a Phillips-head screwdriver,
remove the four screws (1) that secure the
input/output board (6) to the chassis. Lift the
input/output board straight out of the chassis.
4. Input/Output Board Replacement
4.1 Align the input/output board (6) with the
chassis (8) and secure it in place using the
four screws (1) removed in step 3.4.
4.2 Place the power transformer gasket into
the chassis.

 Loading...