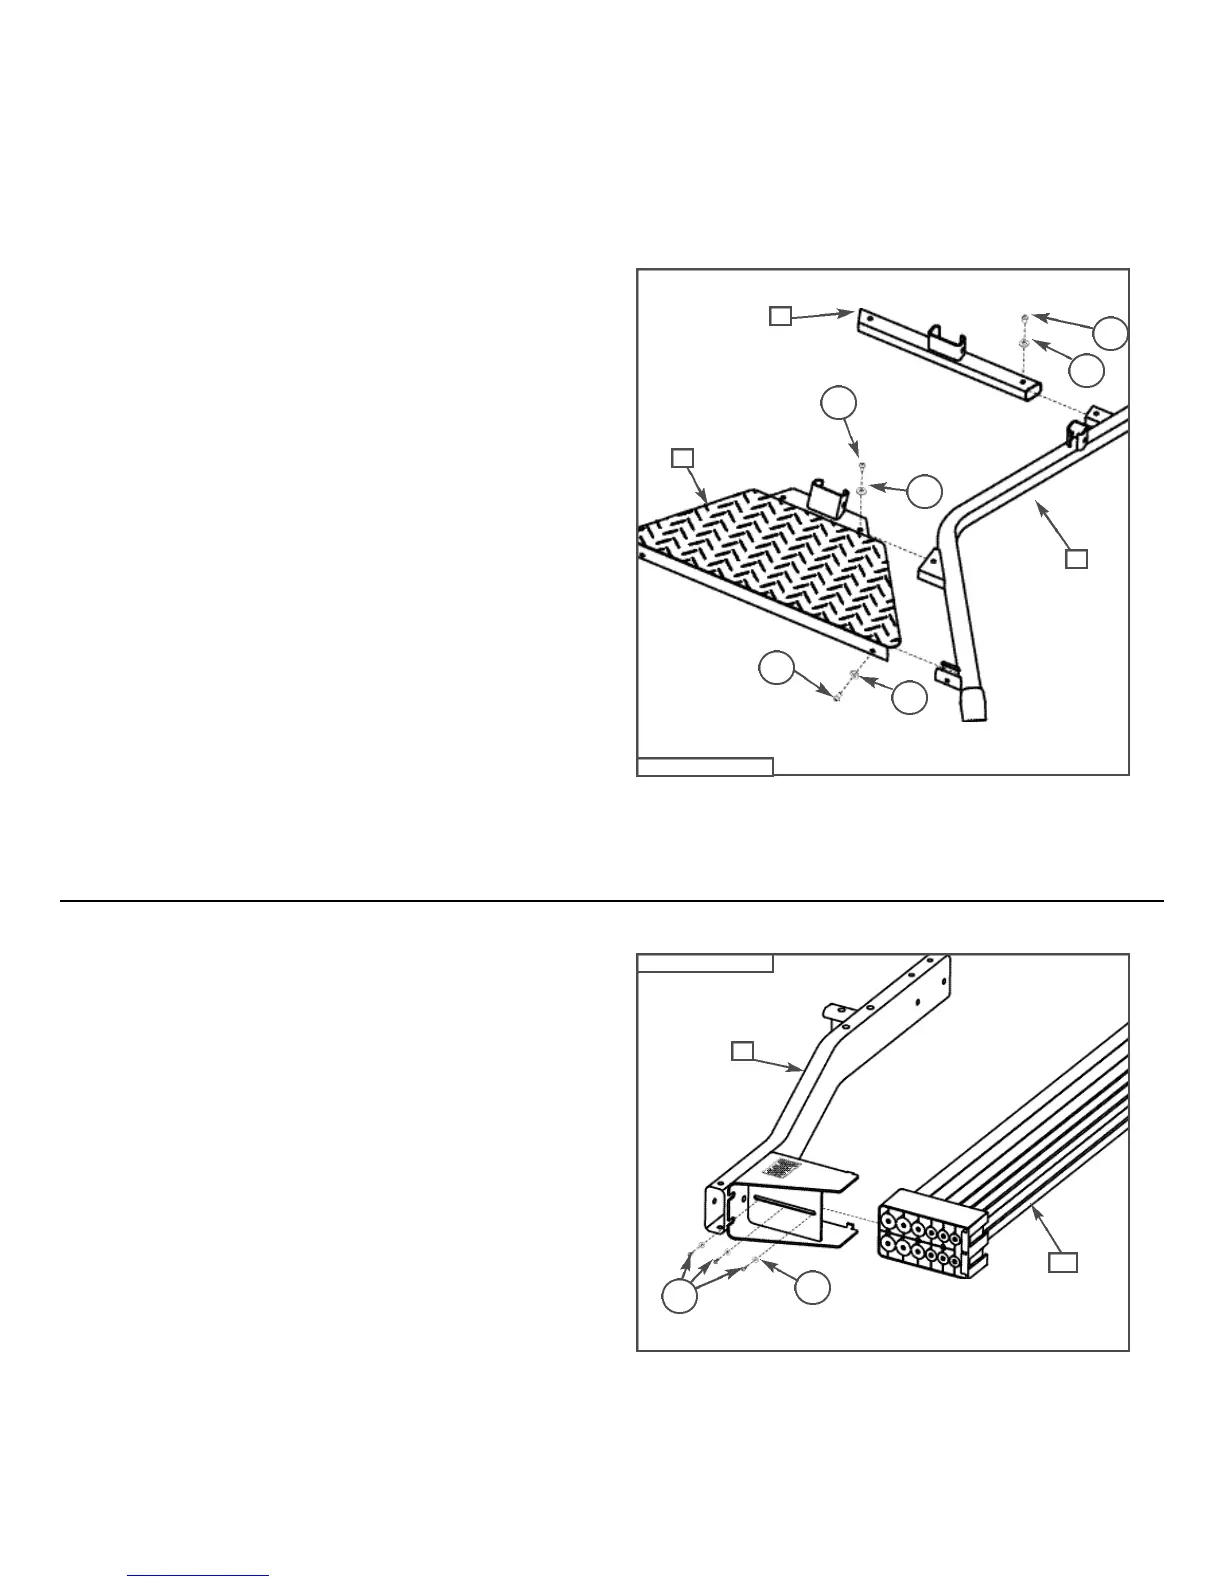
Step 1: Assemble the Base Frame Assembly
Locate the following items:
• Base Frame (Item #4)
• Right Frame Rail (Item #5)
• Left Frame Rail (Item #6)
• Rear Cross Member (Item #7)
• (6) 3/8" X 3/4" Button Head Screws (Item #B)
• (6) 3/8" Washers (Item #K)
Place the Base Frame (Item #4) onto the floor with the wide end
facing you. Line up and insert the connectors from the Right
Frame Rail (Item #5) into the right side of the Frame.
Place (2) 3/8" Washers (K) over the end of (2) 3/8" X 3/4" Button
Head Screws (B) - one washer per screw. Insert screws through
the holes in the Base Frame and Frame Rail (see Figure A). Do
not tighten at this time.
Line up the Rear Cross Member (Item #7) with the Right Frame
Rail. Insert connector from the Frame Rail into the end of the
Rear Cross Member. Place (1) 3/8" washer over (1) 3/8" X 3/4"
Button Head Screw, loosely insert screw into corresponding holes
in Cross Member and Frame Rail but do not tighten at this time.
Repeat with Left Frame Rail (Item #6).
Step 2: Attach Rod Box to the Lower Lat Tower
Locate the following items:
• Lower Lat Tower (Item #1)
• Rod Box with Rods (Item #11)
• (3) #10 X 1" Self Threading Screws (Item #G)
• (3) 1/4" Washers (Item #J)
Lay the Rod Box w/ Rods (Item #11) on the floor facing the
Lower Lat Tower (Item #1) as shown in Figure B. Slide the Rod
Box into the Rod Box Frame firmly.
Place (3) 1/4" Washers (J) over the end of (3) #10 X 1" Self
Threading Screws (G) - one washer per screw. Secure the Rod
Box to the Frame with the screws and washers as shown in Figure
B and tighten.
Assembly Guide
6
B
B
B
K
K
4
7
5
Figure A
J
1
11
Figure B
G