www.bresser.de
③ Follow the on-screen instructions and insert the levelling card between the nozzle
and the platform. Adjust the distance using "Z-" and "Z+". The adjustment range
refers to the levelling paper. As soon as you feel low frictional resistance, the
distance between nozzle and platform is set correctly. After the first extruder has
been calibrated, the switchover to calibration of the next extruder takes place.
Note: Do not turn the nuts under the platform during Z-axis calibration.
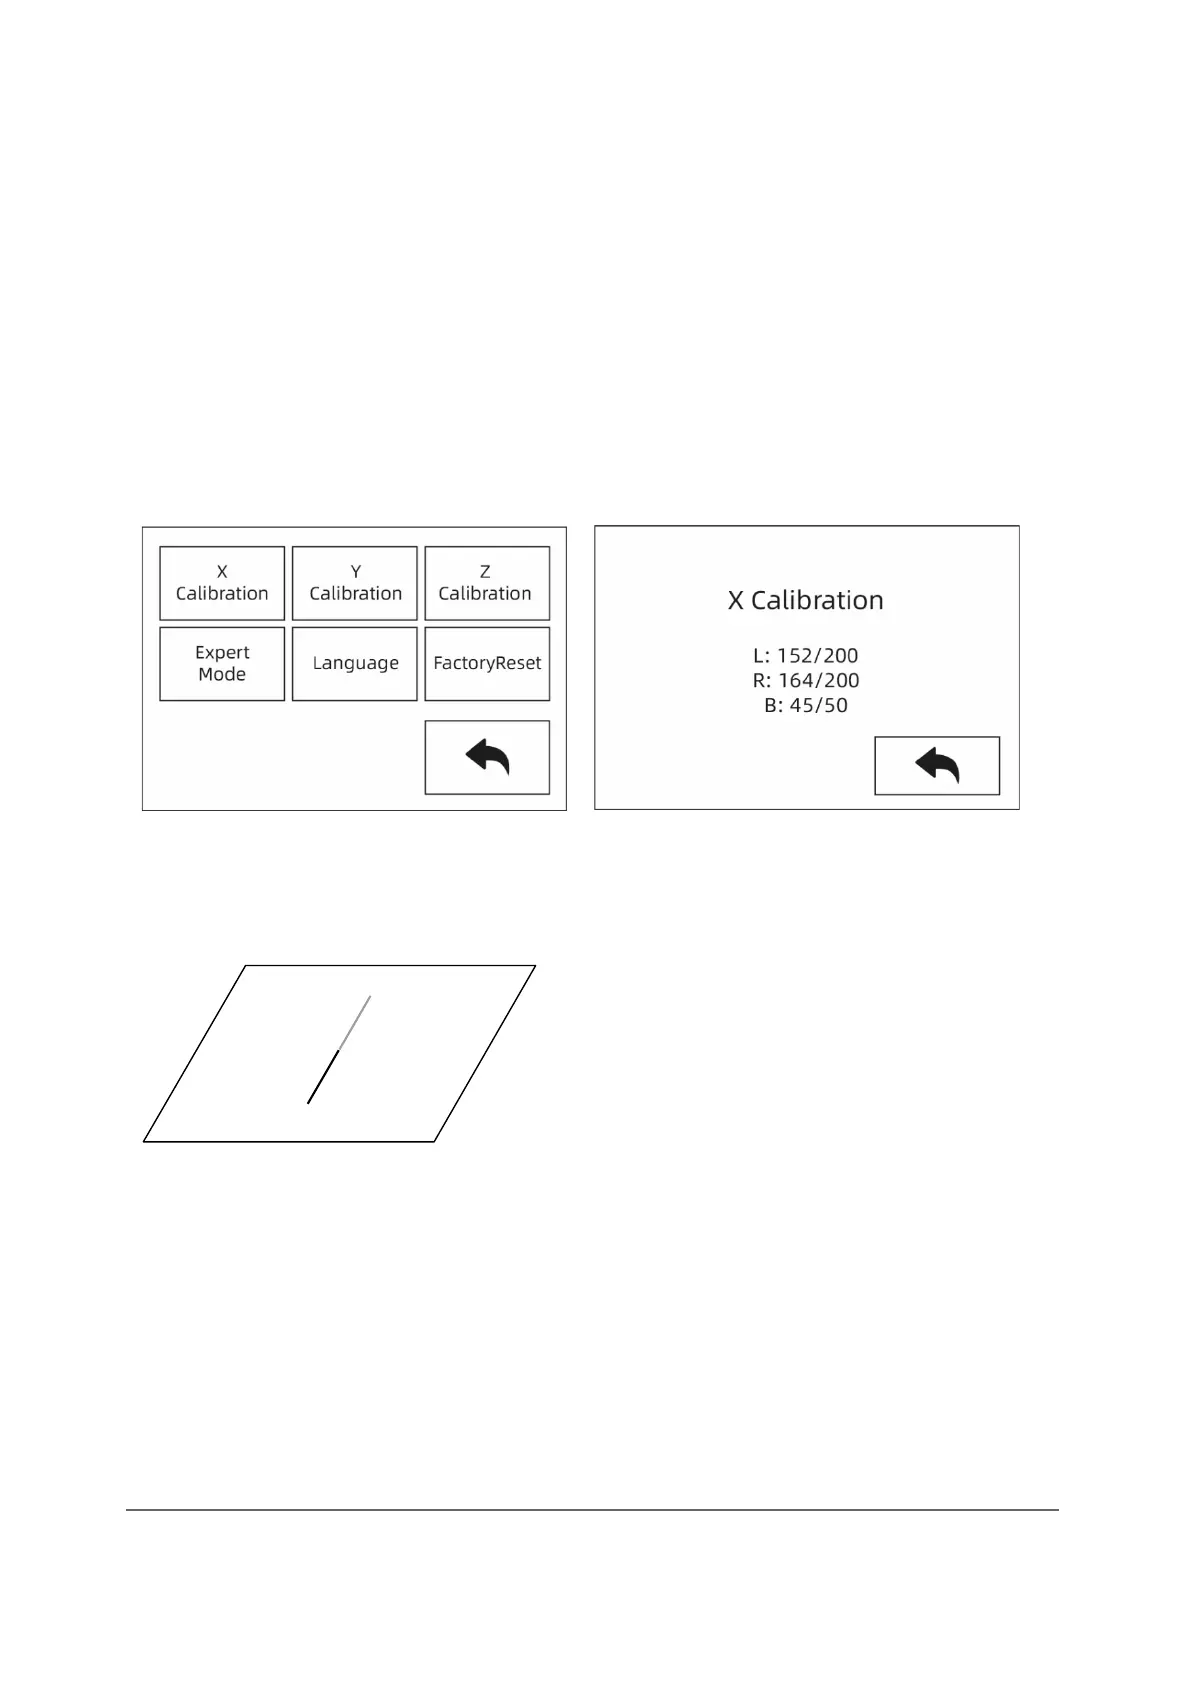
X-axis calibration
X-axis calibration: Uniform adjustment of the two extruders in the direction of the X-
axis to avoid misalignment during printing.
① When Z-axis calibration is complete, touch [Setting]-[X Calibration] or proceed
to X-axis calibration. After the initialization movement of the device has been
carried out, the nozzle and the platform are heated. Now make sure that the
filament has been inserted into the extruder.
② Once the warm-up phase is complete, the left and right extruders print a line one
after the other.