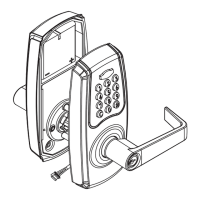
A
Appendix A: (continued)
M. Place the lever onto the spindle and push
until it clicks into place on the lever catch.
N. The lever lockset has been re-installed on a door of the
opposite handing. See the User Guide for programming.
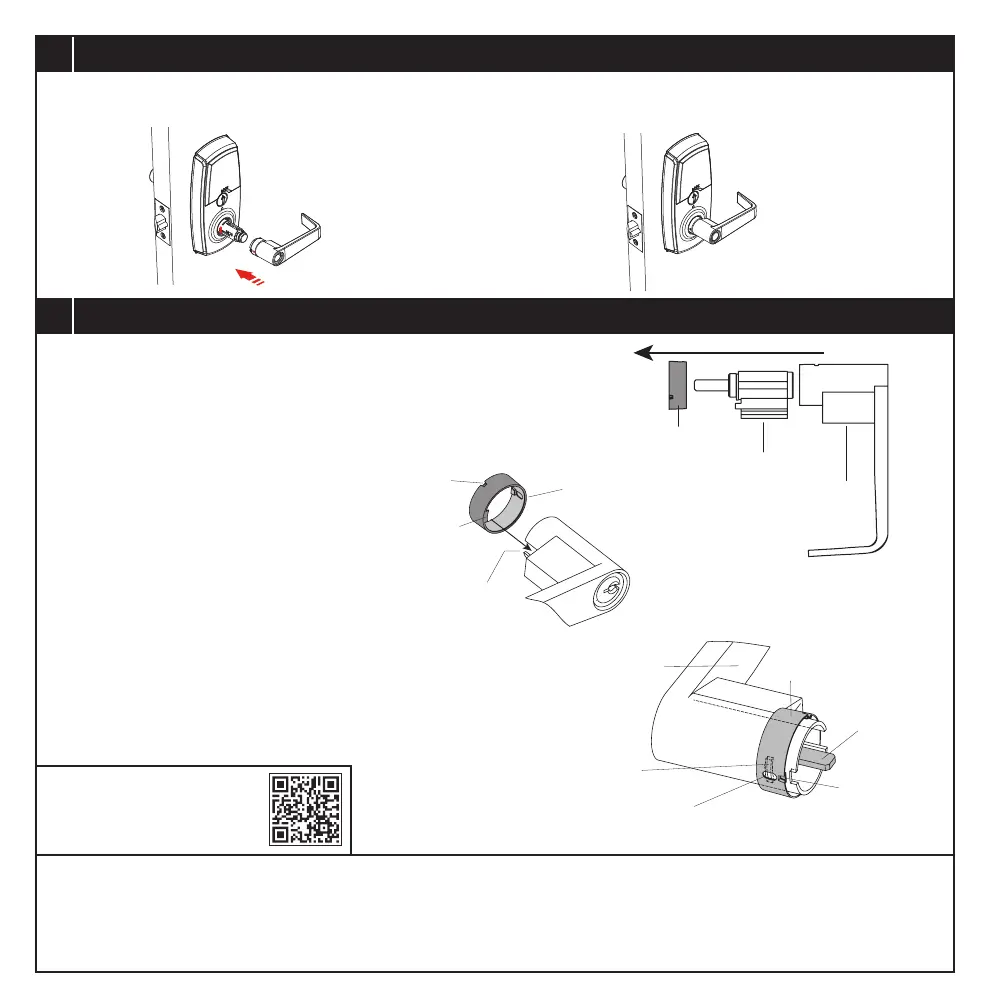
B
Appendix B: Removing & Replacing the Cylinder and Collar
A. The exterior lever (J) has the cylinder (B) and collar (N) pre-installed. To
access the cylinder, rst remove collar (N), followed by the cylinder.
B. To re-assemble, insert the cylinder
into the lever as shown. Place the
collar on the lever and push on until it
stops. For best results, install the
collar with the protrusion leading into
the slot of the lever.
C. The access slot of the collar will be seated over the catch slot of the lever.
Collar (N)
Collar (N)
Collar (N)
Cylinder
Tailpiece
Indent
Indent
Protrusion
Catch Slot in Lever
Access Slot in Collar
Slot in Lever
Cylinder (B)
Lever (J)
Lever (J)
If the lock appears to be damaged or does not operate properly, call 1-866-LOCK-PRO.
For FCC Compliance. please visit: https://www.hamptonproducts.com/legal/fccstatement
TEN YEAR LIMITED WARRANTY – For warranty details or to make a warranty claim for repair or
replacement, please visit www.brinkscommercial.com or call 1-866-LOCK-PRO (1-866-562-5776).
Return of defective product and receipt may be required for warranty claims.
50 Icon, Foothill Ranch, CA 92610-3000
Customer Support: 1-866-LOCK-PRO (1-866-562-5776)
www.brinkscommercial.com
©2023 Hampton Products International Corp.
999-00823 REVA 02/23
To view these instructions
online or for a Spanish
version, scan this QR code.