Brivis 10 Evap AC IM
5. INSTALLATION
-
PROMINA & CONTOUR
5.1 DROPPER DUCT INSTALLATION AND FITTING THE COOLER
•
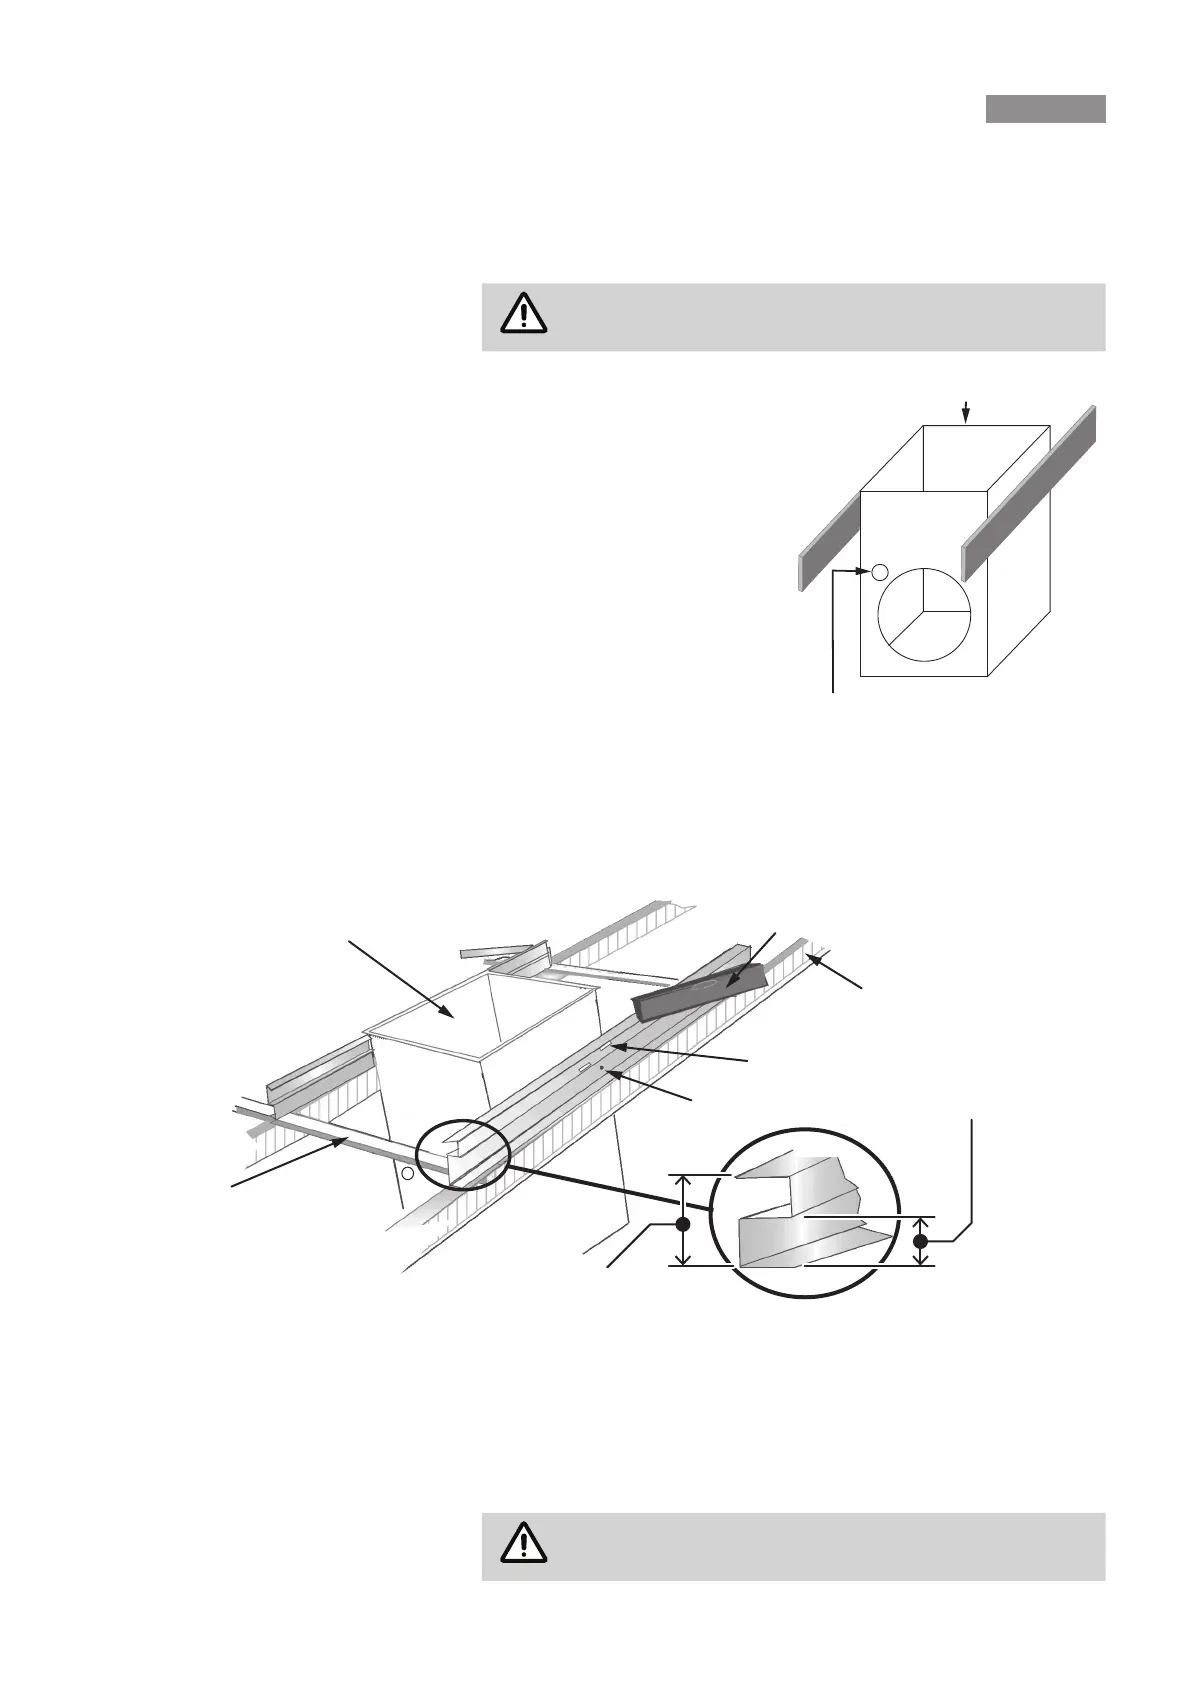
The dropper duct size for all Brivis Promina & Brivis Contour Series models is 550mm X 550mm�
•
Brivis Promina & Brivis Contour Series Coolers MUST use a dropper duct with an out turned ange (15-20mm).
This is installed on an angle through the roof�
•
A spirit level is needed to set the
correct angle to the dropper duct� Brivis
levelling templates are advisable�
The levelling templates DO NOT come as standard,
they MUST BE ordered through the Brivis Sales Centre.
•
Determine the point of penetration through the roof and prepare the opening
according to the type of building construction and roong material.
•
Frame the roof rafters to the correct width to suit the dropper duct�
•
Position the 2 templates to each side of the dropper duct, under the out
turned ange, and with the right angle bracket hard against the dropper
duct corner�
•
The templates provide a 50mm clearance (mid-level) for corrugated iron
roofs, and 100mm clearance (top of template) for tile roofs, to give the
correct height through the roof opening�
•
Use the 50mm template position when resting the templates on top of the
corrugated iron roof material, whereas the 100mm template position is used
with the templates placed on the roof tile batten�
•
Clamp the templates in position, or use a screw or rivet through the template
hole provided to securely hold them to the dropper duct�
•
Insert the dropper duct between the roof rafters (see diagram)�
•
Ensure the template levelling bracket is positioned on the high roof side of
the dropper duct�
•
Rest the templates equally on the tile battens or roof timbers, at both sides
of the dropper duct�
•
Place a spirit level on the templates levelling bracket, and raise one of the template ends (if necessary) until a
level plane is reached�
•
Depending on the pitch of the roof, either the lower or the higher template end will need raising, to level the
bracket�
•
This procedure will also locate the correct dropper duct height through the roof opening�
•
When the template bracket is level, mark and/or x the dropper duct to the roof frame timbers using bolts or
coach screws�
•
Be sure to use the level on both
template sides to correctly position the
dropper duct�
The Cooler outlet has an 8mm clearance from the
dropper duct for the bolt or screw heads.
Tile batten
Dropper duct
Template hole
Template clamping
Roof rafter
Bubble level on levelling bracket
50mm for corrugated roof
100mm for tiled roof
Cut hole in this position
using 43mm hole saw
below roof line to accept
wiring grommet in this
corner (closest to Cooler
Control Box)�
 Loading...