Brivis 21 Evap AC IM
11. INSTALLATION
-
BRIVIS AD
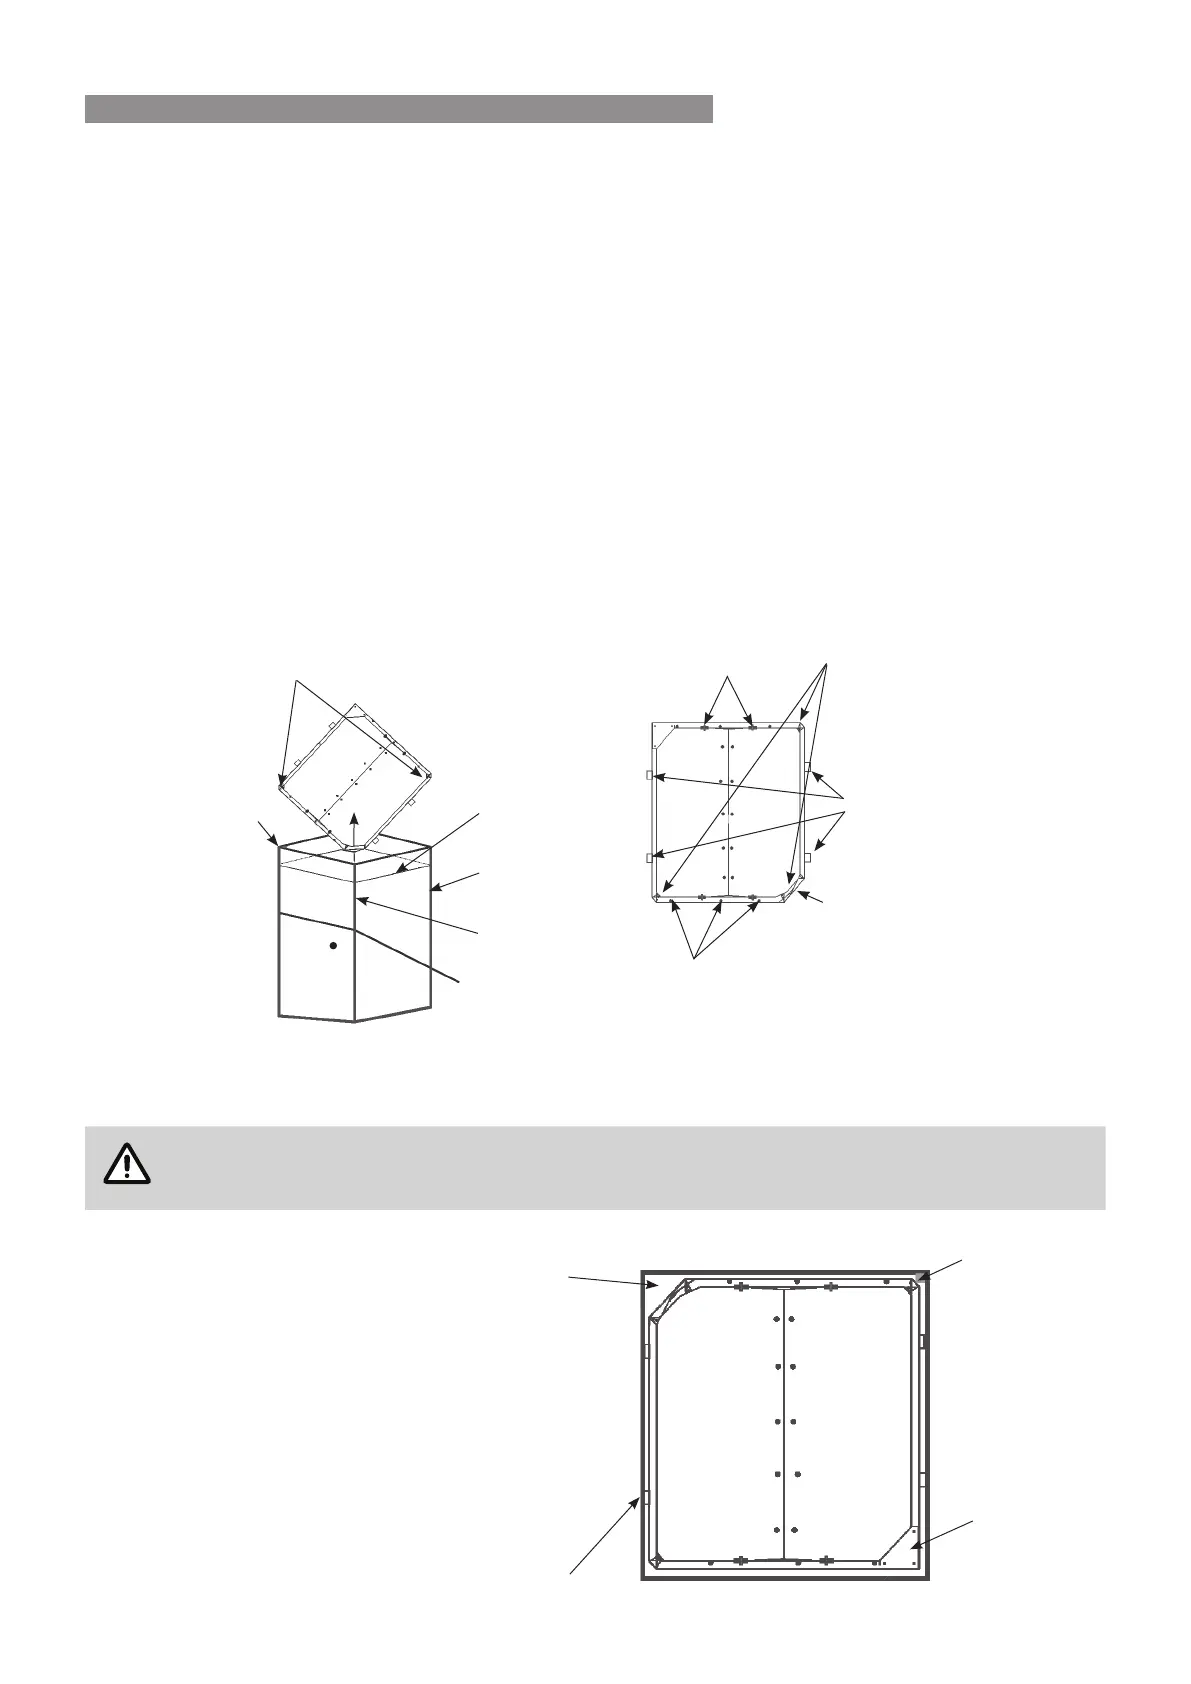
11.3 BRIVIS AD WINTER SEAL INSTALLATION
The Winter Seal can be tted into the dropper duct before or after the dropper has been installed, but it is important
to ensure that:
•
Dropper duct is square
•
The dropper duct seam and the large 45º fold-up corner are to the high side of the roof as shown in the drawing
below, otherwise the aps will not open correctly.
•
The Winter Seal is level and a minimum of 120 mm down from the top of the dropper (150 mm maximum)�
•
On the inside surface of the dropper duct, measure and mark points 120 mm down from top of dropper in each
corner� Join the marked points, drawing four level horizontal lines on the inside of the dropper duct to provide
the height position to x the Winter Seal.
•
Use pliers to bend tting tabs on Winter Seal sides out at 45º, and bend up the large 45º fold-up corner.
•
Hold the Winter Seal by the solid corner (90º) and lower into dropper with small 45º corners aligned diagonally
across the dropper duct� Lower until small corners line up with marked lines� (See diagram below)
•
Rotate the fold-up corner up until the frame aligns with the marked lines allowing tting tabs to jam tight against
the dropper duct sides�
•
Check again that the large 45º fold-up is in the correct corner as per previous instructions�
•
Align the top edge on the marked lines and drill through frame holes from inside to out� Pop rivet or screw from
outside to in, making sure screw or rivet tails do not interfere with the seal’s operation�
Fitting tabs should be straightened before screwing or riveting.
•
Route the cables through the
45º fold-up corner and bend the
45º corners down to seal� The
large fold-up should hold the
cable against dropper duct away
from the Winter Seal�
•
Ensure aps on Winter Seal
operate freely�
45° Triangle Corners
Rotate up
when tted.
Dropper Seam�
Cables should be
positioned in this
corner�
Dropper Box�
High side of roof
120 mm Marks�
Triangle Corners
Flap Pivots
45° fold-up corner�
(Bend down to seal
after cables have
been fed through)�
Frame Holes�(Drill
from inside to out)�
Fitting Tabs�
To be bent at 45°�
Position the larger 45°
fold-up corner so that
it will be under the
electrical box corner
of the cooler, where
the cables exit�
Align one of the small
45° corners with the
seamed corner of the
dropper�
Solid Corner
Solid Corner
 Loading...