Brivis 13 Evap AC IM
7. NETWORK CONNECTION
7.1 WIRING CONNECTION BRIVIS NETWORKERS
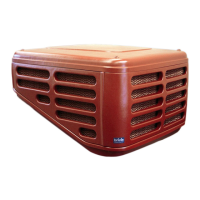
The Brivis Networker backing plate has 4 terminal points for the connection of
Thermostat wires� When connecting, use the top 2 terminal points marked TW1
and TW2 or the bottom 2 terminal points also marked TW1 or TW2� Never use
a combination of terminals when connecting to a single appliance�
For example; A Brivis Networker operating a cooler and a heater would have the
2 bottom terminals connected to the heater and the 2 top terminals connected
to the cooler�
Run a twin wire cable (i.e. gure 8 cable - 0.75mm
2
) from the Cooler to the Brivis
Networker�
•
Remove the backing plate from the Brivis Networker by unclipping it at the
sides�
•
Draw the wires from the wall cavity and feed them through the opening in the
backing plate, connect the cable to the terminal connections on the backing
plate before mounting it on the wall and re-assembling the Brivis Networker�
•
Connect the cable to the Brivis Networker connection lead terminal block at
the Cooler�
If the Cooler is integrated with a Brivis Heater(s) then simply connect the wiring to the Brivis Networker in parallel
with the Heather's circuit�
Classic Series Heaters require an interface module to enable connection.
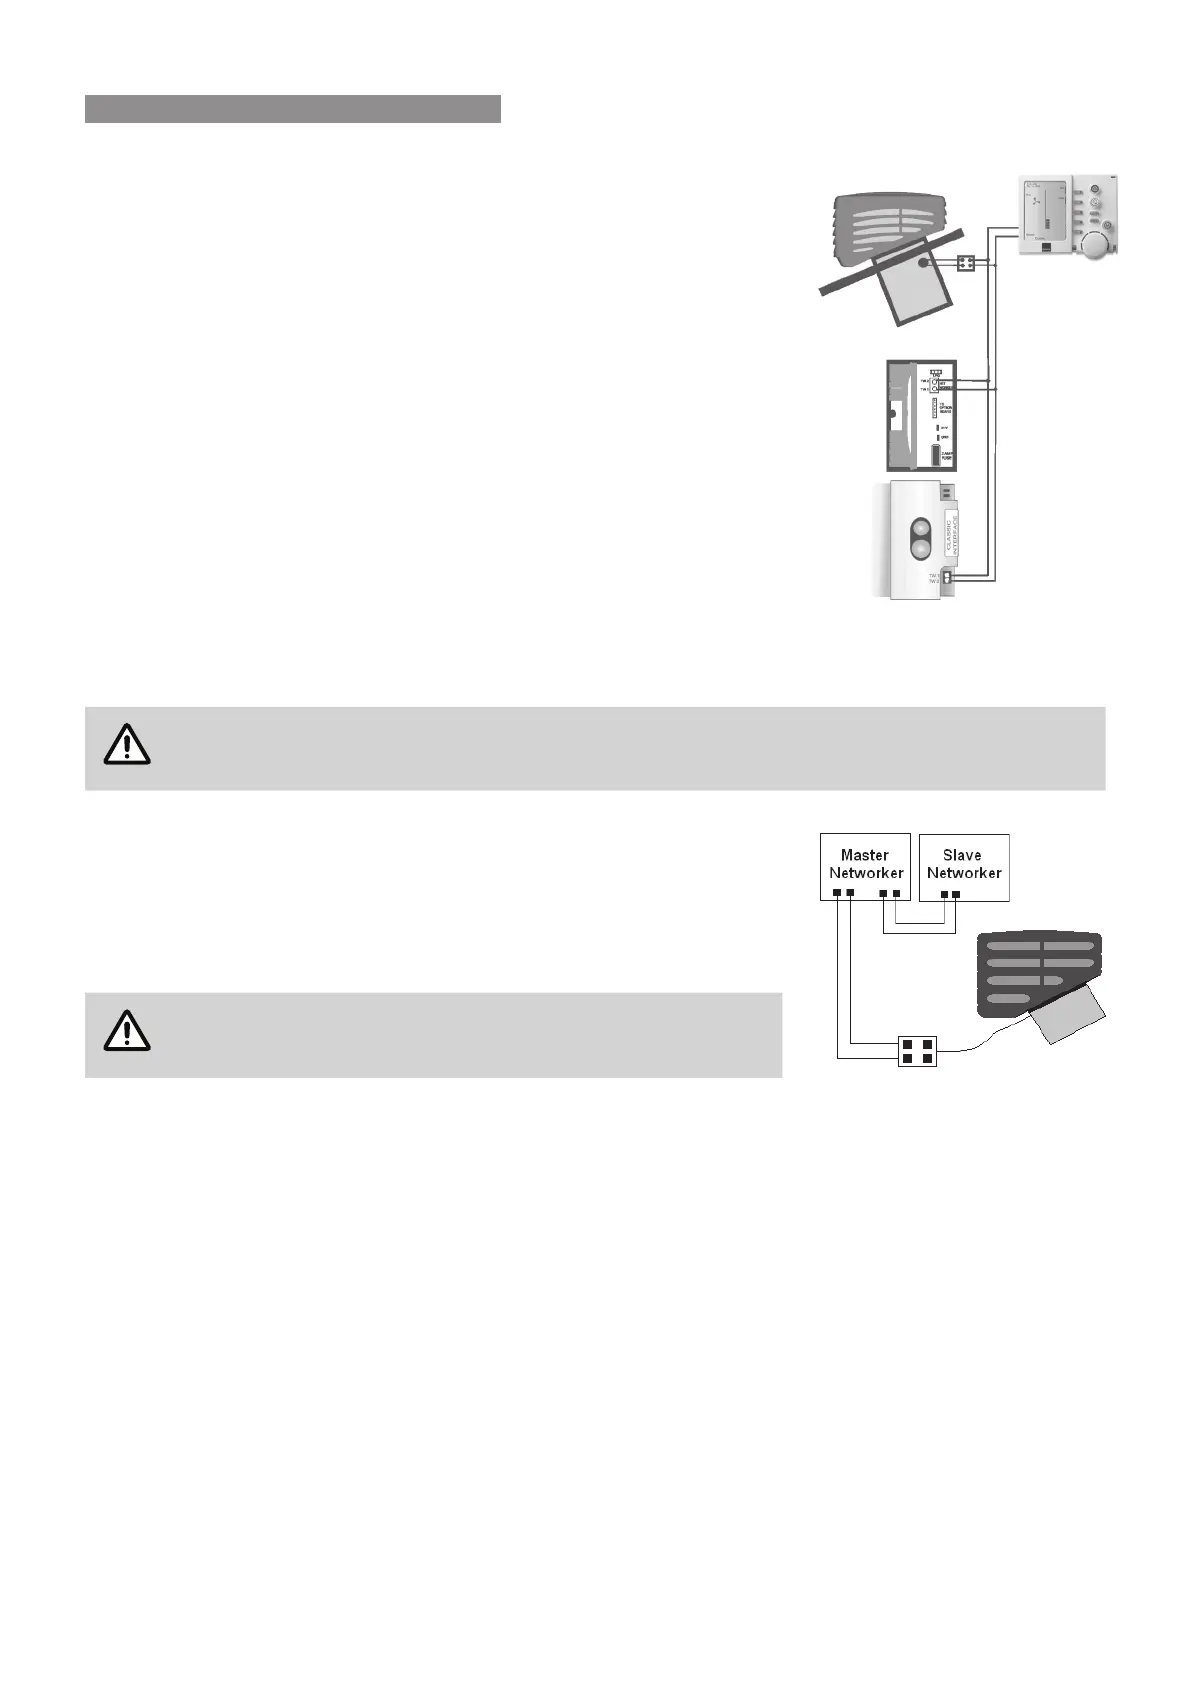
7.2 INSTALLING DUAL BRIVIS NETWORKERS
It is possible to have two Brivis Networkers connected together on a system�
The Brivis Networkers should be wired in parallel, never in series (see diagram
of typical wiring). The two Brivis Networkers are identied as either Master or
Slave� All Brivis Networkers come set as Master by default, and the slave Brivis
Networker will need to be congured upon installation.
Both Brivis Networkers cannot be set as Master on a system
otherwise it will malfunction. Both Brivis Networkers cannot
be set as Slave otherwise the system will lock out.
7.3 DUAL BRIVIS NETWORKERS
Adjustments to the cooler settings can be made from either Brivis Networker; but the settings are common to both
Brivis Networkers. If an adjustment is made on one Brivis Networker it is immediately reected on the other Brivis
Networker�
When the cooler is operating in AUTO mode, the Master Brivis Networker only will be sensing the inside comfort
level, unless the cooler has been designated to the Slave� This means the Master Brivis Networker should be
located in the most appropriate location to control the inside comfort level�
Once the location for the Master and Slave controllers has been determined, the Brivis Networker addresses
should be congured. All Brivis Networkers come set as Master by default, which means only the Slave Brivis
Networker needs to be congured.
A Master Brivis Networker can be identied by the word “clock” beside Key 5 (while the Brivis Networkers are in
the o position). Initially, both Brivis Networkers upon power up will have the word “clock” beside key 5, because
they are both still Masters at this stage�
 Loading...
