Brivis 26 Evap AC IM
14. COMMISSIONING CHECKLIST
Switch OFF the power and unplug the Cooler before touching any wiring. Care MUST BE taken
to ensure electrical components have been isolated before performing any service work, i.e.
water inlet valve, Servo Seal motor. Only an electrically qualied technician should carry out any
service to electrical wiring.
14.1 ISOLATING SWITCH
-
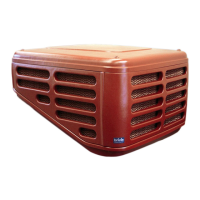
BRIVIS ADVANCE, BRIVIS PROMINA & BRIVIS CONTOUR
The Brivis Advance, Brivis Promina and Brivis Contour Series have an external power-isolating switch to facilitate
servicing�
The switch is located under the front left hand side of the cooler� To access the switch, reach under the front of the
Cooler’s trough and locate the switch� By observing the LED light on the control box you can ascertain whether the
power is on or o. Always test for electrical voltage before commencing any work on the cooler.
14.2 ISOLATING SWITCH
-
BRIVIS AD
The Brivis AD Cooler has an isolating switch located on the side of the Cooler’s electronic control module� Access
to the switch is by removing the appropriate pad or by inserting a screwdriver in the access hole provided in the
corner post nearest to where the electronic control module is mounted, the latter option does not apply to AD BAL
units�
14.3 CHECKLIST
•
The Bleed / Overow outlet pipe assembly is in place in the bottom of the tank (Brivis AD Models only).
•
The ServoSeal damper is not catching and opens fully (Brivis Contour Models only)�
•
The isolating valve on the water supply is turned ON�
•
The water tank lls with water and the water inlet valve closes when the tank is full.
•
The water level is set correctly (Brivis AD Models)�
•
There is no foreign matter in the water tank or fan housing�
•
The pads are correctly located�
•
The pump operates when turned ON at the Wall Control�
•
The fan operates through the entire speed range�
•
For even water distribution with the pads in position and the Cooler in operation�
•
The bleed o water rate and adjust if necessary (Brivis AD Models only).
•
The water drains completely from the tank and that any external drain piping is not blocked or restricted�
•
That the optional dump valve functions correctly by isolating the power to the unit and ensuring that the tank
drains completely (Optional extra for Brivis AD Models Only)�
New cooling pads should be thoroughly ushed before use so, following commissioning, run
the pump for 30 minutes without the fan, and then drain the tank fully. This will prime the pads,
ush out some of the new pad odour, and remove any foreign matter that may have settled in the
system during transport.
14.4 WHAT IF THE FAN MOTOR WILL NOT START?
Check:
•
The 10 Amp fuse in the meter box has not blown�
•
The Cooler’s 3-pin supply plug is correctly located in the power socket�
•
For power at the power socket (plug in another appliance and test)�
•
The isolating switches at the unit and the supply power socket are turned ON�
•
The unit is turned ON at the Brivis Networker Wall Control�
•
The fan is not in a delay due to ServoSeal damper, tank lling, or pad Pre-Wet operation.
•
The motor will spin freely with adequate tip clearance (approximately 2mm)�
 Loading...
