Brivis 12 Evap AC IM
6. INSTALLATION
-
BRIVIS ADVANCE
6.1 BRIVIS ADVANCE SERIES DROPPER DUCT SPECIFIC
•
All Brivis Advance Series units sit on a 550mm x 550mm dropper box with a
15-20mm out turned ange.
•
Brivis Advance Series units can also be installed on an existing dropper
box� Ensure the dropper box is in a sound condition and the top of the
dropper box is level�
•
Brivis Advance Series units may also be installed using a dropper box
transition piece (refer to Sales Department)�
•
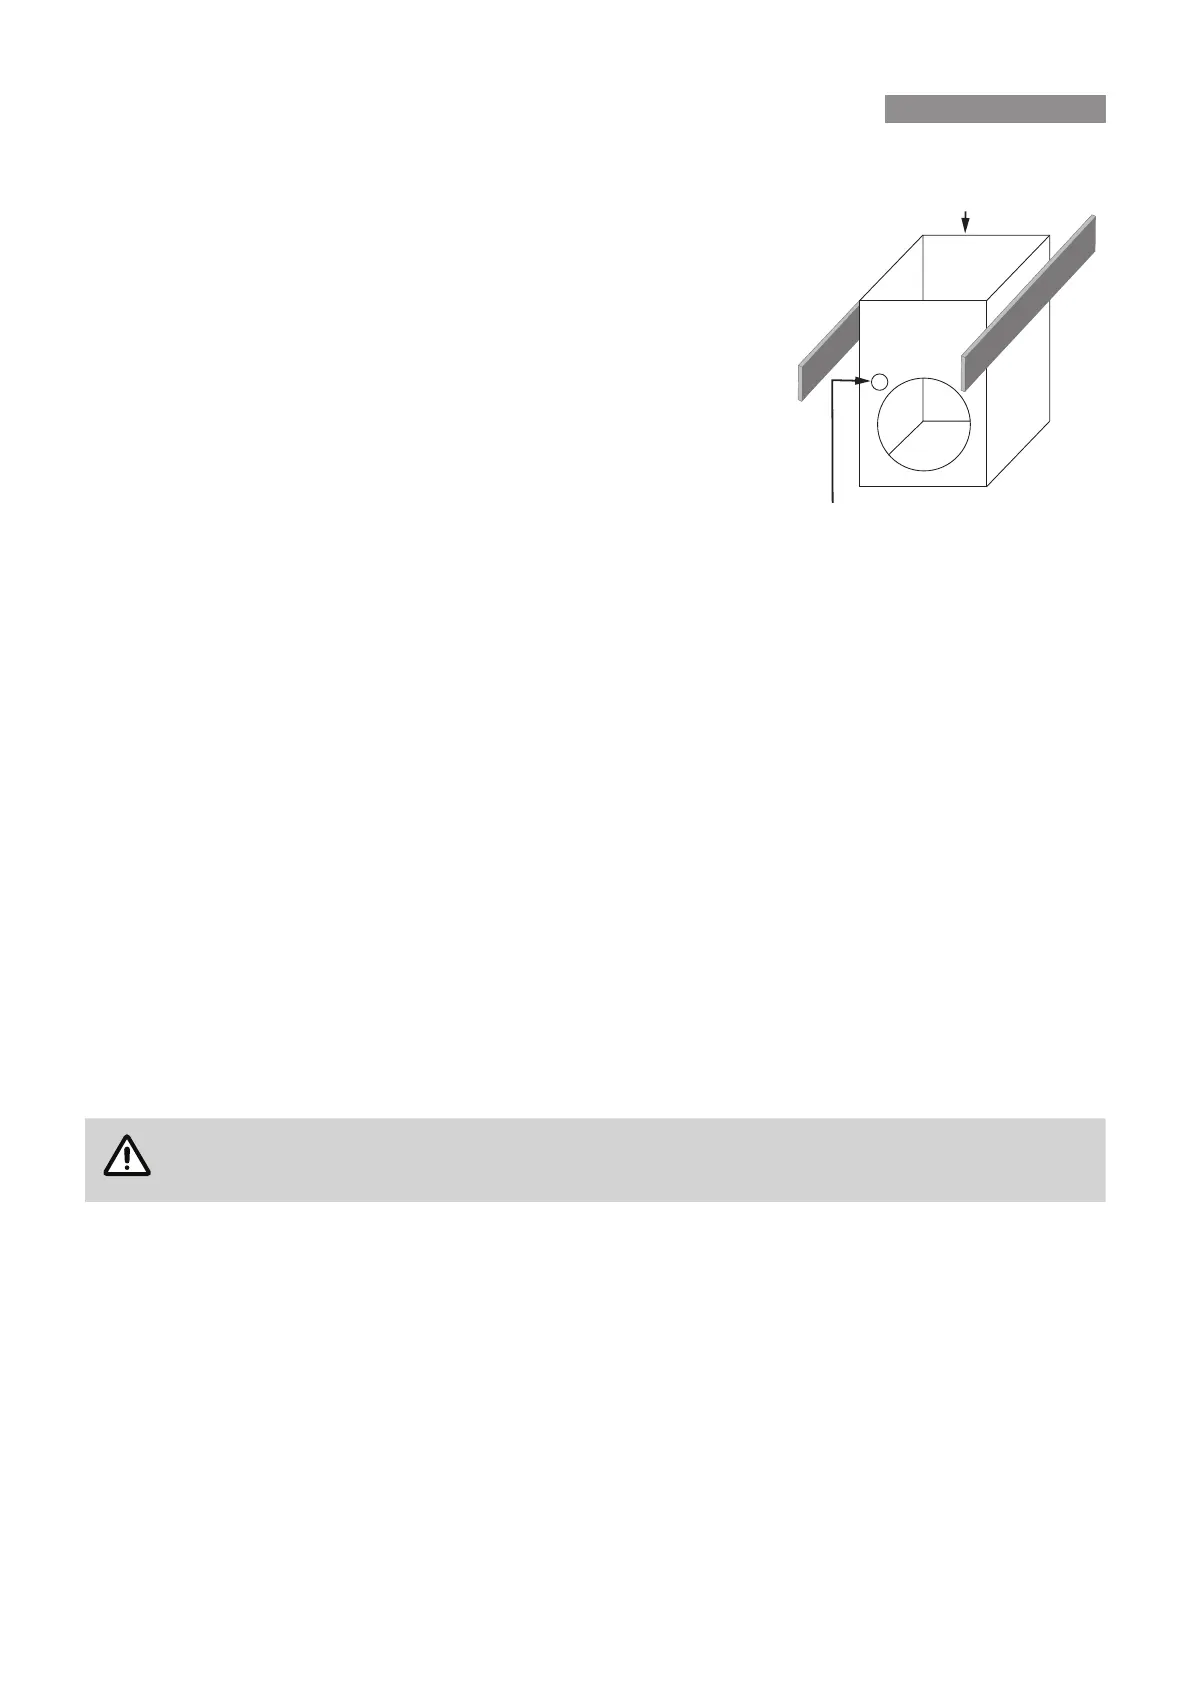
The dropper box MUST BE positioned as shown on the diagram (right)�
•
Secure the dropper duct vertically, so the Cooler is level when placed on
top of it�
•
Ensure the 3 pin power supply plug and lead, the Wall Control Loom
connection lead, and the rubber grommet, are fed to the inside of the
dropper duct�
•
Cut a 43mm hole in the dropper duct below the roof line, on the left-hand-side
on the low side of the roof, to accept the wiring grommet� This will allow
the 3-pin plug and lead, and the Wall Control Loom connection lead to be
withdrawn from the dropper into the roof cavity�
6.2 FITTING BRIVIS ADVANCE SERIES OPTIONAL WINTER
-
SEAL
•
'Brivis Advance FxxDS models are supplied tted with a motorised winter seal. Fitment of the Optional Winter
Seal detailed in this section applies to Brivis Advance FxxD models�'
•
For detailed instructions please refer to Brivis Series 5 Winter-Seal Installation Instructions provided with the
Brivis Series 5/6 Winter-Seal kit�
•
This Procedure MUST BE completed before the Cooler is mounted onto the dropper duct, preferably before
the Cooler is lifted up onto the roof�
•
Gently lift the unit up so that you can see the Cooler’s air outlet�
•
On the Winter-Seal blades is an orange sticker indicating the bottom� This sticker should be facing down when
the cooler is in its nal position.
•
Insert one end of the winter seal blades into the mounting holes provided on the base of the cooler�
•
Lock the other side into place, ensuring that they have been placed in the correct direction and that they are
both free moving�
•
Then proceed with the mounting of the cooler into the dropper duct�
The Brivis Promina Series 6 & Brivis Advance Series 6 both accept the Brivis Series 6 Winter-
Seal.
6.3 FITTING THE BRIVIS ADVANCE UNIT
•
The Brivis Advance Series Cooler chassis comprises latching brackets to secure the unit to the dropper box� To
assist with connection it is important the dropper box has a 15-20mm outward turned ange.
•
In addition to the latching brackets the unit MUST BE secured to the dropper box and the cooler chassis with
screws, refer below for method:
1� Fold the end of all four latching brackets in towards the dropper box�
2� Using the 5mm hole in the bracket as a guide secure with 8g stainless steel screws�
High side of roof
Cut hole in this position
using 43mm hole saw
below roof line to accept
wiring grommet in this
corner (closest to Cooler
Control Box)�
 Loading...
