Chapter 1
10
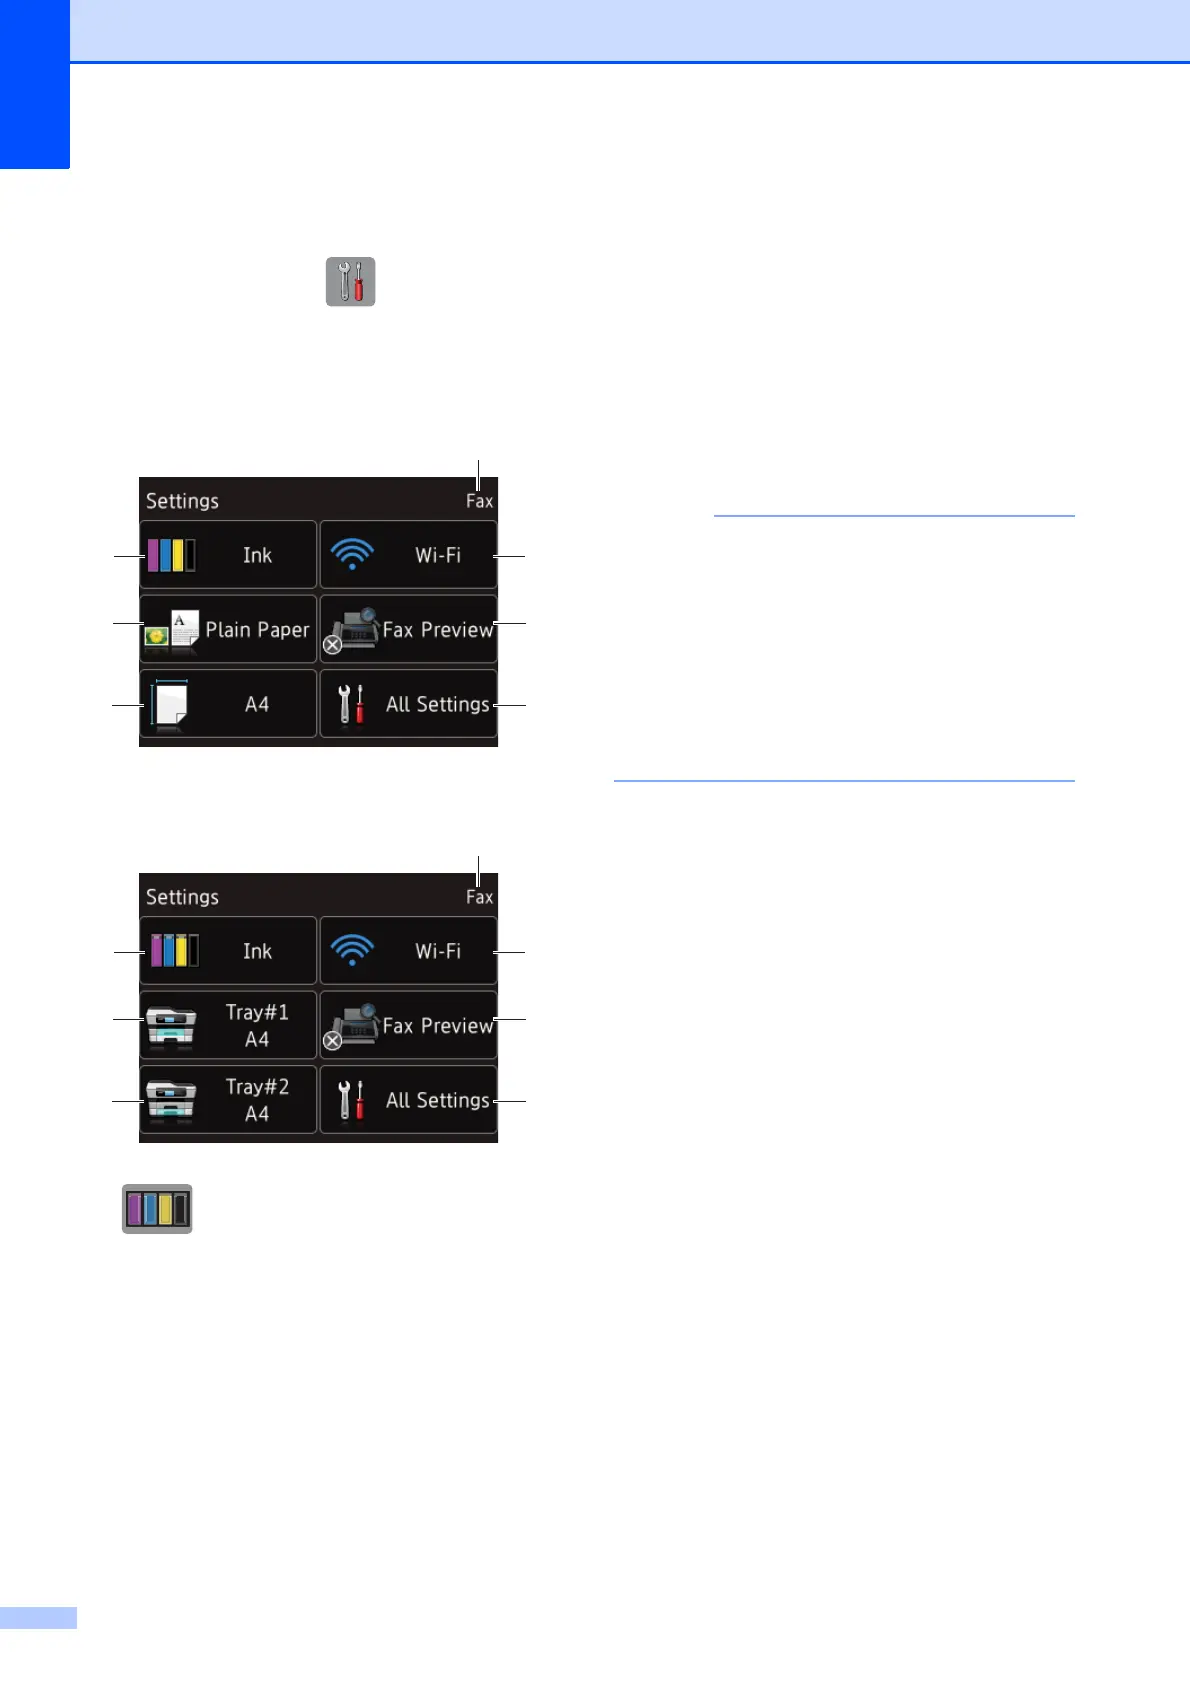
Settings screen 1
The Touchscreen LCD shows the machine
status when you press (Settings).
You can check and access all the machine's
settings from the following screen.
(MFC-J3520/MFC-J6520DW)
1
(MFC-J3720/MFC-J6720DW) 1
1 Ink
See the remaining ink volume.
When the ink cartridge is near the end of its life
or having a problem, an error icon is displayed
on the ink colour. For more information,
see Advanced User’s Guide: Checking the ink
volume.
Press to access the Ink menu.
2 Paper Type (MFC-J3520/MFC-J6520DW)
See the selected paper type.
Press to change the Paper Type setting if
needed.
3 Paper Size (MFC-J3520/MFC-J6520DW)
See the selected paper size.
Press to change the Paper Size setting if
needed.
4 Receive Mode
See the current Receive Mode:
Fax (Fax Only)
Fax/Tel
External TAD
Manual
(For Australia, Singapore and Hong Kong)
When the Distinctive Ring feature is turned on,
the Touchscreen shows D/R. For details,
Distinctive Ring on page 64 and 69 for your
relevant country.
(For New Zealand)
When the FaxAbility feature is turned on, the
Touchscreen shows D/R. For details,
FaxAbility on page 66.
5Wi-Fi
Press to set up a wireless network connection.
A four-level indicator on the screen shows the
current wireless signal strength if you are using
a wireless connection.
6 Fax Preview
See the Fax Preview setting.
Press to access the Fax Preview setting.
7 All Settings
Press to access the full Settings menu.
8 Tray #1 (MFC-J3720/MFC-J6720DW)
Displays the size of paper in Tray #1. Also, lets
you access the Tray #1 setting. You can
change the paper size and paper type.
9 Tray #2 (MFC-J3720/MFC-J6720DW)
Displays the size of paper in Tray #2. Also, lets
you access the Tray #2 setting. You can
change the paper size.
 Loading...