Do you have a question about the Brother QL-710W and is the answer not in the manual?
Details the guide's compilation, publication, specifications, and right to change without notice.
Lists Brother and third-party trademarks and registered trademarks mentioned in the document.
Defines symbols used in the manual for warnings, information, and efficient use.
Informs about included open-source software and where to find its licensing information.
Details warnings and cautions for hazardous situations, potential injuries, and property damage.
Explains symbols for actions not allowed, mandatory actions, and electrical shock alerts.
Covers handling, plugging, and avoiding damage to the power cord to prevent shock or fire.
Details what not to do with the power cord, like overloading, cutting, or using extensions.
Instructions on avoiding EMI, children's access, and unsuitable environments for the machine.
Covers safety for the cutter blade, top cover, and proper installation/storage procedures.
Advises against dropping, hitting, inserting objects, and proper interface cable use.
Guidelines for using DK rolls, applying labels, and storing supplies for optimal performance.
Instructions and warnings for using CD/DVD labels, including compatibility and application.
Advice on handling the CD-ROM to prevent damage and information about software usage.
Lists all components included in the package, such as the printer, cables, CD-ROM, and starter rolls.
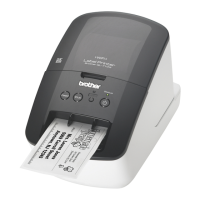
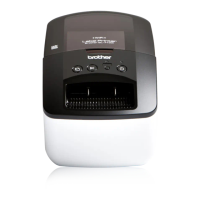
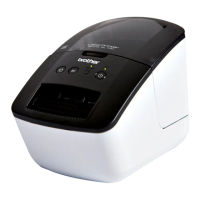
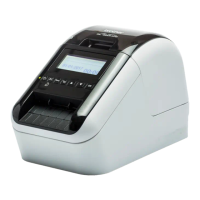
Details the front and rear components of the main printing unit, including ports and buttons.
Step-by-step guide to connect the power cord to the printer and an electrical outlet.
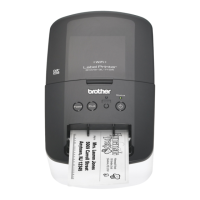
Instructions on how to open the cover, insert the spool, and thread the DK Roll for printing.
Guides installation of P-touch Editor, drivers, and utilities via CD-ROM or download.
Provides a link to download the latest drivers and software from the Brother Solutions Center.
Prerequisites for installation: computer ON, administrator rights, and not connecting USB yet.
Guides through inserting CD-ROM, selecting installation type (Standard, Custom), and user guides.
Steps to agree to the license, start installation, and handle User Account Control prompts.
Connecting the printer via USB and restarting the computer to complete the software installation.
Requirements for Mac: power ON, administrator rights, and connecting the USB cable.
Guides through inserting CD-ROM, running 'Start Here OSX', and following on-screen instructions.
Instructions to add the printer via Print & Fax or Print & Scan settings in System Preferences.
Requirements for wired network installation: computer ON, administrator rights, connect network cable.
Guides through inserting CD-ROM, selecting 'Standard Installation', and choosing connection type.
Steps to agree to license, install, and configure firewall settings for network connection.
Choosing between Peer-to-Peer or Network Shared Printer and confirming settings.
Automatic driver installation, user registration screen, and completion of the software setup.
Requirements for Mac wired network setup: computer ON, administrator rights, connect network cable.
Guides through inserting CD-ROM, running 'Start Here OSX', and selecting connection type.
Steps for simple network setup, adding the printer via list in System Preferences.
Steps for manual network setup using IP address, LPD protocol, and adding the printer.
Configuring wireless network settings of the printer to communicate with the access point.
Details infrastructure mode connection (printer to computer via access point/router).
Presents two methods for wireless installation: CD-ROM with USB or WPS push configuration.
Details using a USB cable temporarily for wireless configuration, including SSID and Network Key.
Explains using WPS for automatic wireless setup with the access point/router.
Area to record SSID and Network Key for wireless network configuration.
Flowchart guiding Windows users through wireless setup steps across multiple pages.
Flowchart guiding Macintosh users through wireless setup steps across multiple pages.
Insert CD-ROM and select 'Standard Installation' from the menu.
Agree to license, click Install, and configure firewall settings for wireless connection.
Choose wireless connection type and select the printer from the list.
Insert CD-ROM, double-click Wireless Device Setup Wizard icon in Utilities.
Choose between Method 1 (USB) or Method 2 (No USB) for wireless setup.
Steps for simple network setup, adding the printer via list in System Preferences.
Steps for manual network setup using IP address, LPD protocol, and adding the printer.
Details connecting the USB cable and searching for wireless networks.
Details placing printer near WPS router and pressing Wi-Fi/WPS buttons.
Pressing WPS button on router and confirming Wi-Fi indicator on printer.
Steps to double-click 'Start Here OSX' and follow on-screen instructions.
Choose printer type (Peer-to-Peer/Shared) and configure firewall settings.
Steps for WPS configuration and automatic driver installation.
Guides for installing the BRAdmin Light utility for network device management on Windows.
Guides for installing the BRAdmin Light utility for network device management on Macintosh.
Steps to install P-touch Editor Lite LAN for label editing.
Instructions to run BRAdmin Light from CD or Utilities folder.
Steps to set static IP address, subnet mask, and gateway using BRAdmin Light.
Guides through installing the label-editing tool and specifying IP address.
Accessing Help via Start Menu -> All Programs -> Brother P-touch.
Accessing Help through the Help-How To option in the New/Open dialog.
Accessing Help via the Help menu within the P-touch Editor application.
Accessing Help by right-clicking the mouse and selecting P-touch Editor Help.
Accessing Help via the Help-How To option in the New/Open dialog.
Accessing Help via the Help menu within the P-touch Editor application.
Accessing Help by control-clicking and selecting P-touch Editor Help.
Guides for installing the BRAdmin Light configuration utility via Network Utility.
Steps to set IP address, subnet mask, and gateway using BRAdmin Light.
Instructions to run BRAdmin Light from CD or Utilities folder.
Steps to set static IP address, subnet mask, and gateway using BRAdmin Light.
Guides through installing the label-editing tool and specifying IP address.
Accessing Help via Start Menu -> All Programs -> Brother P-touch.
Accessing Help through the Help-How To option in the New/Open dialog.
Accessing Help via the Help menu within the P-touch Editor application.
Accessing Help by right-clicking the mouse and selecting P-touch Editor Help.
Accessing Help via the Help-How To option in the New/Open dialog.
Accessing Help via the Help menu within the P-touch Editor application.
Accessing Help by control-clicking and selecting P-touch Editor Help.
| Print technology | Direct thermal |
|---|---|
| Vertical printing | Yes |
| Maximum resolution | 300 x 300 DPI |
| Maximum printing width | 59 mm |
| Ethernet LAN | No |
| Connectivity technology | Wireless |
| Dimensions (WxDxH) | 128 x 236 x 153 mm |
| Tape type | DK |
| Number of styles | 10 |
| Built-in barcodes | CODABAR (NW-7), Code 128 (A/B/C), Code 39, EAN128, EAN13, EAN8, Interleaved 2/5, ITF-14, MaxiCode, PDF417, POSTNET, QR Code, UPC-A, UPC-E |
| Number of box types | 6 |
| Image formats supported | BMP, GIF, JPG, PNG, TIF |
| Maximum label width | 62 mm |
| Maximum label length | 8 m |
| Product color | Black, White |
| Weight | 1200 g |
|---|