14
6.6 Replacing the valve assembly
Tools needed • 1hexagonsocketspannersize1
• 1hexagonsocketspannersize2.5
• 1hexagonsocketspannersize3
• 1auxiliaryscrewM4
E2
E3
E4
E5
E6
E7E8
E9E10
E11
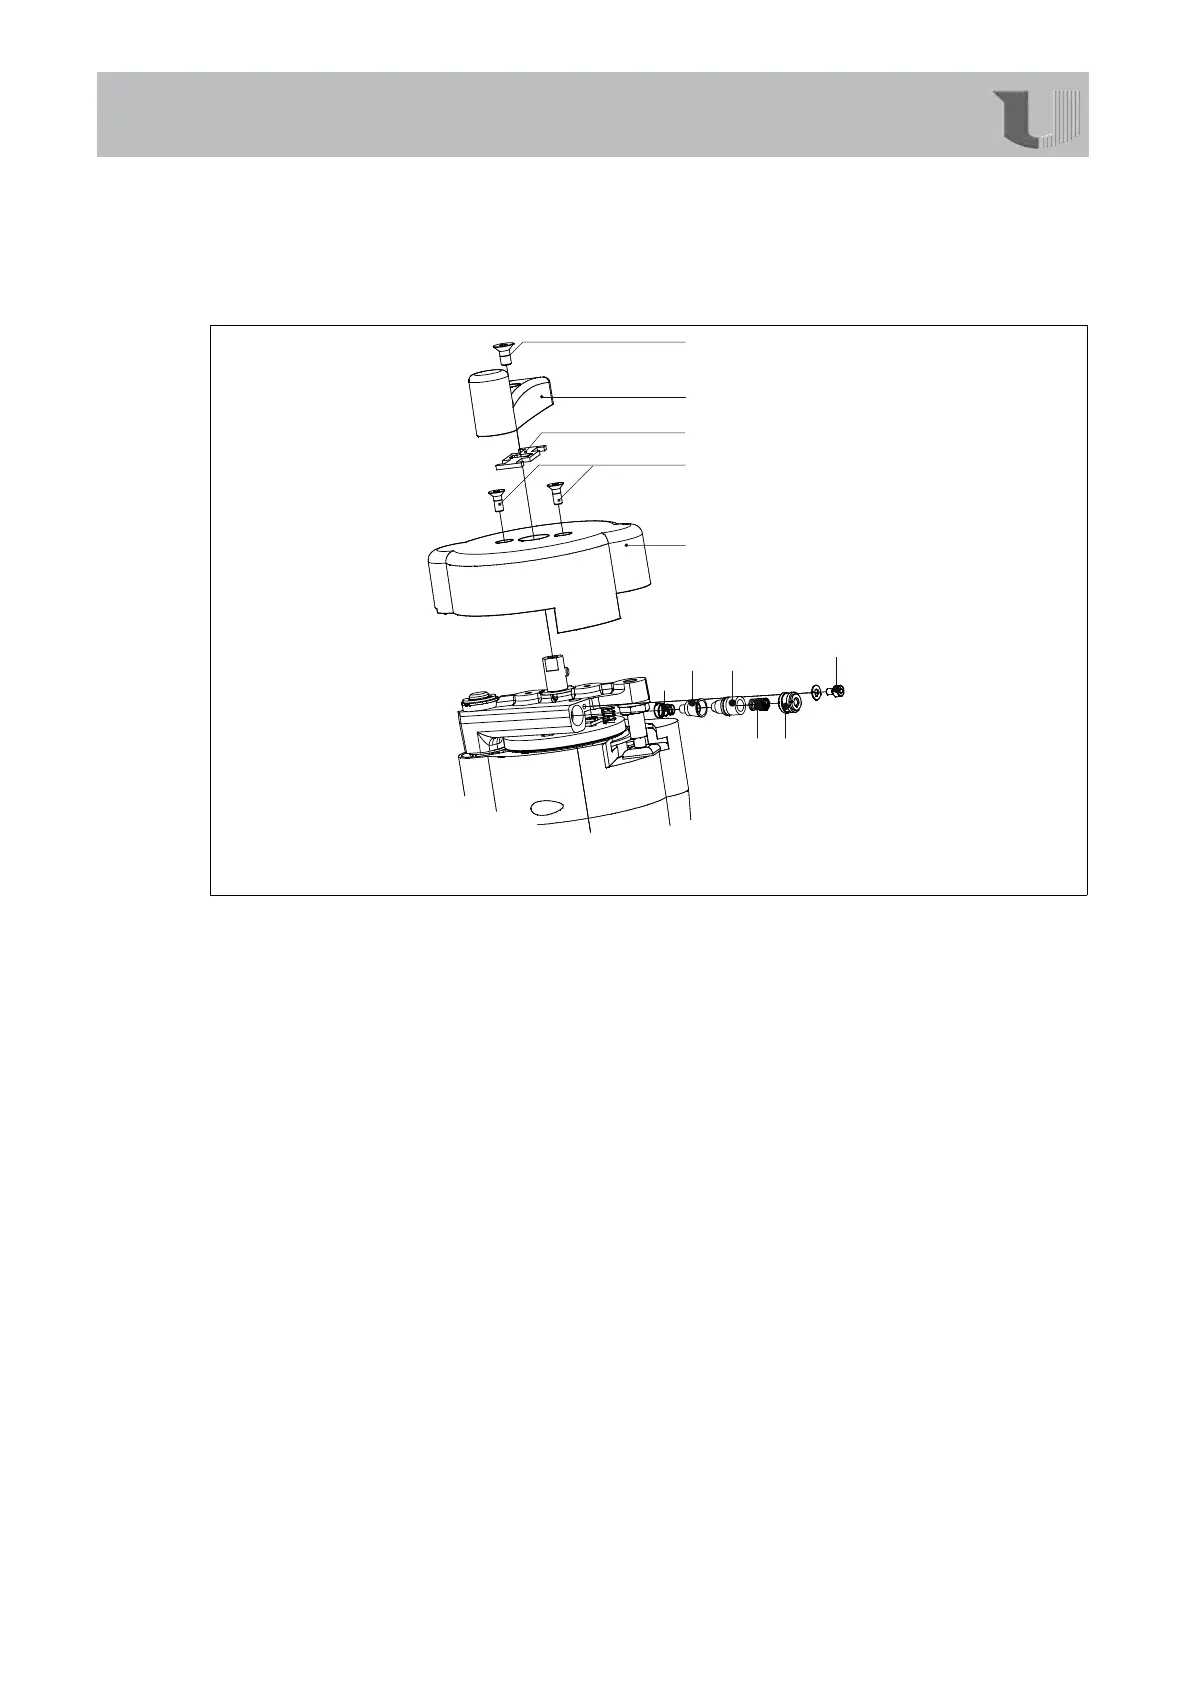
Fig 6.6/1: Replacing the valve assembly
1. Letthedeviceheatup.Continueactivatingthetriggeruntilthetankiscompletely
empty.
2. Withthecoverclosedundothexingscrew(E1)ofthelever(E2)withthehexagon
socketspannersize3.Removetheleverandcarrier(E3).
3. Undothescrews(E4)withthehexagonsocketspannersize2.5.Removethecover
casing(E5).
4. ScrewtheauxiliaryscrewM4intotheclampingpiece(E7).Releasetheclamping
screw(E6)withwasherwitha2.5mmAllenkey.Carefullyremovetheclampingpiece
withauxiliaryscrewM4fromthevalvehousing.Alsoremovethespring(E8)andthe
cone(E9).
5. Decreasethepressureto14.5…29psi/1....2bar.Brieyactuatethetrigger.Theburst
ofpressureejectsthevalve(E9)andspring(E10)fromthevalvehousing.Holdacloth
infrontoftheopeningtocatchthese(hot!)parts.
6. Fitthenewcomponents,covercasingandleverinreverseorder.
Servicing/maintenance