4
3 Starting
3.1 Connecting up
3.1.1 Connecting up (operation without working bracket/workstation)
Toconnectupthedeviceproceedasfollows:
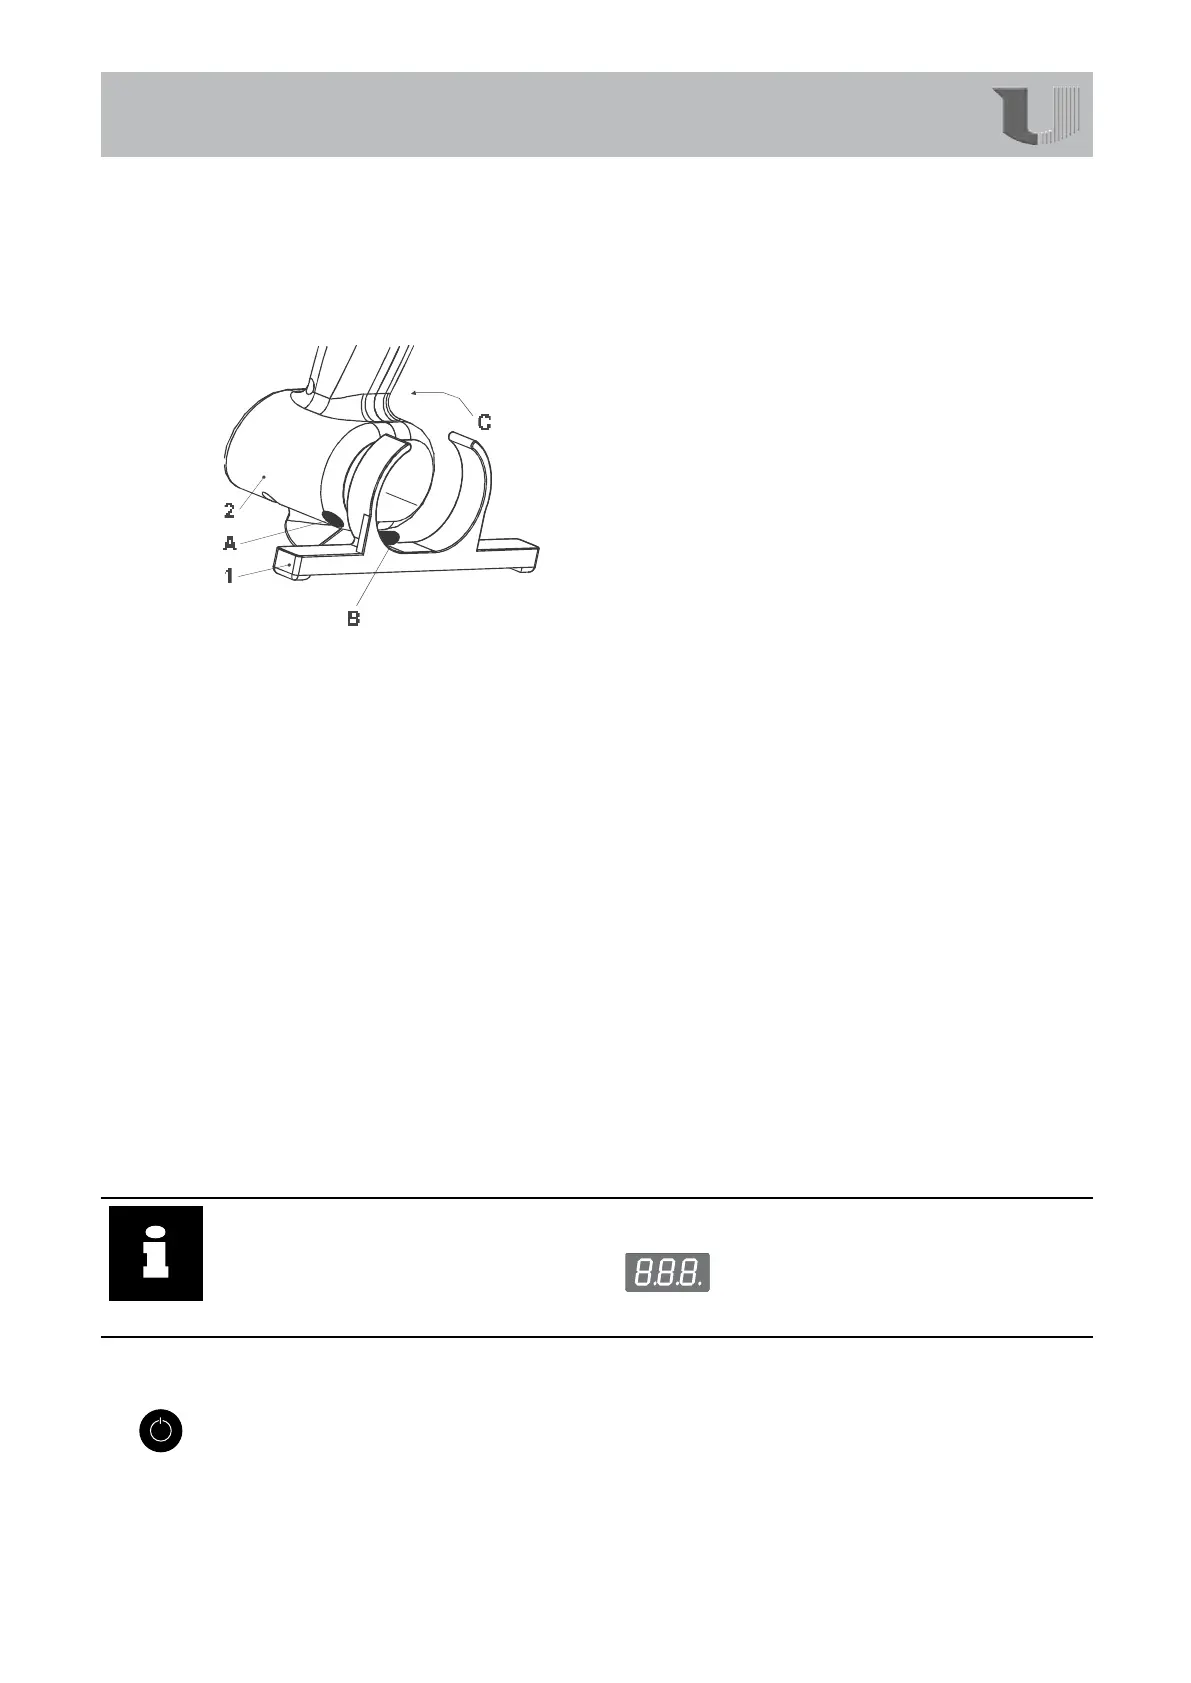
1. Fitthestand:
• Todothisinsertpin(B)ofthebase(1)intohole
(A)inthecasing.
•Movethebase(1)indirection(C)untilitisjust
incontactwiththecasing.
•Todismantlethebasedotheaboveinreverse
order.
2. Placethedeviceonthebaseandstandhoop.
3. Fitthesuppliedpressure-reducingvalvetoaquick-actioncouplinginthecompressed-
airsupply.Thewaterseparatormustbefacingdownwardswhenyoudothis.
Observetherequirementsmadeofthecompressed-airsupply(Section1.2,“Technical
data“).
4. Settheoperatingpressureto58psi/4barwiththepressureregulator(3).
5. Connectthemainsplugtoasocketoutletwithearthingcontact.
6. Switchonthedevice.
Thedeviceisnowreadyforuse.
3.1.2 Connecting up (operation with working bracket/workstation)
Toconnectupthedeviceproceedasfollows:
1. Placethedeviceintheworkingbracket.
2. Attachtheworkingbracket’scompressed-airconnection(1)(seeillustrationonp.20)to
thecompressed-airsupply.
Observetherequirementsmadeofthecompressed-airsupply(Section1.2,“Technical
data“).
3. Settheoperatingpressureto58psi/4barwiththepressureregulator(3).
4. Connectthemainsplugtoasocketoutletwithearthingcontact.
5. Switchonthedevice.
The
deviceisnowreadyforuse.
Info
Thedisplayisswitchedonbriey(approx.1sec)asacheckafterthepowerplugis
insertedandafteramainsvoltagefailure:
.
Thedevicethenswitchesoffforsafetyreasons
3.2 Switching on
ToswitchthedeviceonpressandholdtheStart/Stopbutton(6)foratleast1s.
Thedigitaldisplaylightsupandindicatesthecurrenttemperature.Thedeviceheatsup
immediatelytothepresettemperature(targettemperature).Thedecimalpointontheleft
ashesuntilthetargettemperaturehasbeenreached.
ThetargettemperaturecanbedisplayedbypressingtheSetbutton(7).
Starting