15
6.7 Replacing the (complete) cover
Tools needed •1hexagonsocketspannersize2.5
• 1hexagonsocketspannersize3
• 1open-endspannersize13
F1
F2
F3
F4
F5
F6
F7
F9
F10
F8
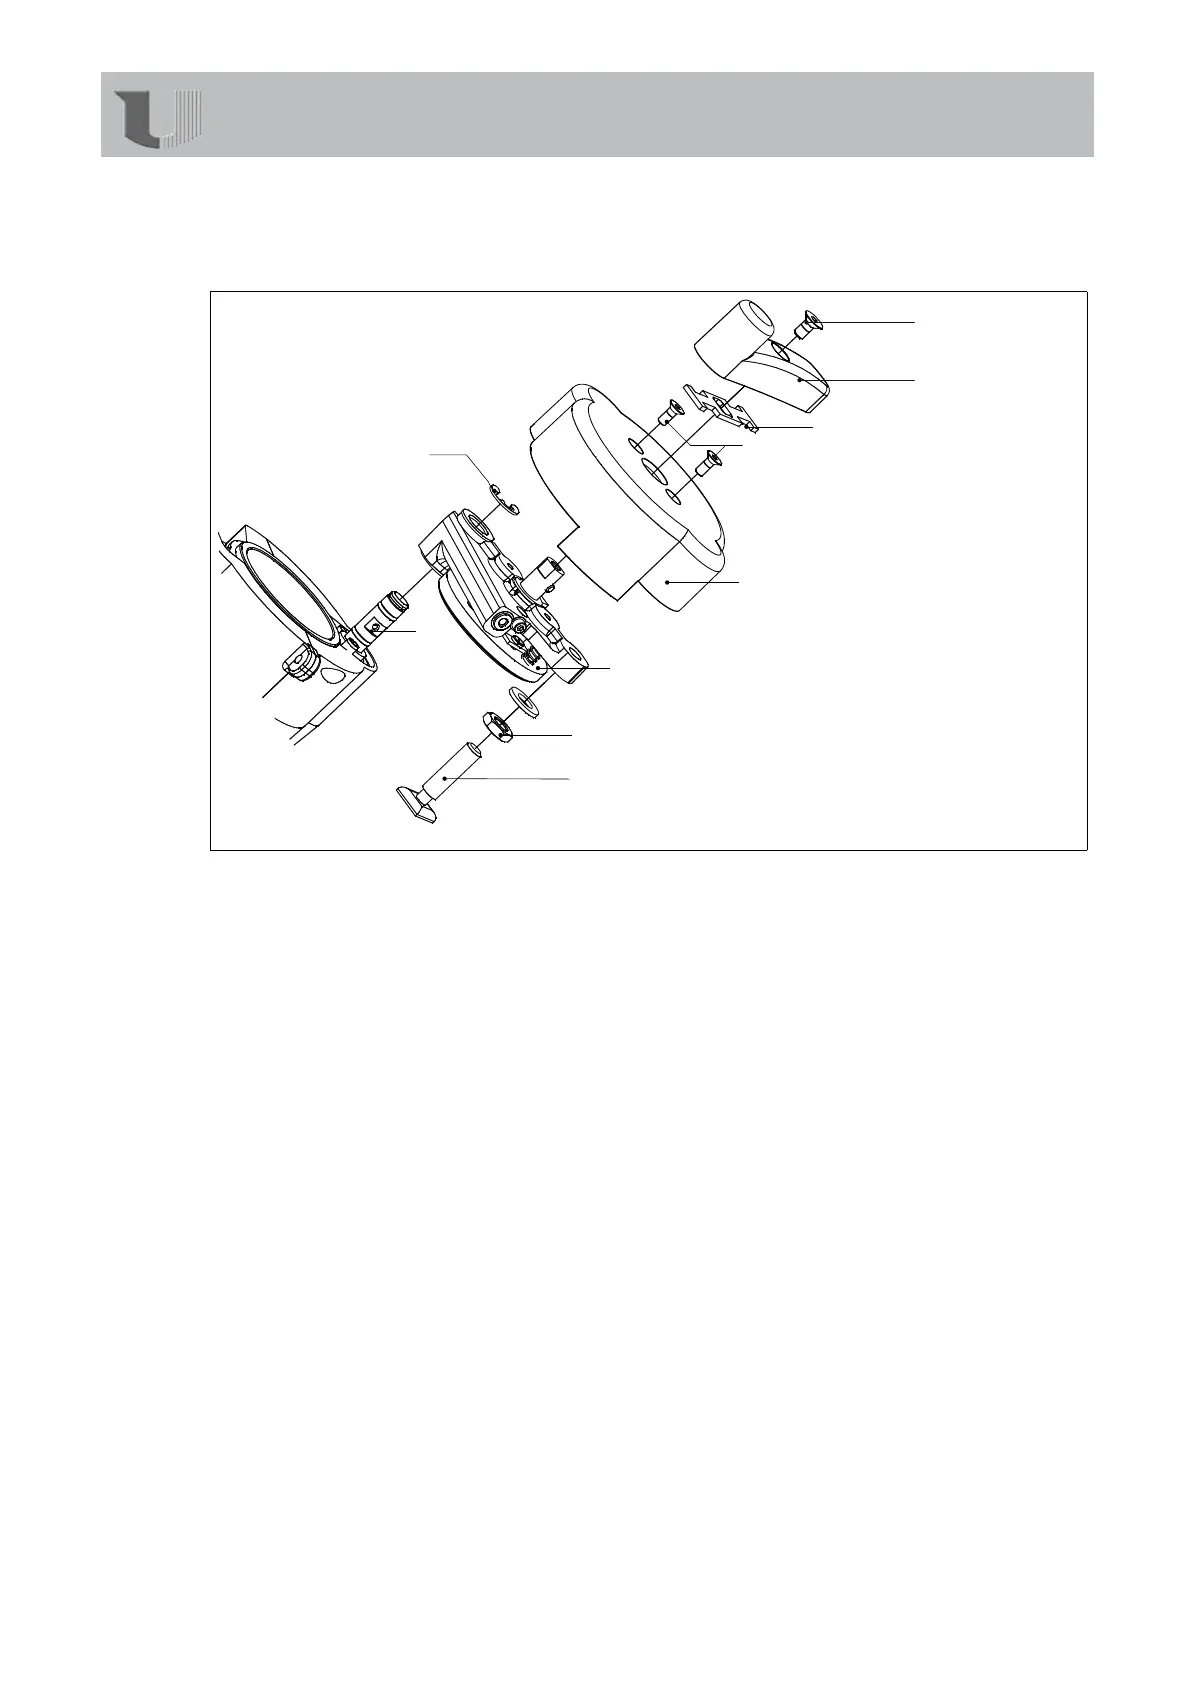
Fig. 6.7/1: Replacing the cover
1. Letthedeviceheatup.Continueactivatingthetriggeruntilthetankiscompletelyempty.
2. Withthecoveropenundothexingscrew(F1)ofthelever(F2)withthehexagonsocket
spannersize3.Removetheleverandcarrier(F3).
3. Undothescrews(F4)withthehexagonsocketspannersize2.5.Removethecovercas-
ing(F5).
4. ReleaseandremovetheSeegercirclipring(F6).
5. Pulltheentireclosureunit(F7)offfromtheaxle(F8).Carefullysetthenewclosureunit
ontheaxle.
6. MounttheSeegercirclipring(F6).
7. Releasethecounternut(F9)withtheSW13open-endwrench.
8. Adjustthetieboltbytwistingitsothatitsfootslidescleanlyintotherecessinthehous-
ingwhenthelidcloses.Thenretightenthecounternuts.Checkagaintoseeifthecover
closescleanly.Ifnecessary,readjustthetiebolt.
9. Mountthecovercasingandthelever.
Servicing/maintenance