23
Installation
CAUTION!
Risk of injury due heavy devices!
▶ Duringtransportorduringassembly,aheavydevicemayfall
andcauseinjury.
▶ Donottransport,installorremoveheavydeviceswithoutthe
aidofasecondpersonandusingsuitableauxiliaryequipment.
▶ Useappropriatetools.
8.2 Before installation
• Theangle-seatcontrolvalvecanbeinstalledinanyinstallation
position,preferablywiththeactuatorinuprightposition.
• Beforeconnectingthevalve,ensurethepipelinesareush.
• Makecertaintheowdirectioniscorrect(Flowdirection
alwaysbelowseat).
8.2.1 Preparatory work
→ Cleanpipelines(Sealingmaterial,swarf,etc.).
Devices with welded body
NOTE!
For valves with installed control:
Whenweldingthevalvebodyintothepipeline,thecontrol
mustnotbeinstalled.
▶ Removecontrolfromtheactuatordescribedbelow.
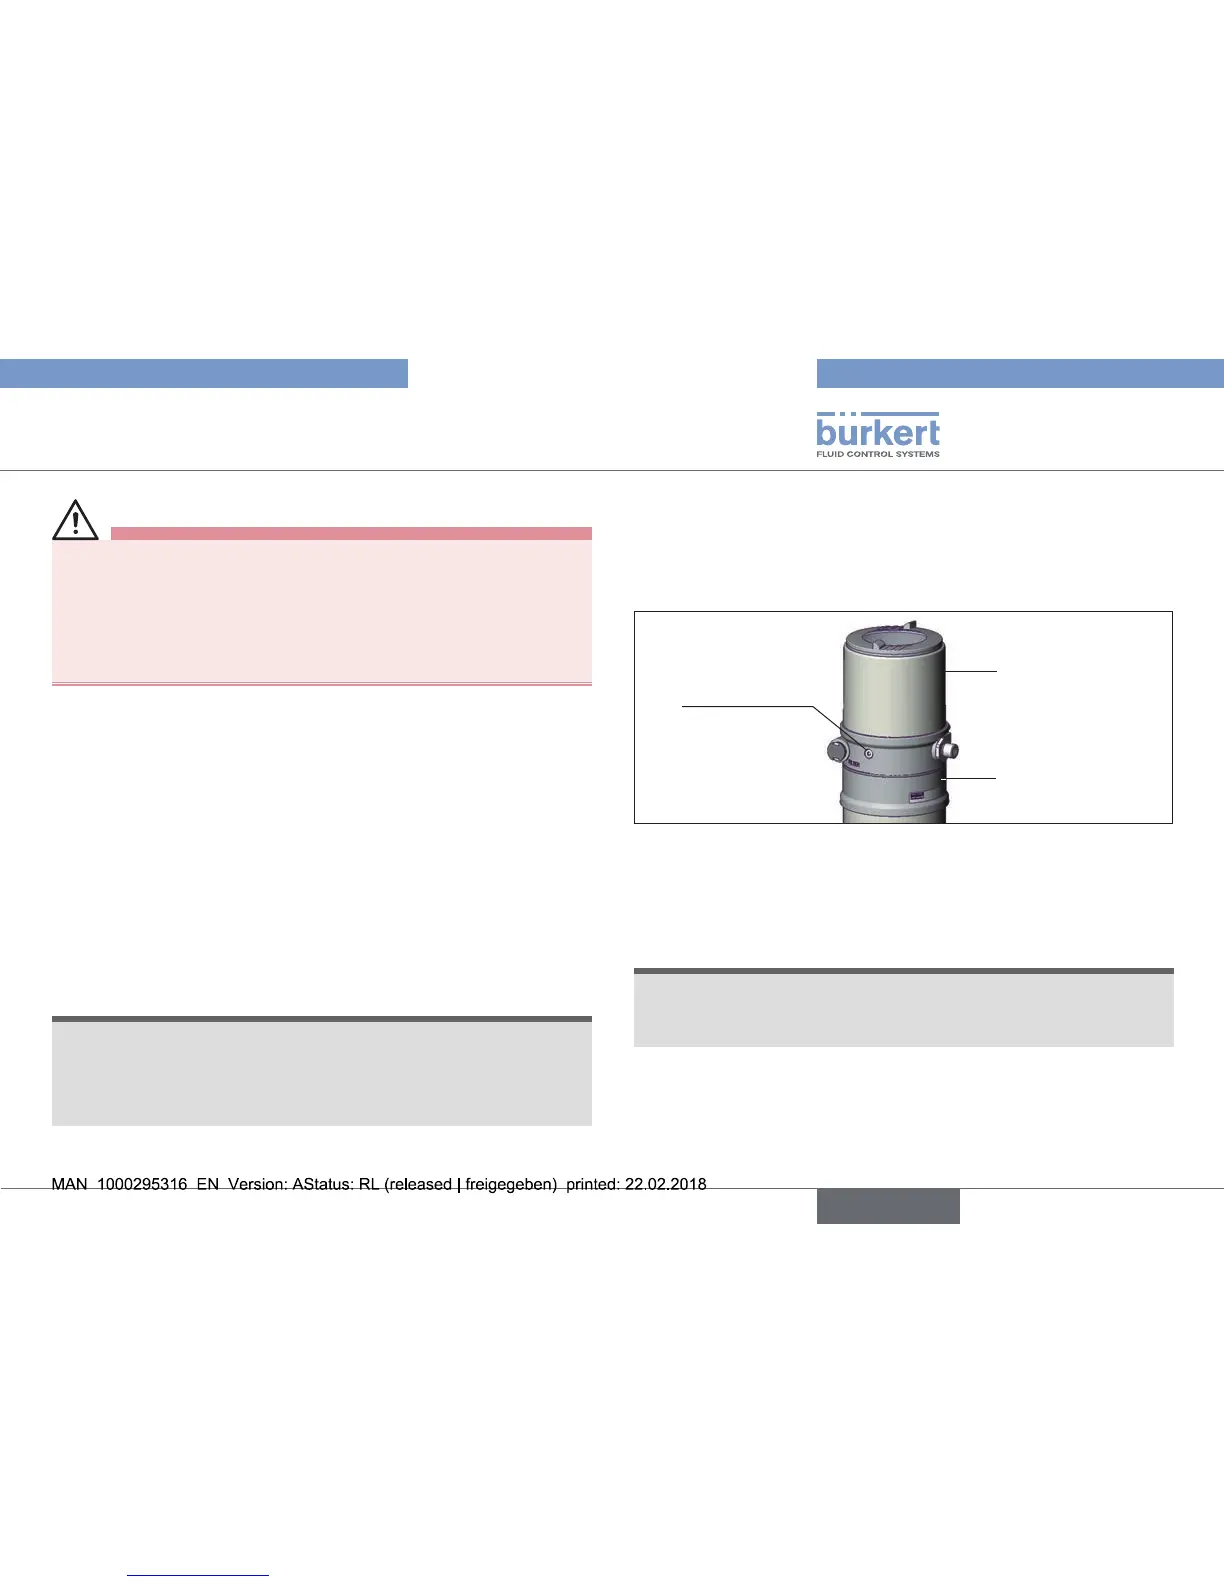
Removethecontrolunitfromtheactuator(ifpresent):
→ Clampthevalvebodyinaholdingdevice.
→ Loosenthefasteningscrews(2x).
→ Removethecontrolunitupwards.
Fasteningscrew
(2x)
Controlunit
Actuator
Fig. 16: Disassembly the control unit
Removetheactuatorfromthevalvebody.
→ Installcollet(whitegrommet)inpilotairport1.
NOTE!
Damage to the seat seal or the seat contour!
▶ Whenremovingtheactuator,ensurethatthevalveisinopen
position.
→ ControlfunctionApressurizethepilotairport1withcom-
pressedair(5bar):valveopens.
→ Usingasuitableopen-endwrench,placethewrenchaton
thepipe.