24
Installation
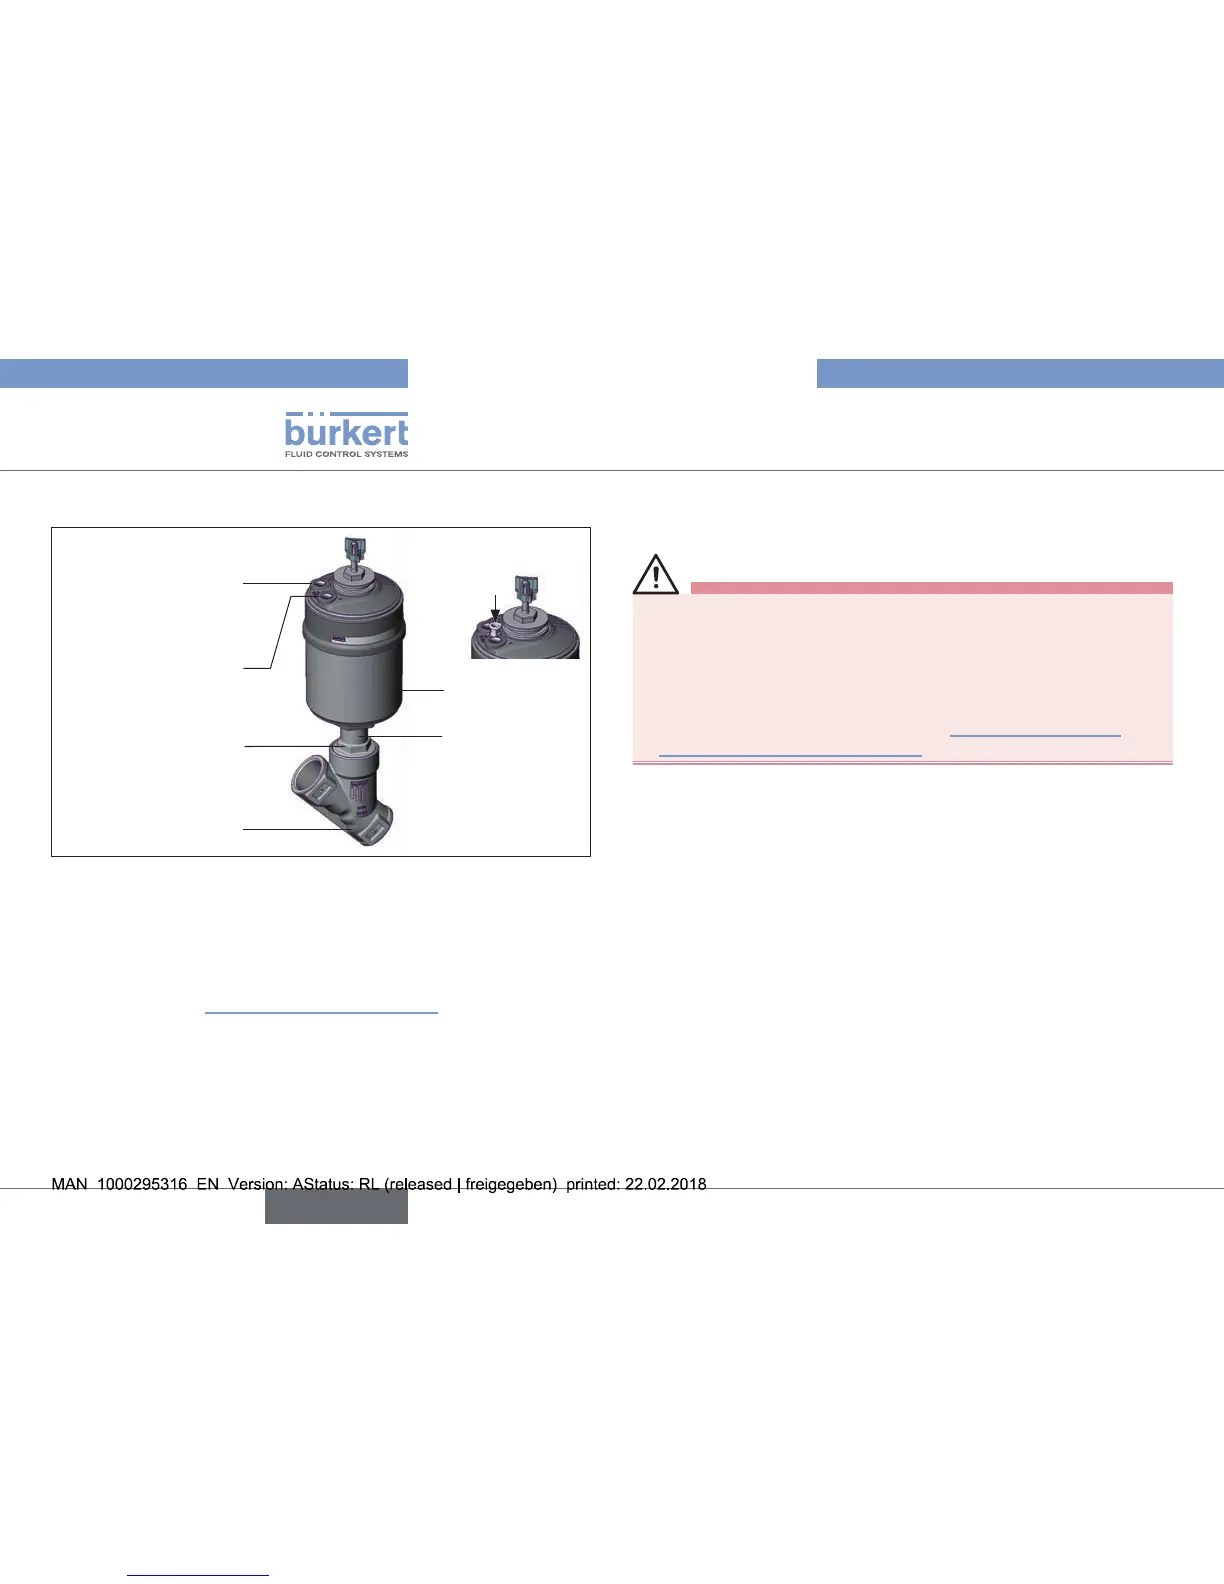
→ Unscrewtheactuatorfromthevalvebody.
Actuator
Nipple
Valvebody
Flatsforopen-
endwrench
Pilotairport
CFA,CFB,CFI
Exhaustairport
CFA,CFB
PilotairportCFI
2
1
Installcollet:
Fig. 17: Installation
Other device versions
→ Donotremoveactuatorunlessthisisacustomer-specic
requirement.
→ Proceduresee“Deviceswithweldedbody”.
8.3 Installation
WARNING!
Risk of injury from improper installation!
Assemblywithunsuitabletoolsornon-observanceofthetight-
eningtorqueisdangerousasthedevicemaybedamaged.
▶ Forinstallationuseanopen-endwrench,neverapipe
wrench.
▶ Observethetighteningtorque(see“Tab.16:Tightening
torquesofvalvebody/nipples”).
Dirt trap for devices with authorisation in accordance with DIN
EN 161
InaccordancewithDINEN161“Automaticshut-ovalvesfor
gasburnersandgasappliances”adirttrapmustbeconnected
upstreamofthevalveandpreventtheinsertionofa1mmplug
gauge.
→ Iftheauthorisationalsoappliestostainlesssteelbodies,the
sametypeofdirttrapmustbeattachedinfrontoftheangle-
seatcontrolvalve.