26
Installation
NOTE!
Excessive torque when tightening the fastening screw
cannot ensure the degree of protectionIP65/IP67.
▶ Thefasteningscrewsmustonlybeappliedwithamaximum
torqueof1.5Nm.
→ Attachthecontrolunittotheactuatorusingthetwolateral
fasteningscrews.Onlylightlytightenthescrews(maximum
torque:1.5Nm).
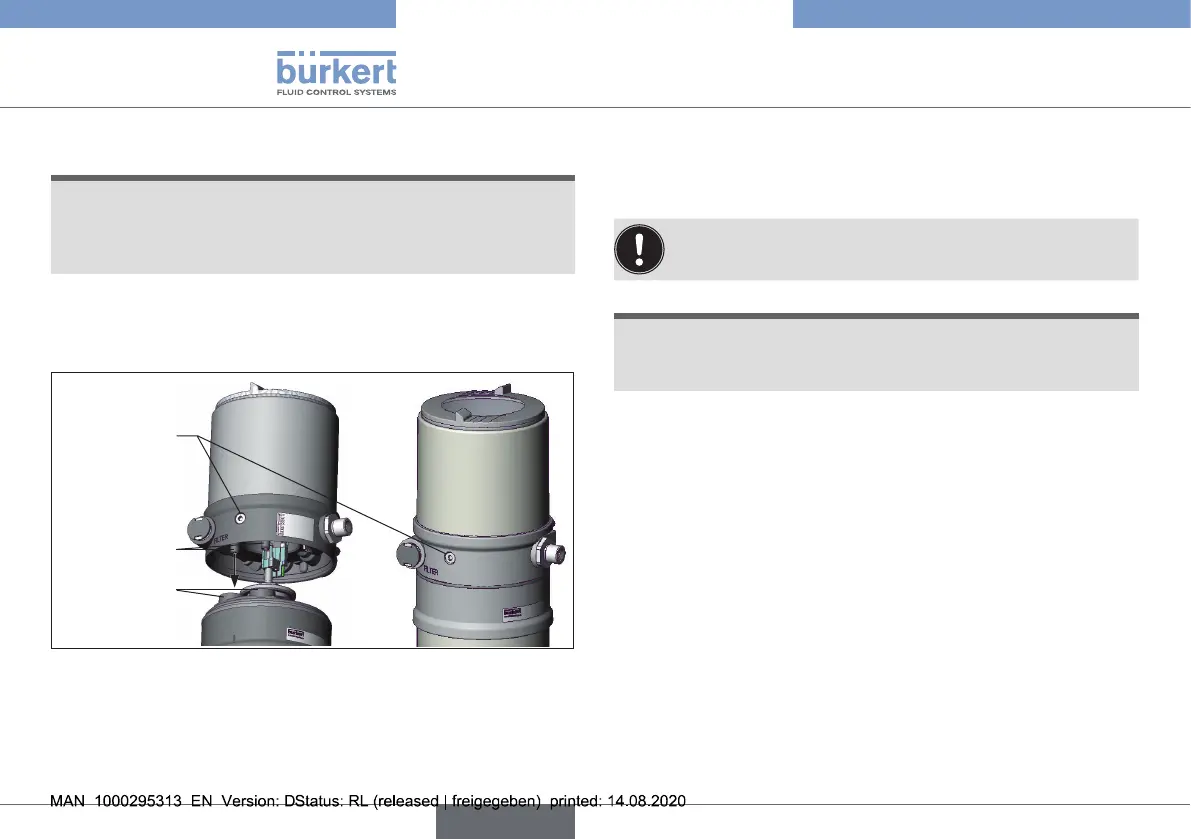
Connection
piece
Pilot air
ports
Actuator
Fastening
screws(x2),
max.1.5Nm
Fig. 14: Control unit installation
8.3.4 Turning actuator
Thepositionoftheportscanbesmoothlyalignedbyturningthe
actuator360°.
Onlytheactuatorcanberotated.Itisnotpossibletorotate
thecontrolunitagainsttheactuator.
NOTE!
Damage to the valve seat seal or seat contour.
▶ Whenturningtheactuator,thevalvemustbeintheopen
position.
Procedure:
→ Clampvalvebodyinaholdingdevice(onlyforvalveswhich
havenotyetbeeninstalled).
→ For control functionA:
Without control unit:pressurisethepilotairport1withcom-
pressedair(5bar):Valveopens.
With control unit:openthevalveinaccordancewiththeoper-
atinginstructionsofthecontrolunit.
→ Counterwithasuitableopen-endwrenchonthewrenchatof
thenipple.
Type2301
English