31
Maintenance, cleaning
10.3 Replacing wearing parts
10.3.1 Replacing the control cone set
Thecontrolconesetconsistsof
• Control cone
• Seal
• Spring-typestraightpin
• Lubricant
Tochangethecontrolconeset,rstremovetheactuatorfrom
thevalvebody.
DANGER!
Risk of injury from discharge of pressure and escaping
medium.
Dismantlingadevicewhichisunderpressureishazardousdue
toasuddendischargeofpressureorescapingmedium.
▶ Beforedisassembly,shutothepressureandventalllines.
WARNING!
Risk of injury due to using wrong tool.
Performinginstallationwork,usingunsuitabletools,ishaz-
ardousduetopossibledamagetothedevice.
▶ Toremovetheactuatorfromthevalvebody,useanopen-
endwrench,neverapipewrench.
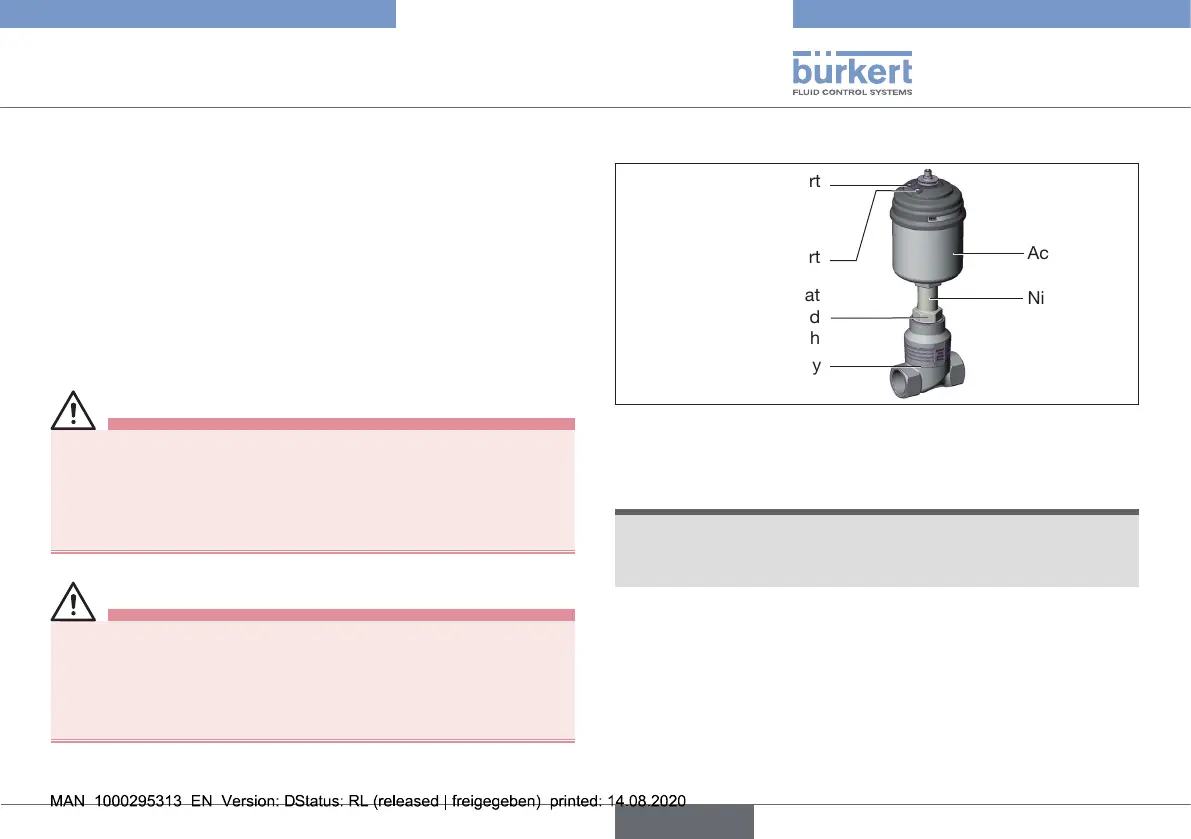
Remove the actuator from the valve body
Actuator
Nipple
Valve body
Wrenchat
foropen-end
wrench
Pilot air port
Pilot air port
2
1
Fig. 18: Valve
→ Clampvalvebodyinacollet(onlyforvalveswhichhavenot
yetbeeninstalled).
NOTE!
Damage to the valve seat seal or seat contour.
▶ Whenremovingtheactuator,thevalvemustbeintheopen
position.
→ For control function A
Without control unit:pressurisepilotairport1withcom-
pressedair(5bar).Valveopens.
With control unit:
Openthevalveinaccordancewiththe
operatinginstructionsofthecontrolunit.
→ Placeasuitableopen-endwrenchonthewrenchatofthe
nipple.
→ Unscrewactuatorfromthevalvebody.
Type2301
English