32
Maintenance, cleaning
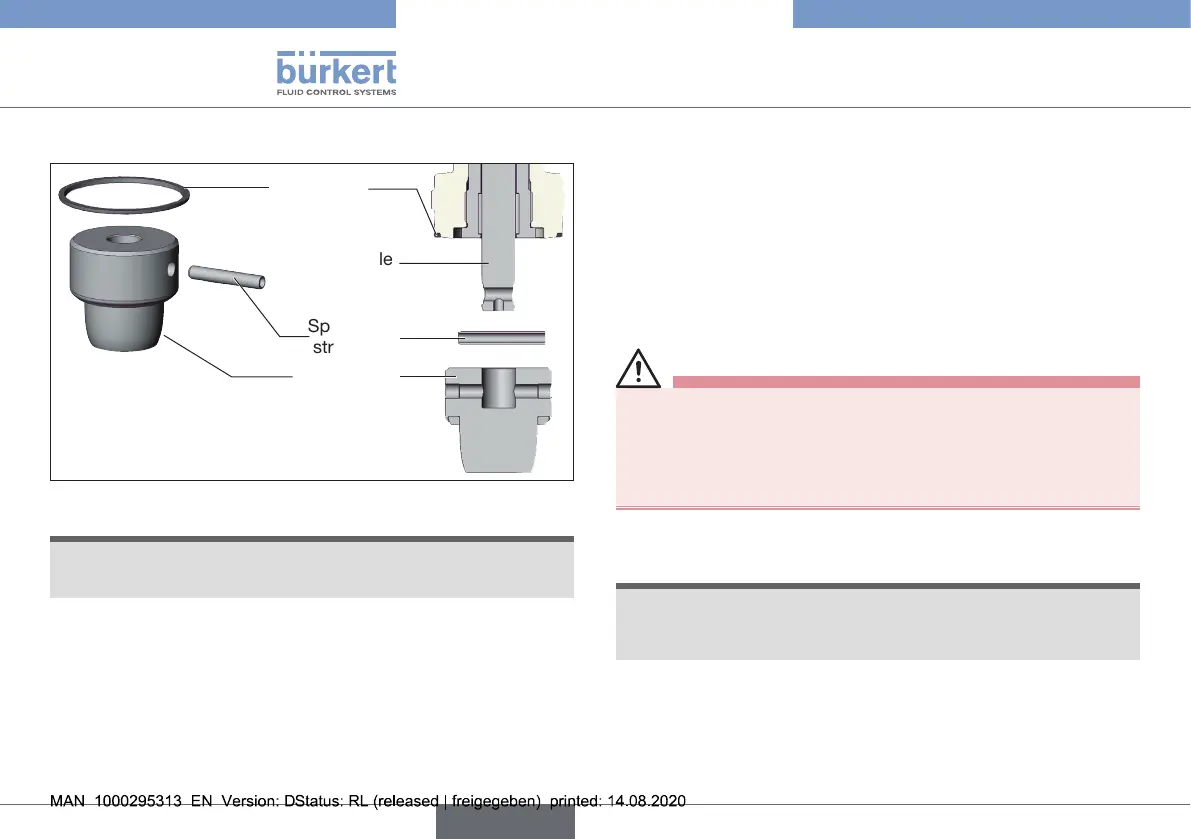
Change control cone set
Spindle
Spring-type
straightpin
Control cone
Seal
Fig.19: Replacing the control cone set
NOTE!
Important for impeccable and stable device function.
Thesealsurfaceofthecontrolconemustnotbedamaged.
Procedure:
→ Knockoutspring-typestraightpinusingasuitablepinpunch.
Pin punch ø4mm
,withspindlediameter10mm
Pin punch ø5mm,
withspindlediameter14mm
→ Removecontrolcone.
→ Placenewcontrolconeonthespindle.
→ Alignboreholesinthecontrolconeandspindle.
→ Supportcontrolconeonthecylindricalpartusingaprismor
somethingsimilar.
→ Setupthespring-typestraightpinandcarefullyhammeritin.
→ Centrethespring-typestraightpinwiththespindleaxis.
Install actuator (with control unit) on the valve body
→ Replacethesealifnecessary.
WARNING!
Risk due to incorrect lubricants.
Unsuitablelubricantmaycontaminatethemedium.Thereisa
riskofexplosioninoxygenapplications.
▶ Forspecicapplications,e.g.oxygenoranalysisapplica-
tions,useapprovedlubricantsonly.
→ Beforere-installation,greasenipplethreadoftheactuator
(e.g.usingKlüberpasteUH196-402fromKlüber).
NOTE!
Damage to the valve seat seal or seat contour.
▶ Wheninstallingtheactuator,thevalvemustbeintheopen
position.
→ For control function A
Without control unit:pressurisepilotairport1withcom-
pressedair(5bar).Valveopens.
With control unit:openthevalveinaccordancewiththeoper-
atinginstructionsofthecontrolunit.
Type2301
English