3 Adjustments
Measuring the torque of the coupling and brake on the rewind hub:
Wind the cord several times round the test collar ( g. 13 A on page 19) and mount it on the rewind hub (1). The
spring lugs of the hub must slot into the smaller slot in the test collar.
Attach a spring scale [10 N] (3) to the end of the cord, raise it vertically until the test collar starts to turn.
Allow the cord to unwind at least one full turn from the test collar, and read off the tensile force F for the coupling
on the spring scale.
Reset the winding torque of the coupling if it differs from the specied value ( 3.2 on page 20).
Disconnect the rewind hub (1) from the drive in order to measure the winding torque for the brake. Press the
release button, hinge up the printhead assembly, repeat the measuring procedure ( g. 13 B on page 19).
If the winding torque of the brake differs from the specied value, the parts involved must be replaced, they
cannot be reset.
3.2 Adjusting the Winding Torques
Danger!
Danger to life and limb from electric shock!
Disconnect the device from the mains supply before opening the outer casing.
6
5
4
3
2
1
3
4
5
6
7
4
3
2
1
6
3
4
5
6
7
5
5
4
3
2
1
6
3
4
5
6
7
61 72 3 4 5
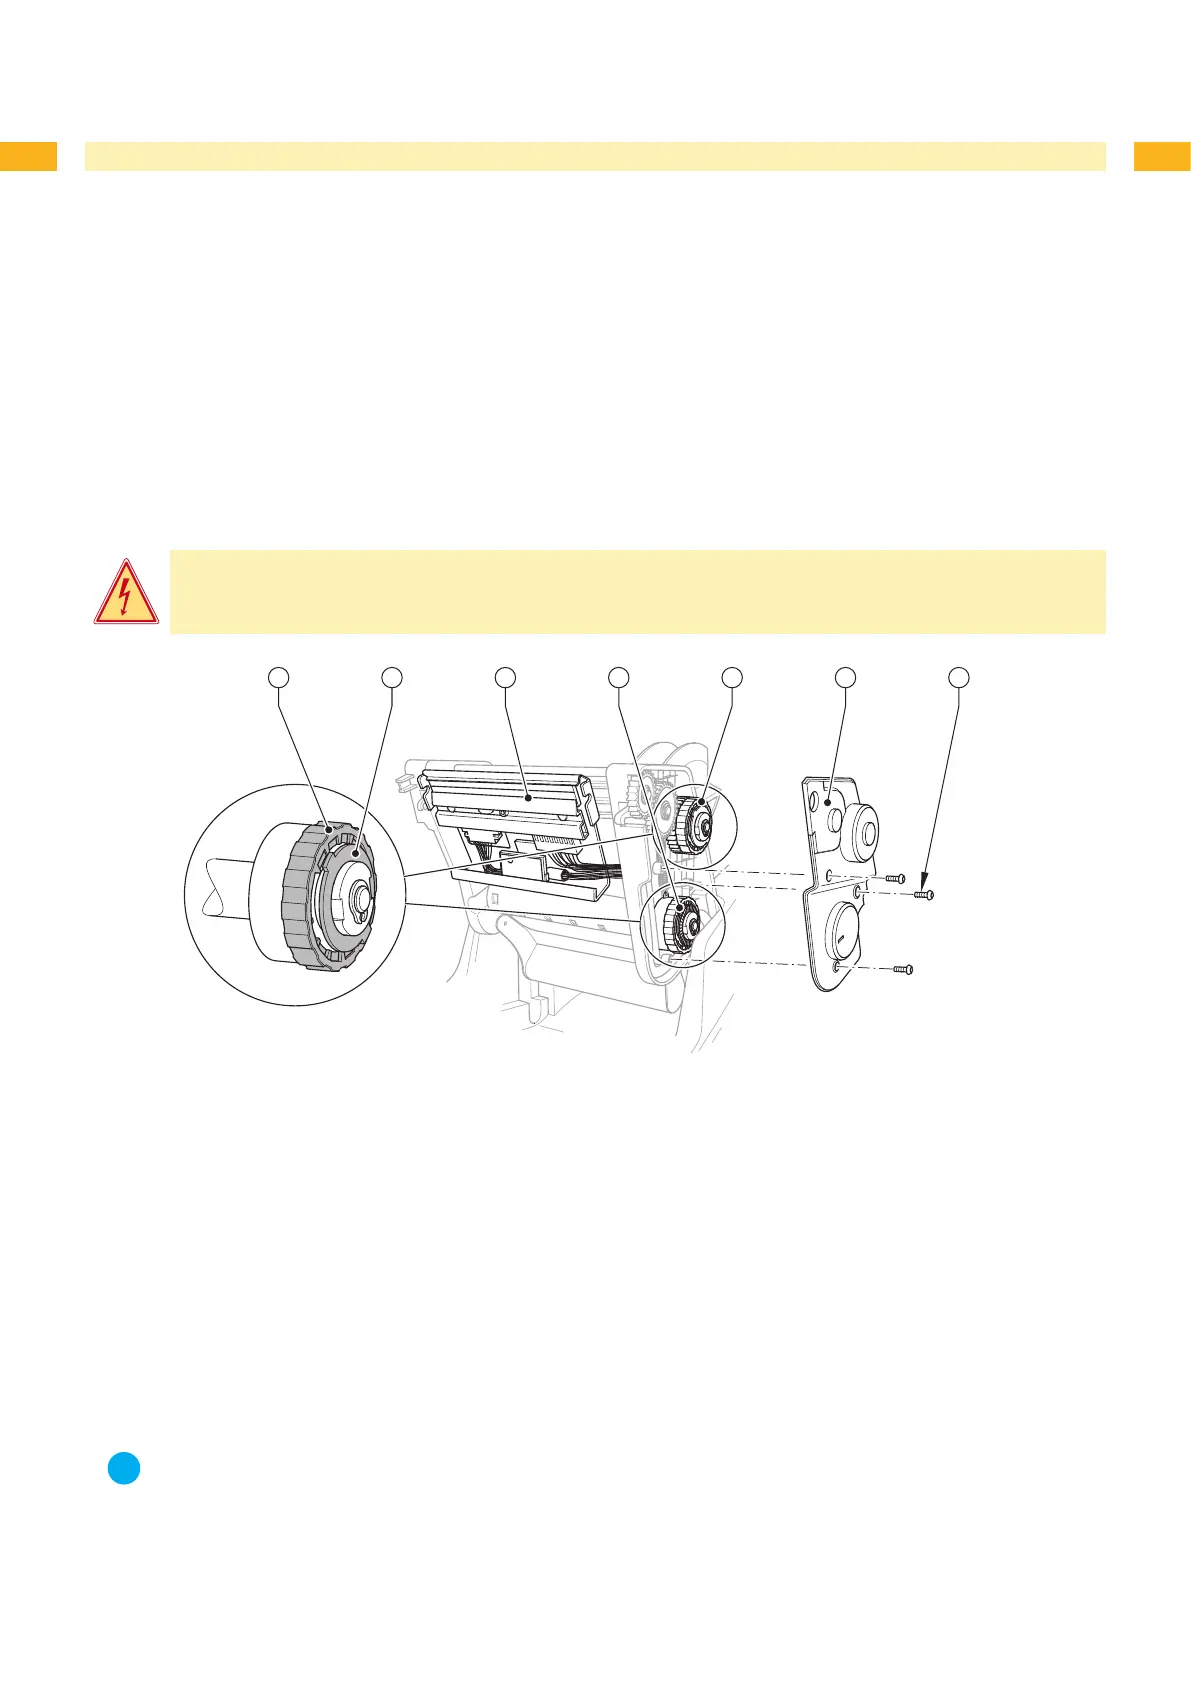
Fig. 14 Adjusting the winding torques
1 Knurled ring
2 Locking device
3 Print module
4 Supply hub friction coupling
5 Rewind hub friction coupling
6 Cover
7 Screw
Hinge up the print module (3), unscrew screw (7), and remove the cover (6).
Press the knurled ring (1) of the friction coupling towards the casing wall, turn it into the desired position and
release. Ensure that the locking lugs have been fully inserted into the recesses of the knurled ring.
Measure the winding torque again, compare it with the specied value, and correct if necessary. Repeat until the
measured winding torque lies within the tolerance range.
Reattach the cover (6) with the three screws (7).
Notice!
The numbers on the knurled ring are no setting values. They are used for orientation only when setting the
winding torque.
1: Minimum winding torque, 7: Maximum winding torque
1.
2.
3.
4.
5.
6.
1.
2.
3.
4.