2 Replacing Assembly Units
2.3 Replacing the Control Panel
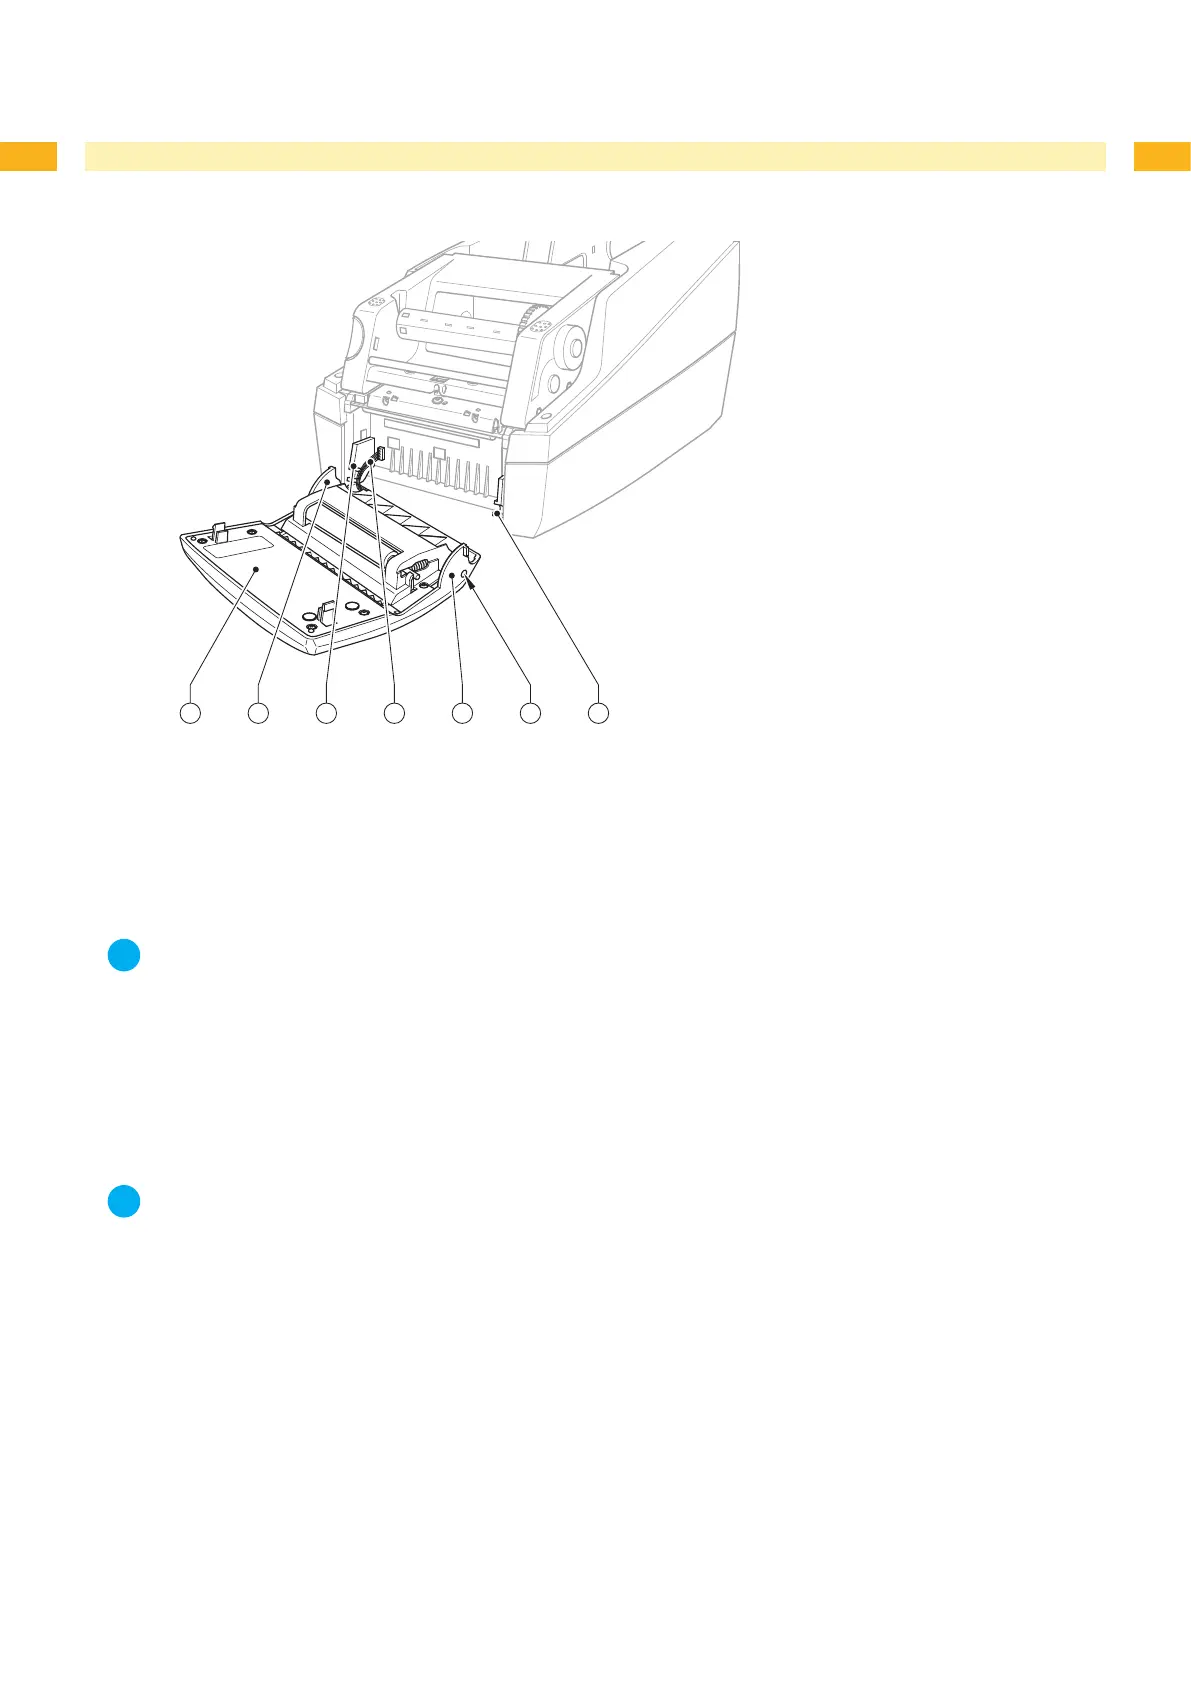
Fig. 2 Replacing the control panel
1 Control panel
2 Lug
3 Bearing
4 Plug connector
5 Axle
Notice!
When replacing Control Panel B or P by a Control Panel C in order to convert the printer to the cutter
version the peel-off edge must be removed. To convert the printer in the opposite direction the peel-off edge
must be inserted ( 2.8 on page 13).
Hinge down the control panel (1).
Hold the device with one hand, grip the control panel with the other hand, and remove one axle (5) from its
bearing (3) by pulling strongly.
Grip the control panel above the second axle, and pull it until the axle comes out of its bearing.
Notice!
Ensure that the plug connector (4) is not damaged.
4. Draw the lugs (2) beside the bearings (3) out of the device.
5. Pull the plug (4) out of the printer, and put down the control panel.
6. Put the plug (4) of the new control panel into the printer.
7. Draw the lugs (2) beside the bearings (3).
8. Tilt the control panel upwards a little.
9. Hook the axles (5) into their bearings.
10. Press rmly on the control panel until the axles audibly slot into their bearings.
1.
2.
3.