2 Replacing Assembly Units
2.11 Replacing the Blades of the Cutting Unit
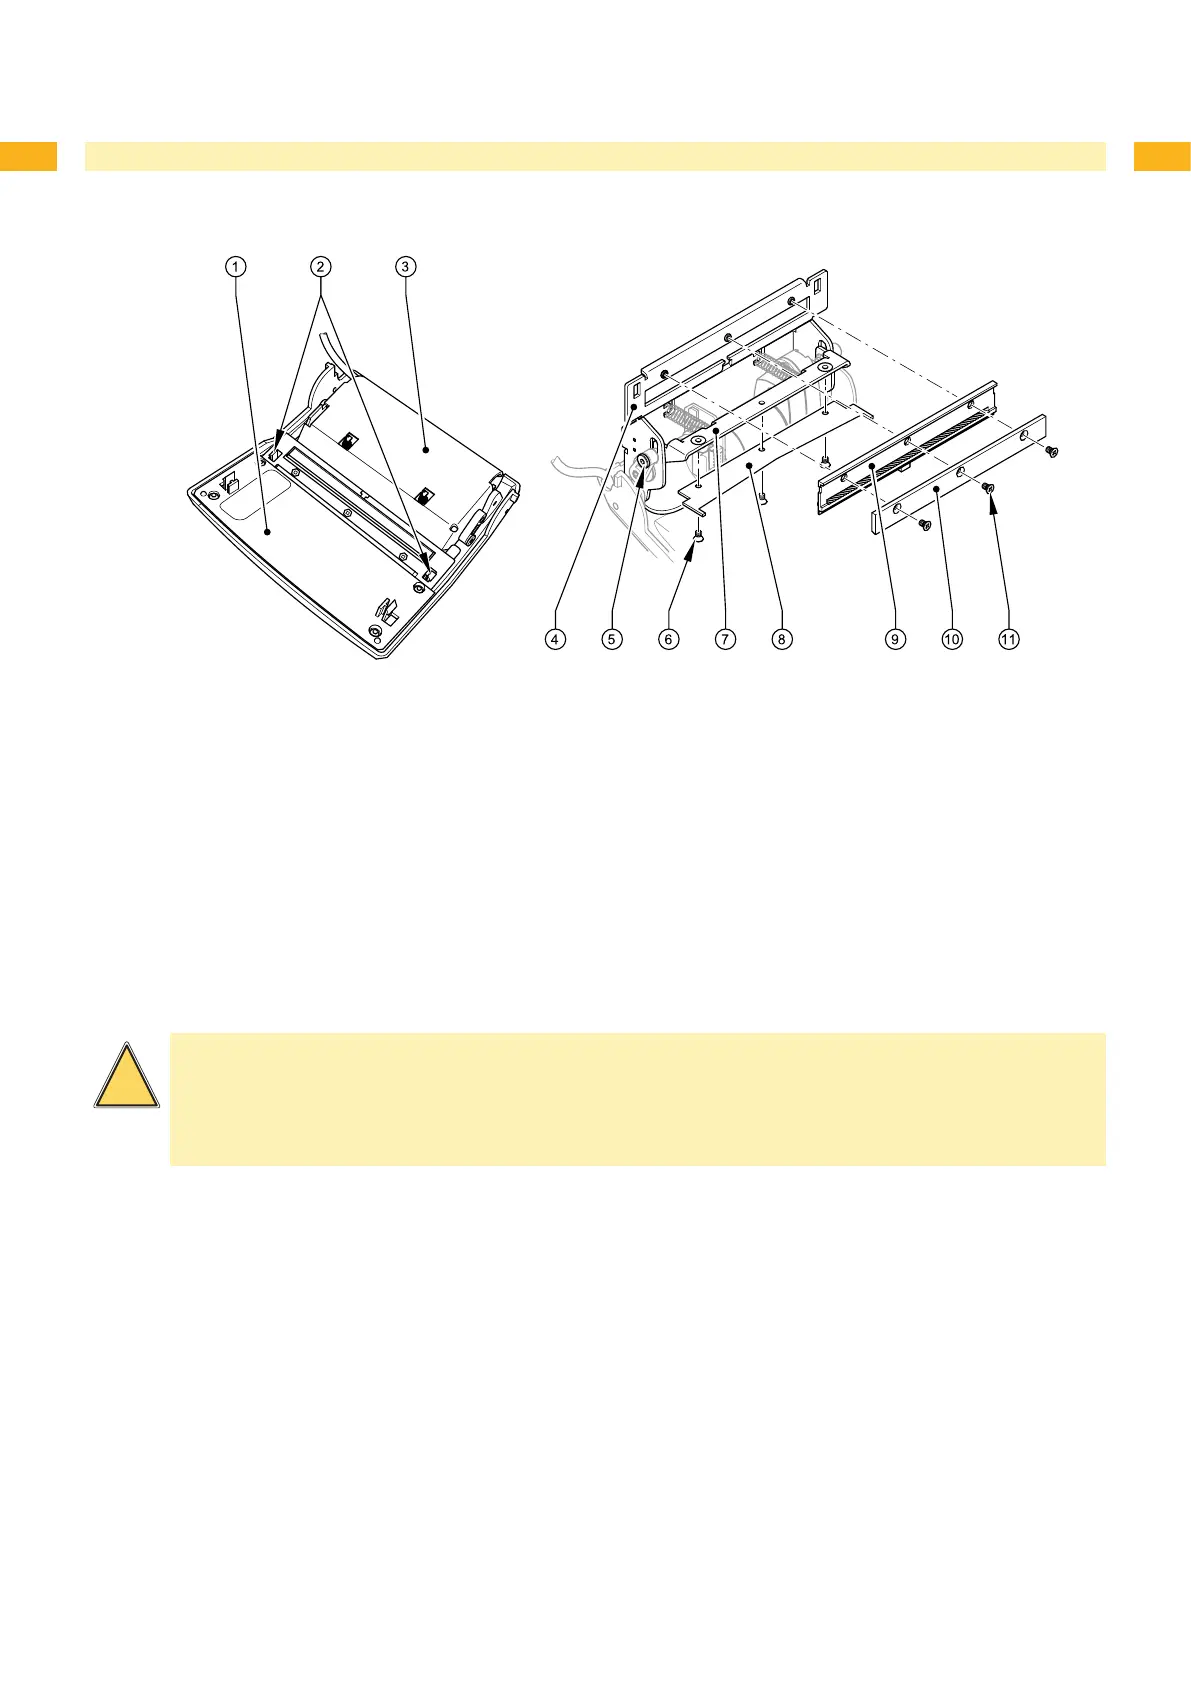
Fig. 10 Replacing the blades of the cutting unit
1 Control panel
2 Two plastic latches
3 Cutting unit
4 Base plate
5 Screw
6 Three screws
7 Clamp
8 Lower blade
9 Paper guide
10 Upper blade
11 Three screws
Turn the control panel (1) down and hinge it up ( 2.3 on page 8).
Unlock the cutting unit (3) at the both plastic latches (2) and lift it.
Turn the screw (5) clockwise using a 2.5 mm Allen key and that way swivel the clamp (7) with the lower blade (8)
away from the upper blade (10).
Danger!
Danger of cuts and bruising!
The springs at the clamp are strongly tight while turning up or down and when it is turned down. Do not
reach into the area between the blades.
Do not touch the blade edges with bare hands.
4. Loosen the three screws (6) of the lower blade (8), remove the blade and attach the new blade with the three
screws at the clamp (7).
5. Loosen the three screws (11) of the upper blade (10), remove the blade and the paper guide (9) and attach the
paper guide and the new blade with the three screws at the base plate (4).
6. Go on mounting in reverse order.
1.
2.
3.