14 14
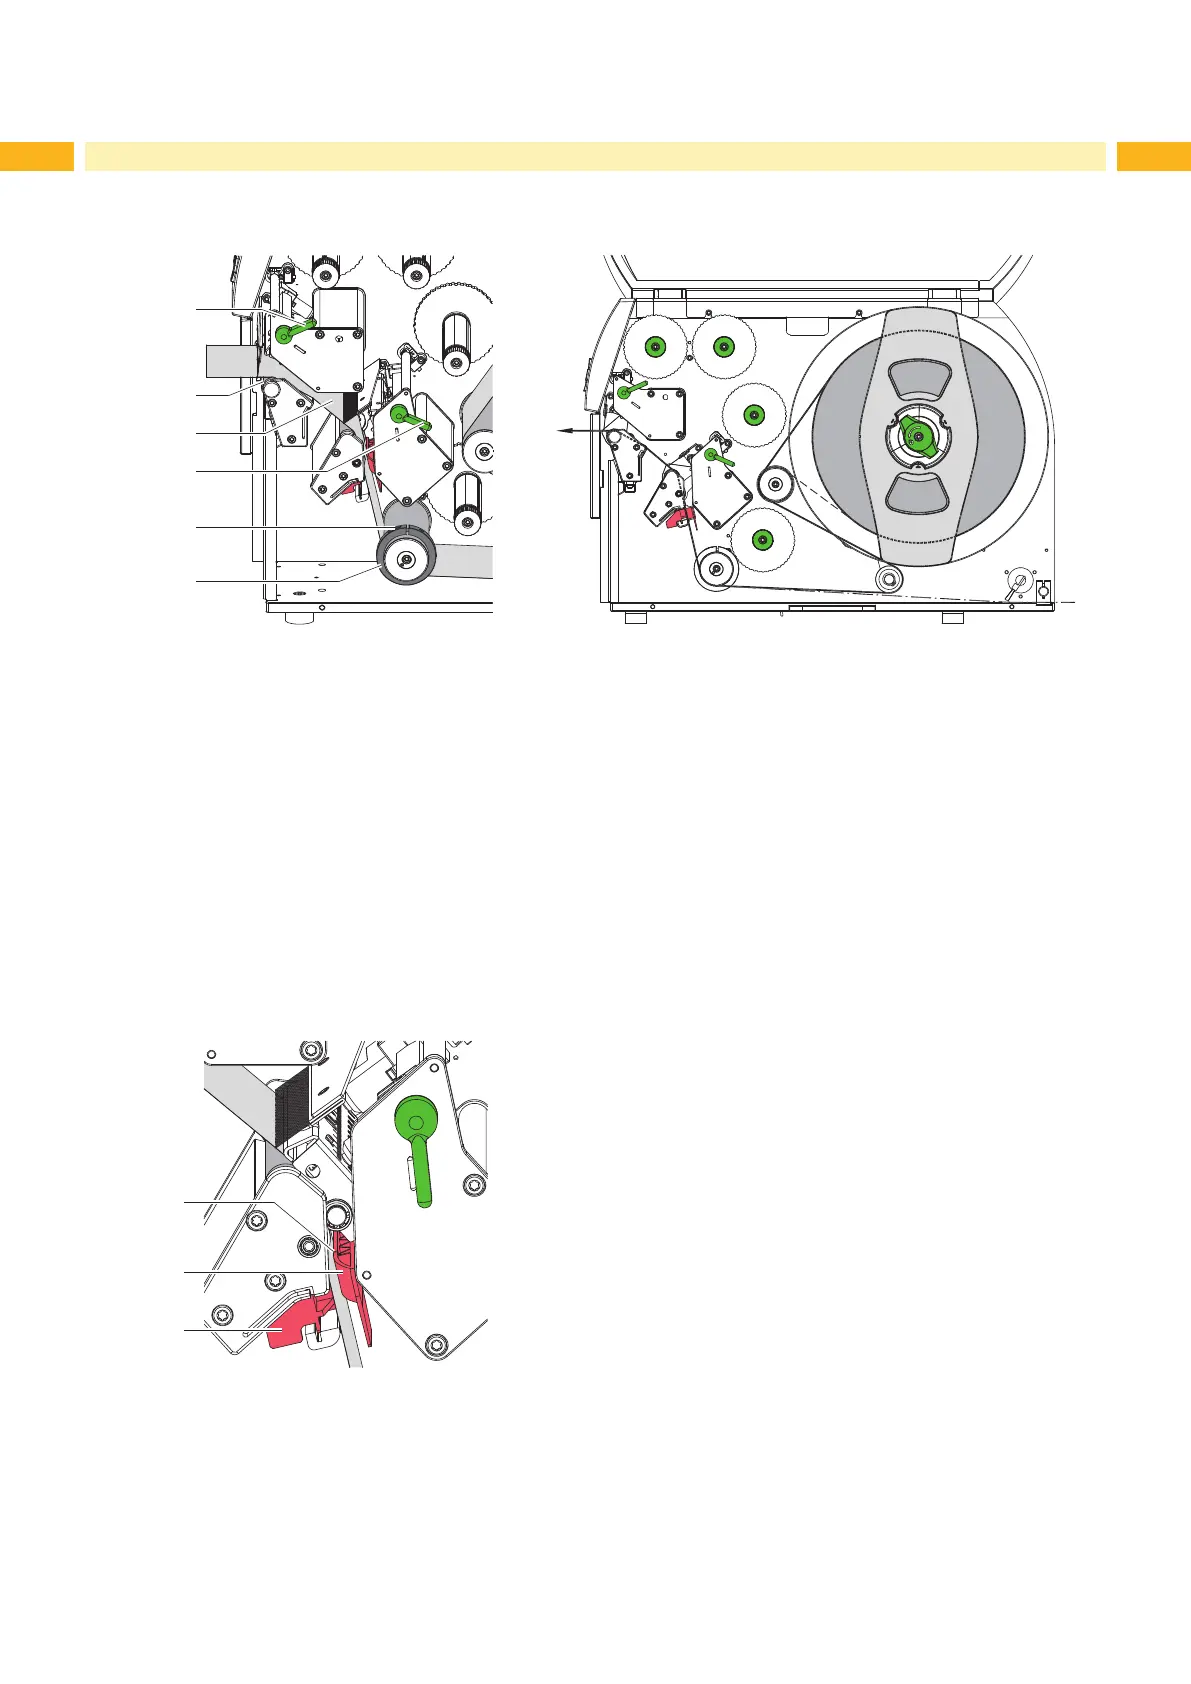
4.1.4 Inserting Labels into the Print Mechanics
1
2
4
6
5
3
Fig. 9 Loading labels Fig. 10 Label feed path
1. Unroll a label strip of approx. 1 m. Guide the label strip to the print mechanics as shown in gure 10.
The broken line shows the path for inside wound labels.
Alternatively: Feed the fanfold labels to the print units according the chain line.
2. Turn levers (1,4) counterclockwise to lift both printheads.
3. Loosen the threaded pin (5) and slide the guide ring (6) to the outermost position.
4. Guide media strip through the print mechanics as shown in gure 9 to the upper print roller (2).
5. Slide the guide ring (6) against the edge of the label strip (3) and tighten the threaded pin (5).
6. Fix the media by closing the lower printhead.
7. Tighten the label strip between the printheads and close the upper printhead.
4.1.5 Setting the Label Sensor
Fig. 11 Setting the label sensor
The label sensor (2) can be shifted perpendicular to the direction of paper ow for adaptation to the label medium.
The sensor unit (1) of the label sensor is marked with a indentation in the label sensor retainer.
Position label sensor with tab (3) in such a way that the sensor (1) can detect the label gap or a reex or perfo-
ration mark.
- or, if the labels deviate from a rectangular shape, -
Align label sensor using the tab (3) with the front edge of the label in the direction of paper ow.
4 Loading Material