ENGLISH
8
should be on the same side, and the two support legs with the
wheels should be on the opposing end.
• Carefully, lift the grill into an upright position, wheels on the floor.
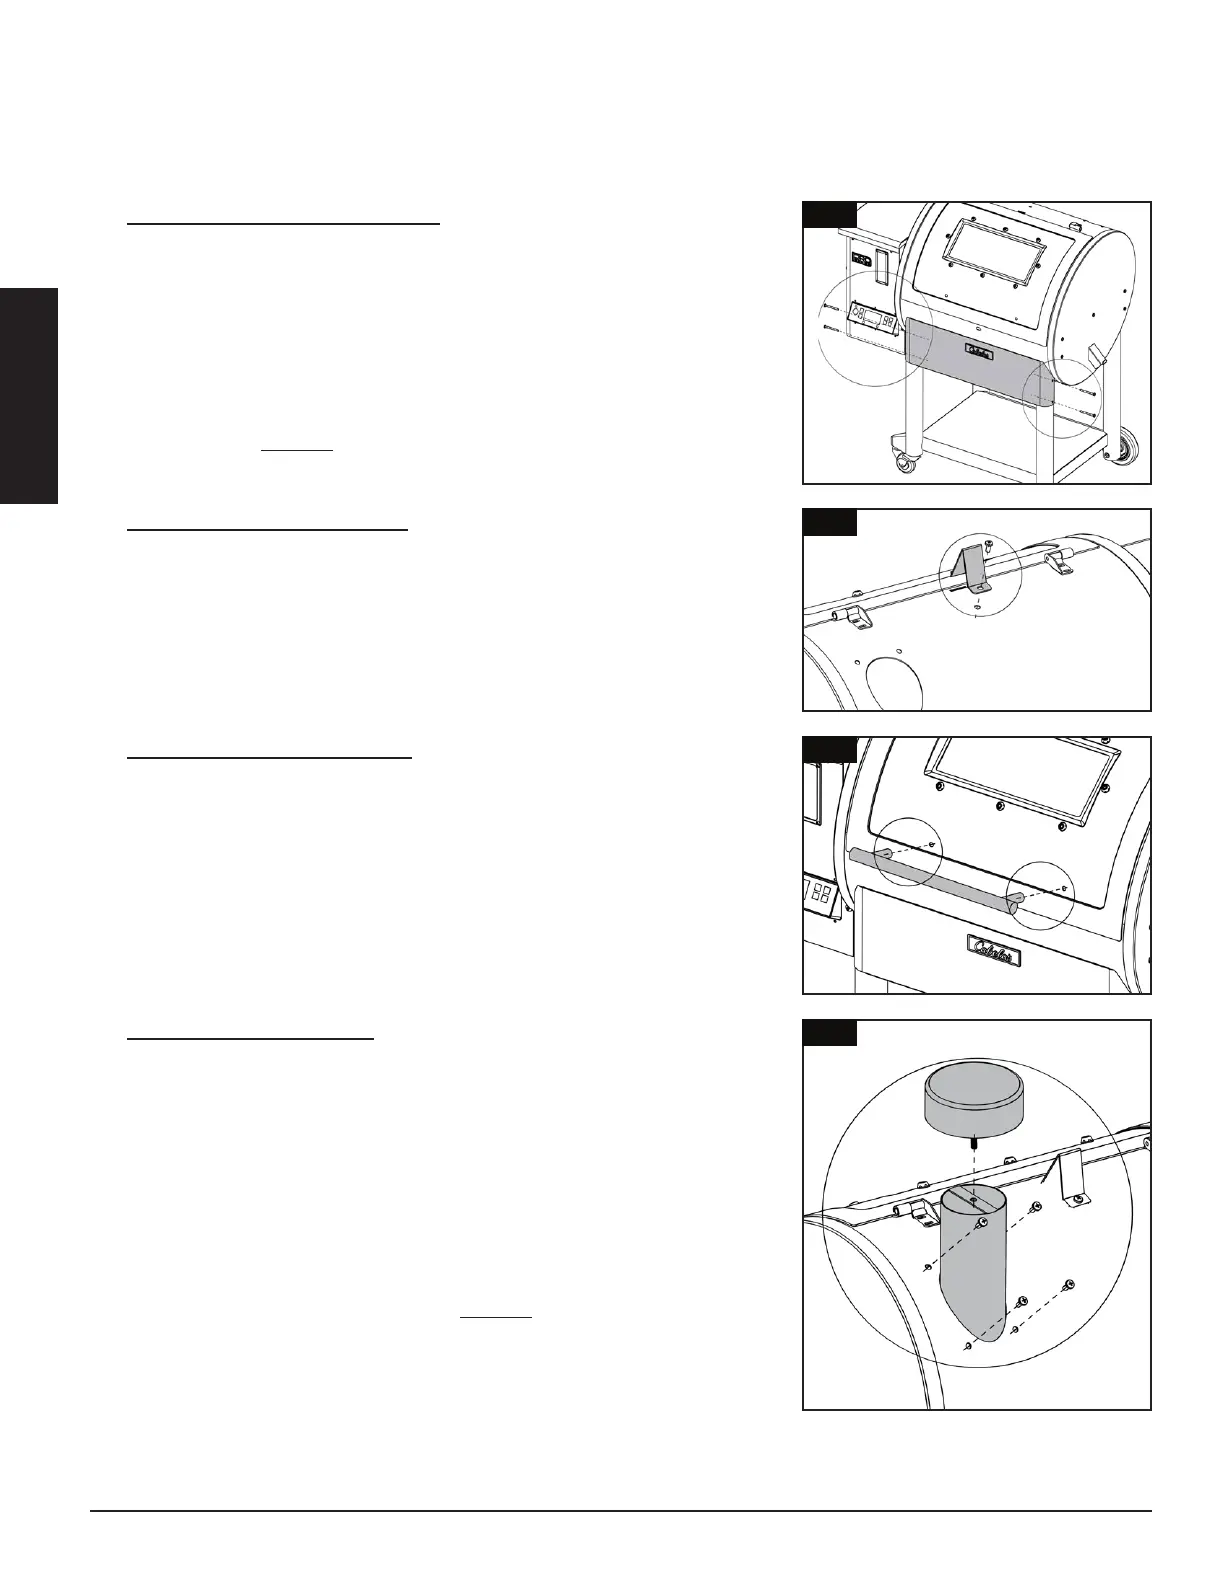
5.
Parts Required:
1 x Support Plate
(#11)
4 x Screw
(#G)
Installation:
• Clip the curved sides of the support plate to the front-facing support
legs, and align the holes to secure. Insert a screw into each hole, but
fasten only half-way. Once all four screws are partially installed to the
support legs, secure the screws completely.
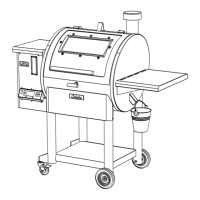
6.
Parts Required:
1 x Lid Stopper
(#3)
Installation:
• Secure the lid stopper onto the top of the main barrel using the pre-
installed screw on the top of the main barrel.
7.
Parts Required:
1 x Lid Handle
(#10)
Installation:
• Remove the pre-installed screws from the lid handle. From inside the
main barrel lid, insert one screw so that it protrudes to the outside, then
hand-tighten the screw (from the inside) into the lid handle. Repeat
same installation for other end of lid handle.
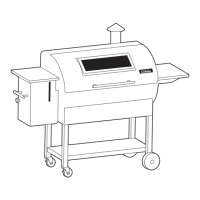
8.
Parts Required:
1 x Chimney Cap
(#4)
1 x Chimney Stack
(#5)
4 x Screw
(#H)
Installation:
• Locate the chimney opening on the backside of the main barrel.
From the inside of the main barrel, insert the chimney chimney stack
through the opening. Insert a screw into each hole from the outside
of the main barrel, but fasten only half-way. Once all four screws are
partially installed, secure the screws completely.
• Next, twist the chimney cap onto the top of the chimney stack.
NOTE: Adjust the chimney cap to affect the airflow inside the main
grill. If cooking at low temperature, keep the cap more open. Ensure
the chimney cap allows for air to escape.
5
6
7
8