ENGLISH
9
9.
Parts Required:
1 x Grease Bucket
(#19)
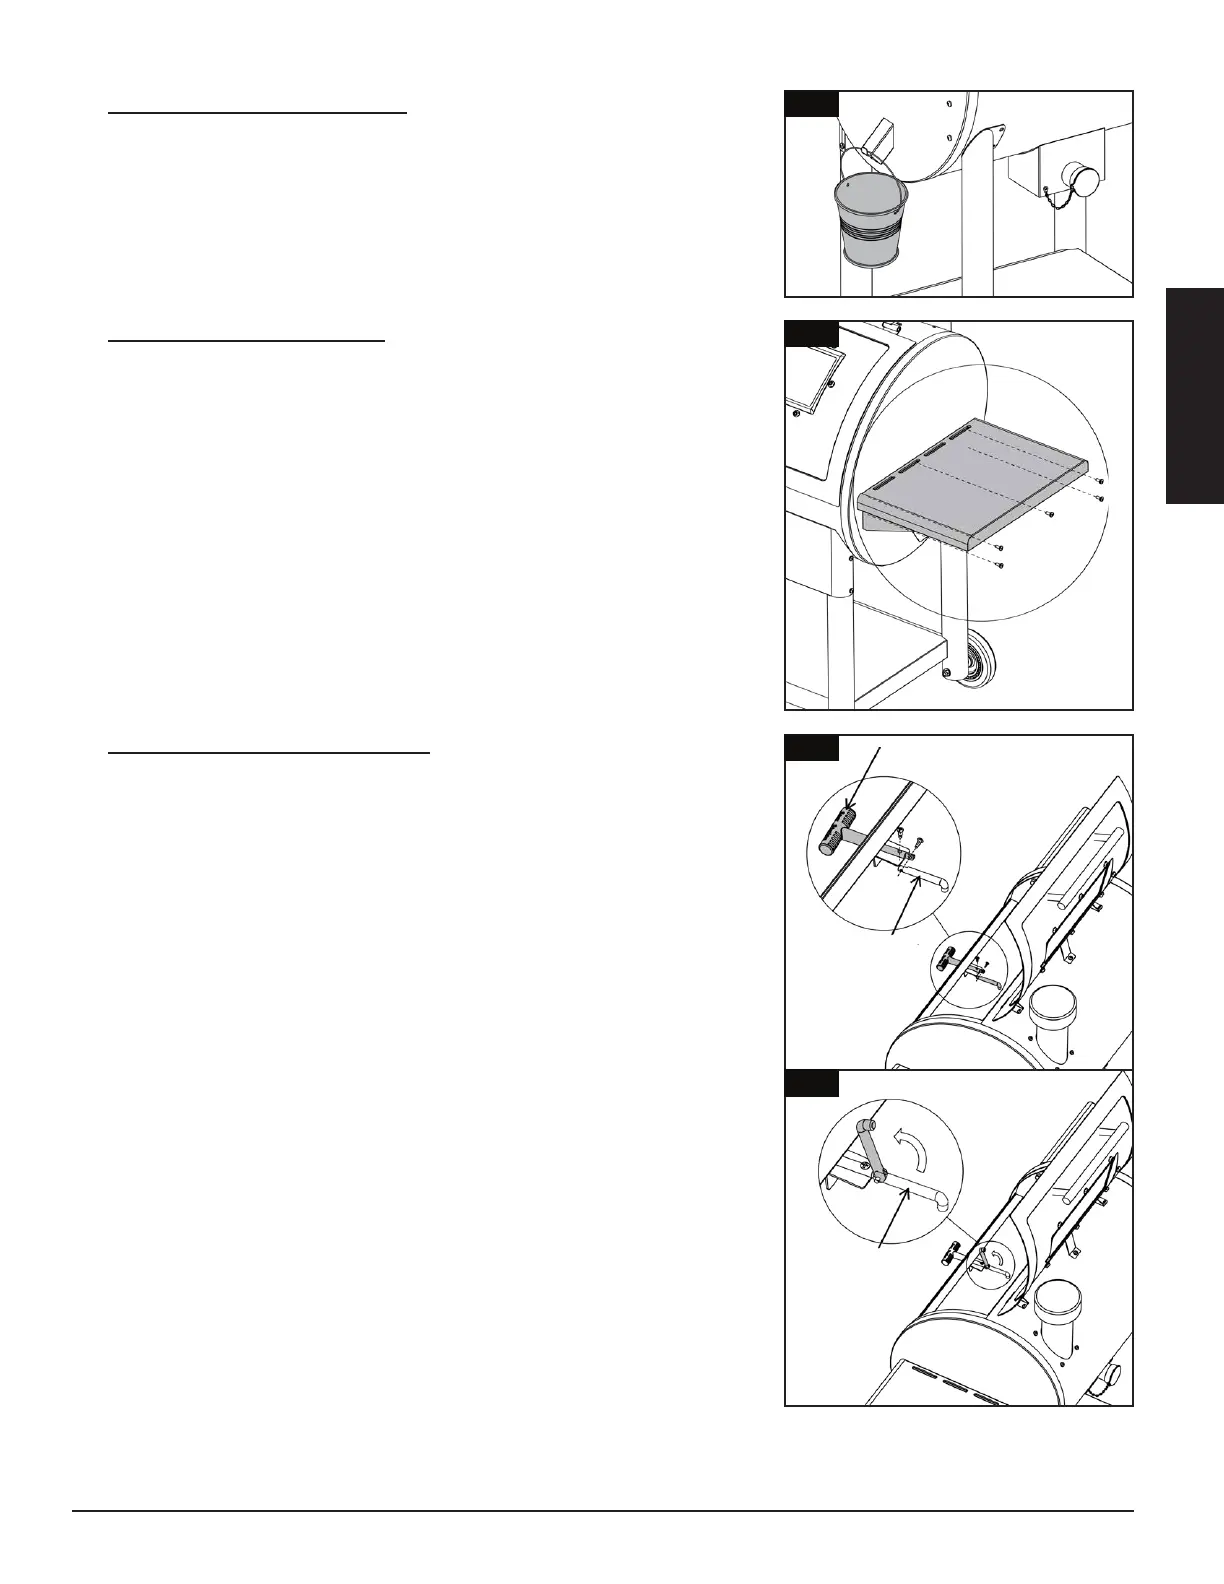
Installation:
• Place the grease bucket on the spout hook on the end of the main
barrel. Ensure it is level to avoid grease spills.
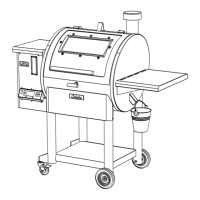
10.
Parts Required:
1 x Side Shelf
(#12)
Installation:
• Remove the five pre-mounted screws from the side of the main barrel.
• From underneath, secure the side shelf to the side panel of the main
barrel using the five screws previously removed.
NOTE: Do not tighten any screws completely until all screws have
been installed. Once all screws are installed, then tighten securely.
IMPORTANT: Avoid using the side shelves to move or lift the grill.
The weight of the unit will cause the side shelf to break, which is not
covered by warranty.
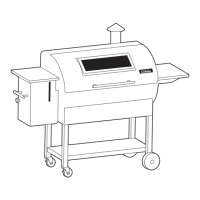
11.
Parts Required:
1 x Sear Station Handle
(#13)
1 x Sear Station Arm
(#14)
Installation:
• Open the main barrel lid. Along the middle of the front panel of the
main barrel, remove the one pre-mounted screw from the interior
ledge plate. Insert the sear station handle through the opening on
the front panel, and secure using previously removed screw. Note
illustration details in 11.
• Next, remove the pre-assembled screw on the sear station arm.
Match up the joint ends, and connect the sear station handle to the
sear station arm with the previously removed screw. Once the arm is
installed, ensure it can easily be raised and lowered. Note illustration
details in 11.
IMPORTANT: The curved end of the sear station arm should be
pointed towards the bottom of the grill. This will anchor into the
flame broiler slide plate in a future assembly step.
9
10
11
11