42
Proprietary Information: Not for use or disclosure except by written agreement with Calix.
© Calix. All Rights Reserved.
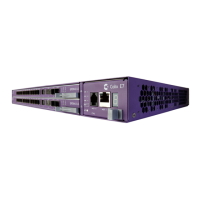
Installing Pluggable Transceiver Modules
Install pluggable transceiver modules into the E7-2 line cards to equip the ports for optical or
copper interface connections.
To install pluggable transceiver modules
1. Unpack the pluggable module. Remove the dust cover from the transceiver interface, if
present.
2. Orient the module with the exposed PCB side facing down. Insert the module into an
appropriate socket on an E7-2 line card as follows:
To equip 10GE ports:
a. Insert XFP modules into sockets labeled XFP 1 or XFP 2, as required.
b. Insert SFP+ modules into sockets labeled SFP+ 1 or SFP+ 2, as required.
To equip GE ports, insert SFP modules into sockets labeled SFP 1 to SFP 12, as
required.
To equip GPON OLT ports, insert GPON OIM modules into sockets labeled
GPON 1 to GPON 4, as required.
3. Press the module firmly into the socket until it clicks into place.
Once the module is installed, you can connect interface cables (fibers) to it. See Connecting
Fibers (on page 43) for instructions.